


Every year, I tell myself I don’t need to crochet more Christmas ornaments… and every year, I end up making just one more.
This time, it’s this adorable Country Charm Mini Hat Ornament a tiny, quick-to-make project that adds a handmade touch to your Christmas tree, gift wrapping, or garlands.
These little hats are part of my Country Charm Christmas Collection, they match beautifully with the Bauble Cover, Acorn Ornament, and soon to come Mini Stocking.
This easy crochet mini hat ornament pattern works up in under 20 minutes and is perfect for using up leftover yarn scraps, and there are so many options just by changing the yarn for different rounds!

If you love ornaments you will love these ones too!
Free Crochet Mini Mitten Ornament Pattern
Crochet Granny Square Sweater Ornament Free Pattern
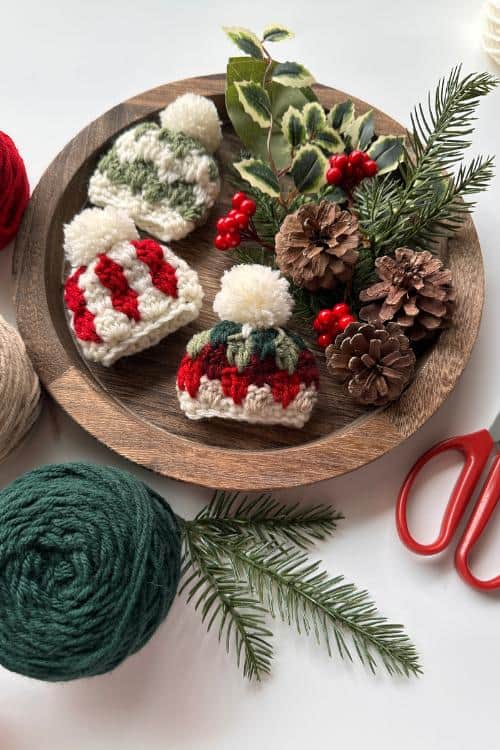
What Makes This Easy Crochet Mini Hat Pattern So Great
This pattern is easy, relaxing, and the perfect project for those cozy evenings with a cup of tea and a favourite movie.
- Easy: Uses basic stitches like single crochet, double crochet, and long double crochet.
- Quick to make: Each hat takes about 15–20 minutes.
- Scrap-buster: Uses around 10 grams of yarn yay for using up leftovers.
- Adorable décor: Great for Christmas trees, gift toppers, or table settings.
- Customizable: Change colours every round for endless styles.
This is the kind of easy crochet Christmas ornament that’s fun to make over and over again — one turns into a dozen before you know it.
Most Popular
Christmas Patterns
Yarn Colour Ideas
You can make these in endless colour combinations to match your Christmas style:
- Classic Christmas: Cherry and Sugar Cookie
- Rustic Farmhouse: Olive and Antique White
- Winter Frost: Cream and Silver
- Bright and Fun: Claret, Winter Green, and Cherry
To create a coordinated look, repeat a colour palette across your handmade ornaments. A set of three to five makes a perfect gift or bundle for craft fairs.
Free Downloads
Gift Tags

Purchase Ad Free Pattern – Instant Download!
Purchase the ad-free PDF for a smooth, distraction-free crocheting experience anytime, anywhere.
Already a subscriber? Check your latest email for your special discount code. Not subscribed yet? Sign up here to get yours!
Thanks so much for supporting my blog!
Get the Pattern
- Free version: Available right here on my blog no sign-up needed.
- Printable PDF: Get the ad-free version with all stitch counts on Etsy and Ravelry.
Already a subscriber? Check your latest email for your exclusive discount code!
More Free Christmas Crochet Patterns You’ll Love
Each design follows the same easy, beginner-friendly style so you can make a full matching set for your tree.
- Country Charm Crochet Bauble Cover Pattern
- The Rainer Crochet Stocking
- Polar Ridge Free Crochet Christmas Stocking Pattern
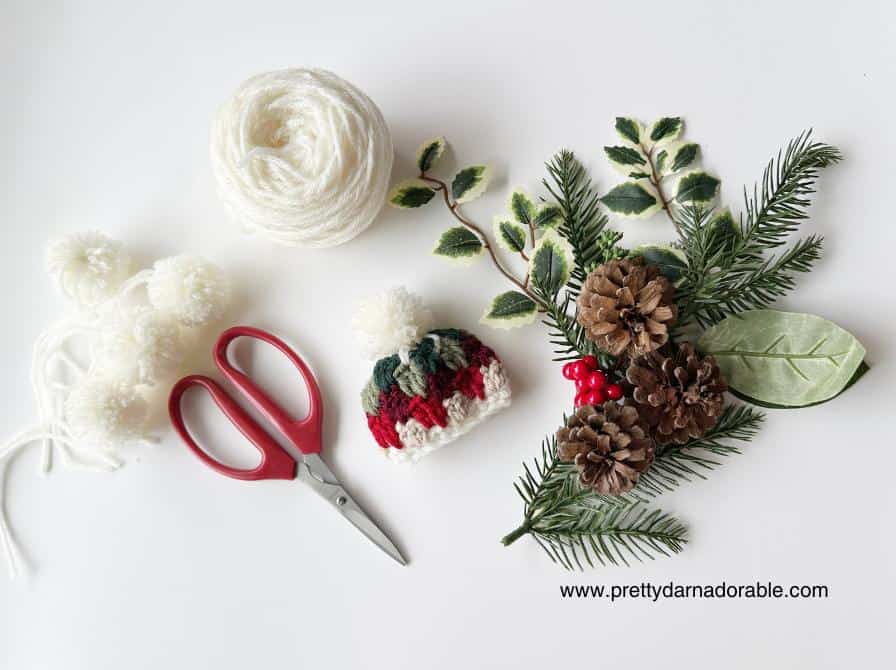
Country Charm Mini Hat Ornament – Free Pattern
Skill Level
Easy
Abbreviations (US Terms)
- ch – chain
- dc – double crochet
- ldc – long double crochet (see special stitches)
- sc – single crochet
- sk – skip
- sp – space
- st – stitch
- sts – stitches
- sl st – slip stitch
Gauge
No swatching required for this project.
Finished Measurements
Not including pompom. 2.5” x 2.5” laying flat
Materials Needed
- 10 grams Worsted weight yarn – for Solid Colour Hat (not including pompom)
Lion Brand Pound of Love shown in photos. Colours used: Olive, Winter Green, Cherry, Sugar Cookie, Antique White, and Claret. - 3 – 4 grams of yarn for pompom
- 5.50 mm crochet hook
- Yarn needle
- Scissors
Please note that the actual amount of yarn needed may change depending on the yarn chosen always purchase a little more than you think you may need.

To adjust for multiple colours:
Divide 10 grams by the number of colours you plan to use. This will give you the approximate amount of yarn needed for each colour. This does not include the pompom.
Example: If the solid colour option uses 10 g and you want to use 4 colours, divide 10 ÷ 4 = 2.5 g per colour.
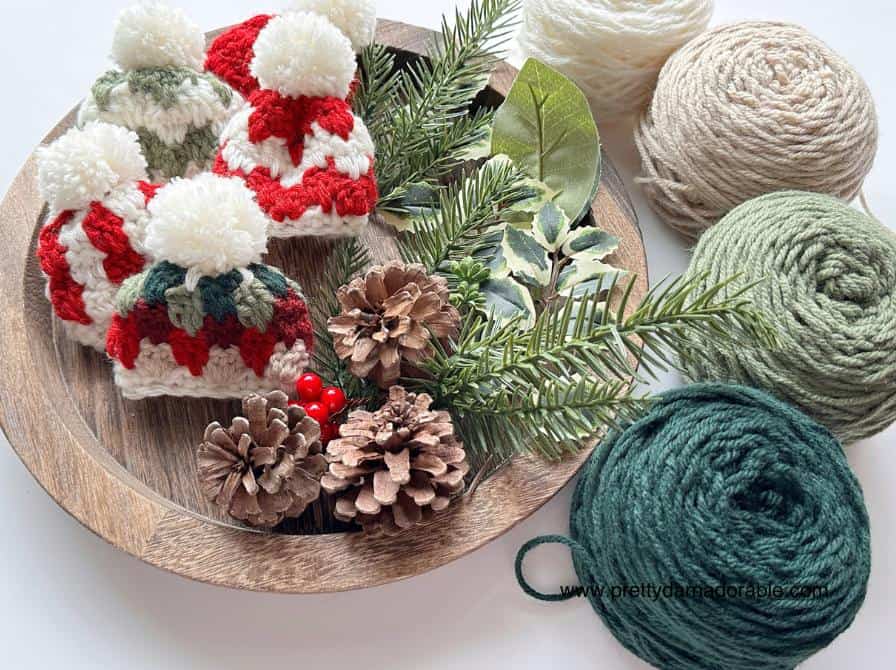
Using Colours in Your Christmas Mini Hat Ornament
Follow the crochet Mini Hat Ornament round instructions as written, and simply switch yarns according to the colour guide below. Each round is worked completely in a single colour. At the end of the listed rounds, change colours as instructed.
How to Make Colour Changes
Steps
- Work the round as written in the current colour.
- When you get to the very last slip stitch (sl st) of the round, stop before completing it.
- Drop the old colour and place the new colour on your hook.
- Pull the new colour through to finish the slip stitch – this completes the join for that round.
- Chain 1 and turn (as pattern instructs), now working the next round in the new colour.
- No need to weave in. Simply tie a knot and tuck them to the inside of the Mini Hat Ornament.

Note: Make sure all yarn tails from your colour changes are pulled to the same side of the Mini Hat Ornament. Round 1 is the outside of the Mini Hat Ornament, so pull all tails to the inside. If you forget, no worries – just use your crochet hook to grab them through and pull them to the inside later.
Notes
- This mini hat ornament is worked from the bottom up.
- The hat is worked in joined rounds, and you’ll turn at the end of each round.
- Leave a long tail at the top of the hat for closing.
- Change colours on the final slip stitch of the round unless otherwise noted.
- Colour changes are done every round or as noted for different designs.
- Stitch counts are included at the end of each round in ( ).
- Written in US crochet terms.
- Turning chain does not count as a stitch.
- This crochet Mini Hat Ornament can have many different looks just by adjusting colour changes.
Special Stitches
Long Double Crochet (ldc): Work double crochet around and in front of the previous round and into the stitch indicated one round below.
Cluster: In the space between groups of 3 dc, work (dc, ldc in middle st of cluster below, dc). When working ldc be sure to bring the height of the stitch up to match the height of the dc previously made in the space between the clusters. Country Charm Mini Hat Ornament


Hat is worked bottom up.
Start with Colour A (cream) and ch 18. Join with sl st to form a circle. Ch 1.
Rnd 1: Sc in 1st ch and each ch around. Join with sl st. Ch 1, turn. (18 sts)
Start colour changes here
Rnd 2: 3 dc in 1st st, sk next 2 sts, *3 dc in next st, sk next 2 sts* repeat * to * around. Skip last 2 sts. Join with sl st, ch 1, turn. (18 sts)

Rnd 3: In space before 1st cluster: (dc, ldc in 1st sc below, dc). *Sk next cluster, in space before next cluster (dc, ldc in 1st sc below, dc).* Repeat from * to * around. Skip last cluster. Join with sl st, ch 1, turn. (18 sts)
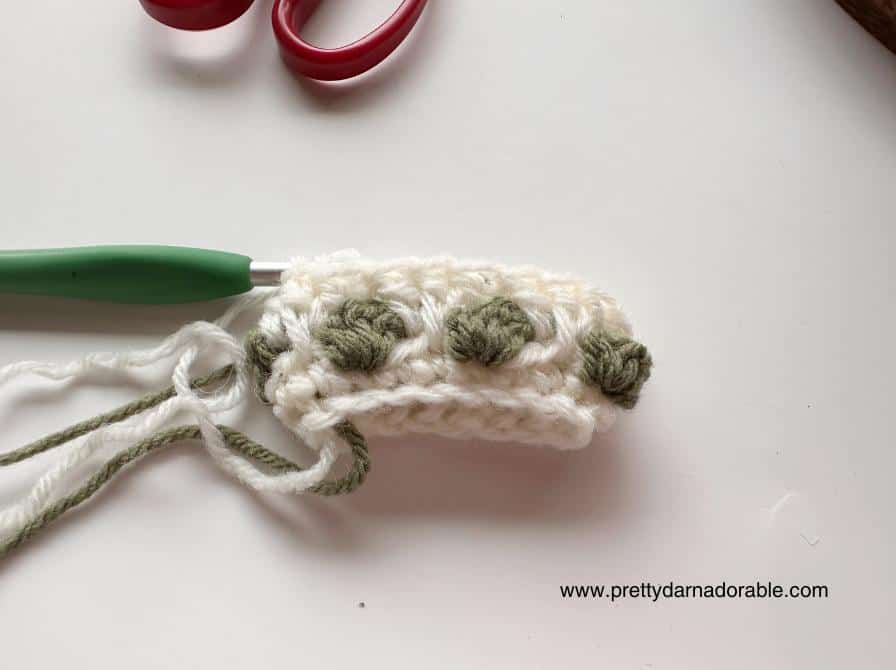
Rnds 4 – 6: Working in space before 1st cluster, (dc, ldc in middle st of cluster below, dc). *Sk next cluster, in space before next cluster (dc, ldc in middle st of cluster below, dc).* Repeat from * to *around. Skip last cluster. Join with sl st, ch 1, turn. (18 sts)

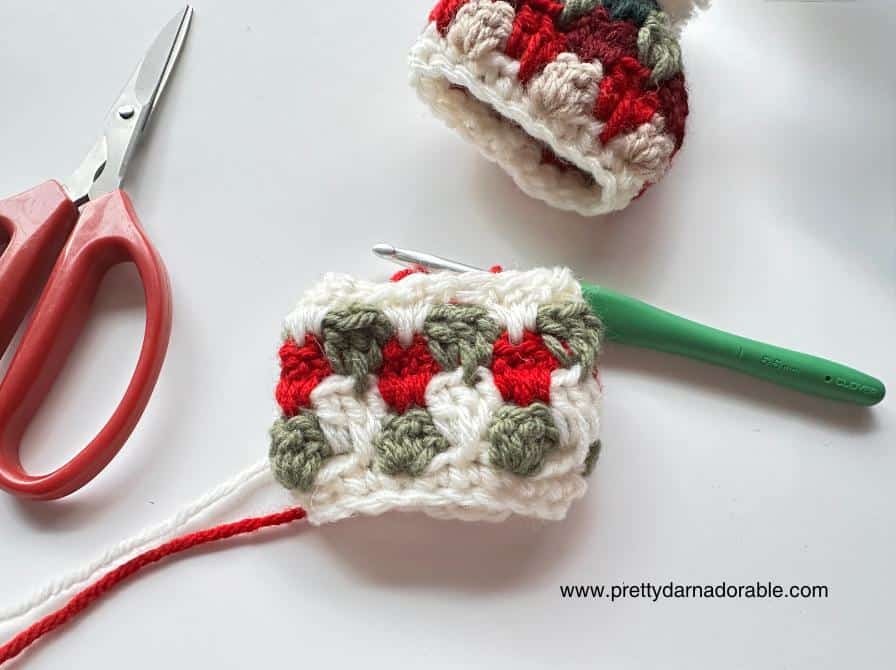
Note for finishing round: You will no longer be working into the spaces. Work directly into stitches as instructed below.
Rnd 7: Finishing Round: Dc in middle st of cluster below, sc2tog over next 2 sts. *dc in middle st of cluster below, sc2tog over next 2 sts.* Repeat from *to* to end of round.
Fasten off and leave a long tail to close the top of the hat.

Close the top
Using yarn and needle weave in and out through the top stitches of the hat. Pull the top of the hat closed and weave in ends.

How to Make a Pom Pom

How To Make A Pom Pom
- To make the pom-pom, follow these simple steps using the Clover 1 3/8 inch pom-pom maker or any item about 1 1/2 to 2 inches in width, such as a fork, a piece of cardboard, or your two fingers:

1. Wrap Yarn:
– Wind yarn around the chosen item (fork, cardboard, or fingers) until it reaches about 1 inch in thickness.
2. Secure Middle:
– Slide the wound yarn off the item and tie a piece of yarn tightly around the middle. Leave the ends long; these will be used to attach the pom-pom to the hat.
3. Cut Loops:
– Cut all the loops on both sides of the tied yarn, effectively creating a bundle of loose yarn strands.
4. Trimming:
– Trim the pom-pom to the desired size and shape. The more yarn you wrap initially, the denser the pom-pom will be.

5. Attach to Hat:
– Attach the pom-pom to the top of the hat, securing it in place using the long ends of yarn tied around the middle. Watch video here.
6. Hanger (Optional):
– Lastly, if desired, attach a piece of yarn as a hanger. Pull a piece about 6-8 inches long, tie a knot, and trim the end. You can pull the knot to the inside of the hat for a neat finish.
If you make this project, I’d love to see it! Tag me on Instagram @prettydarnadorable so I can share your version with the Pretty Darn Adorable community.
Hugs, yarn snuggles, and endless stitches,
Cyp 💕