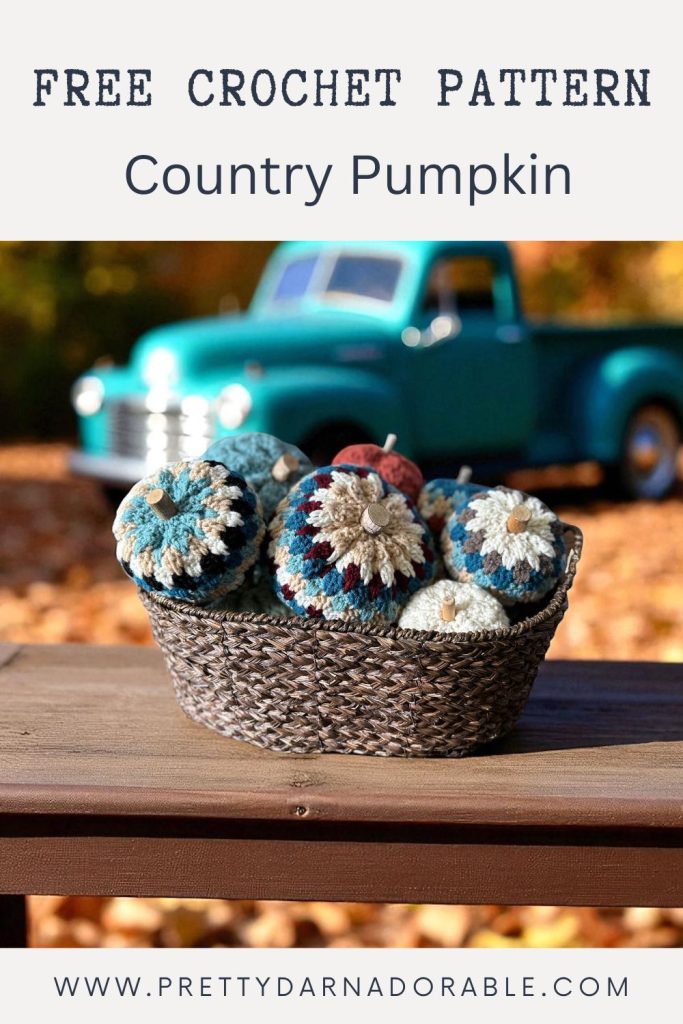
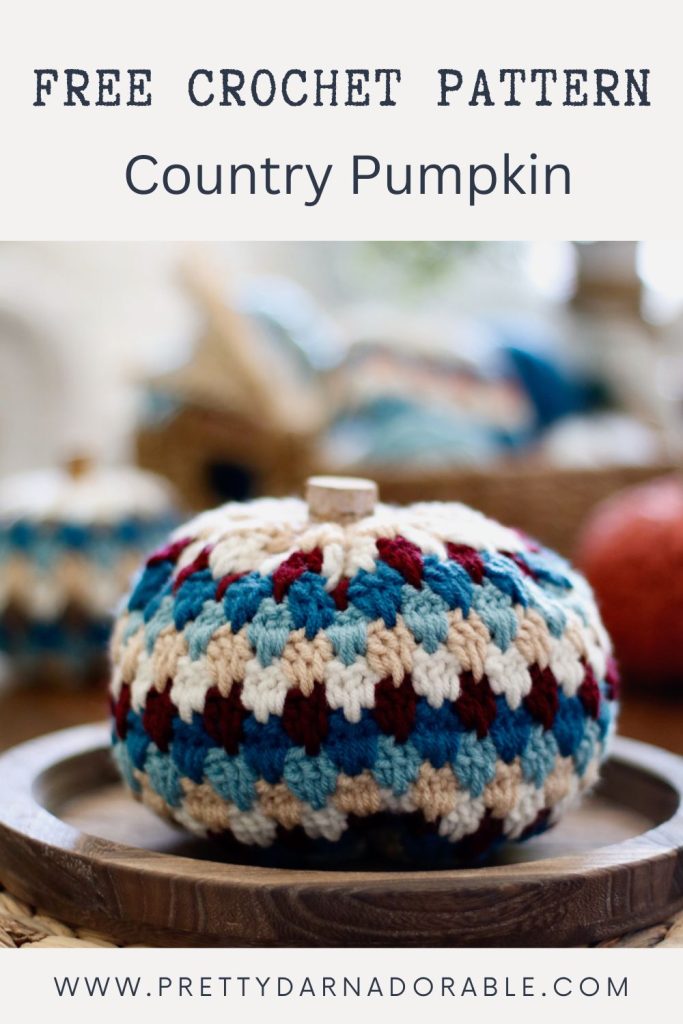
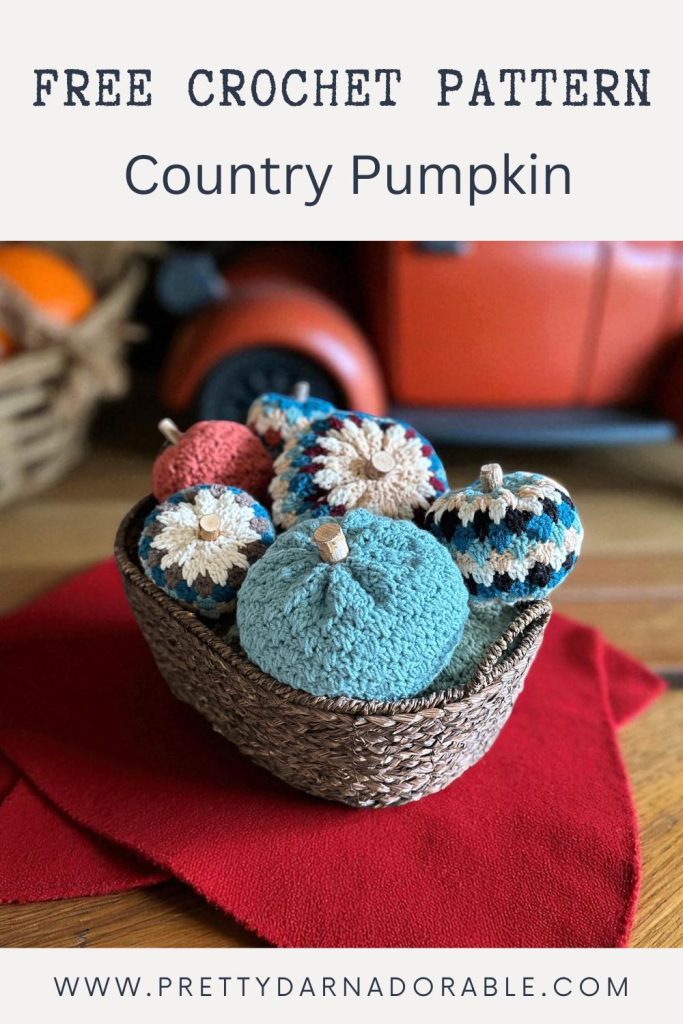
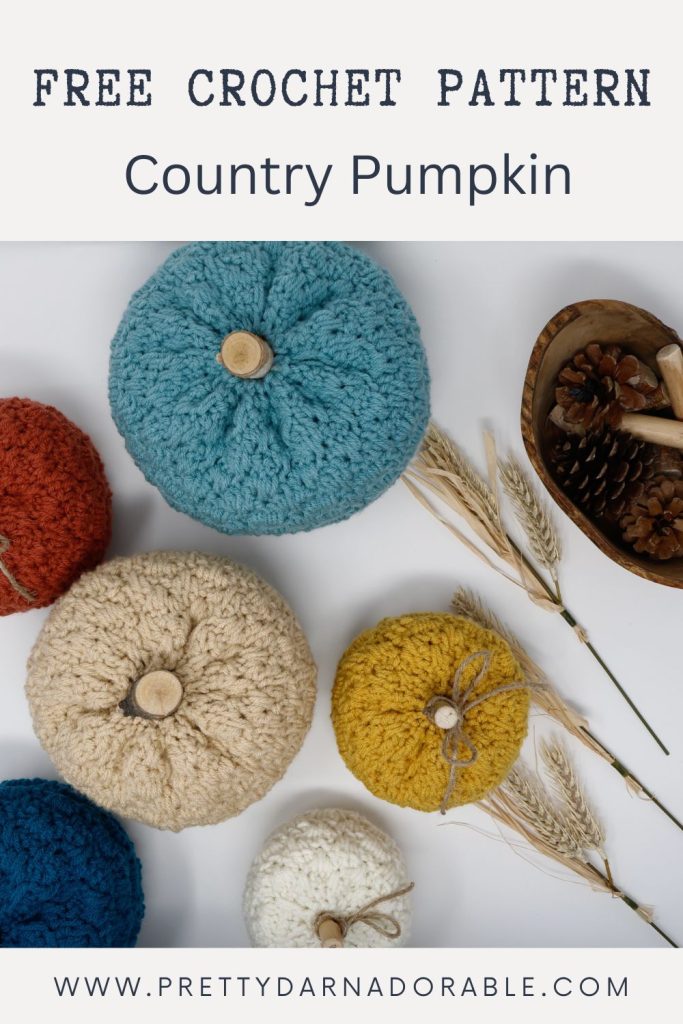
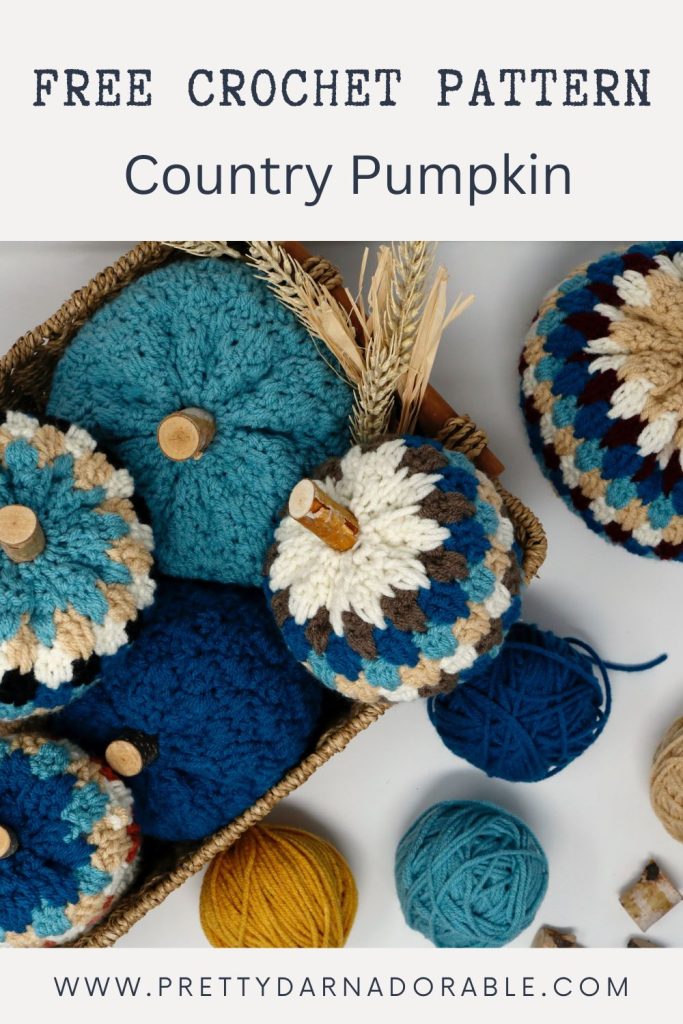
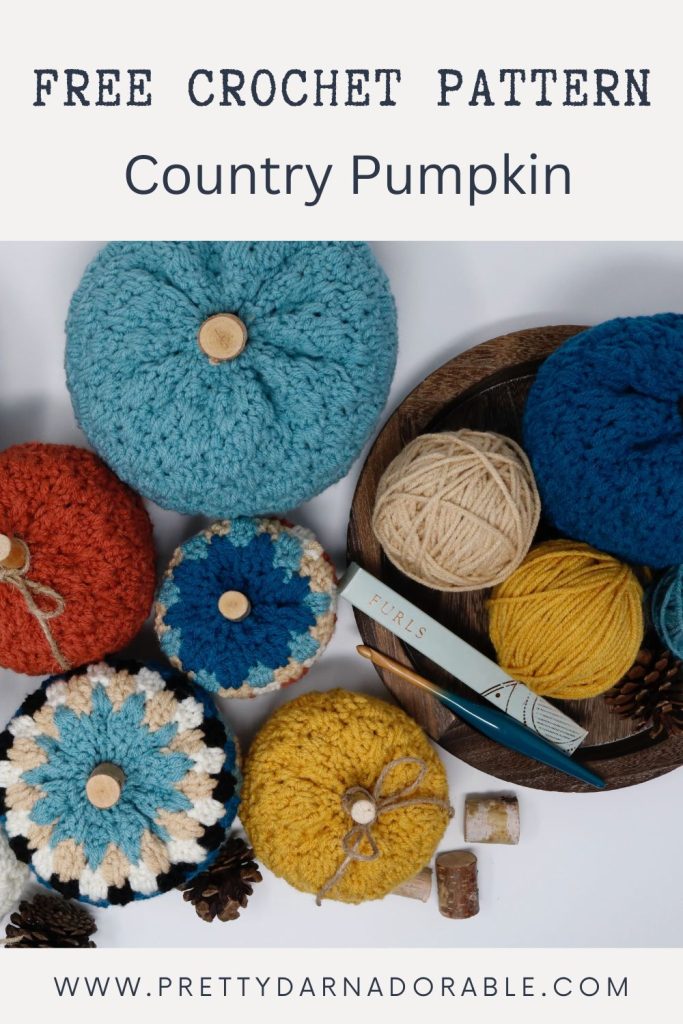
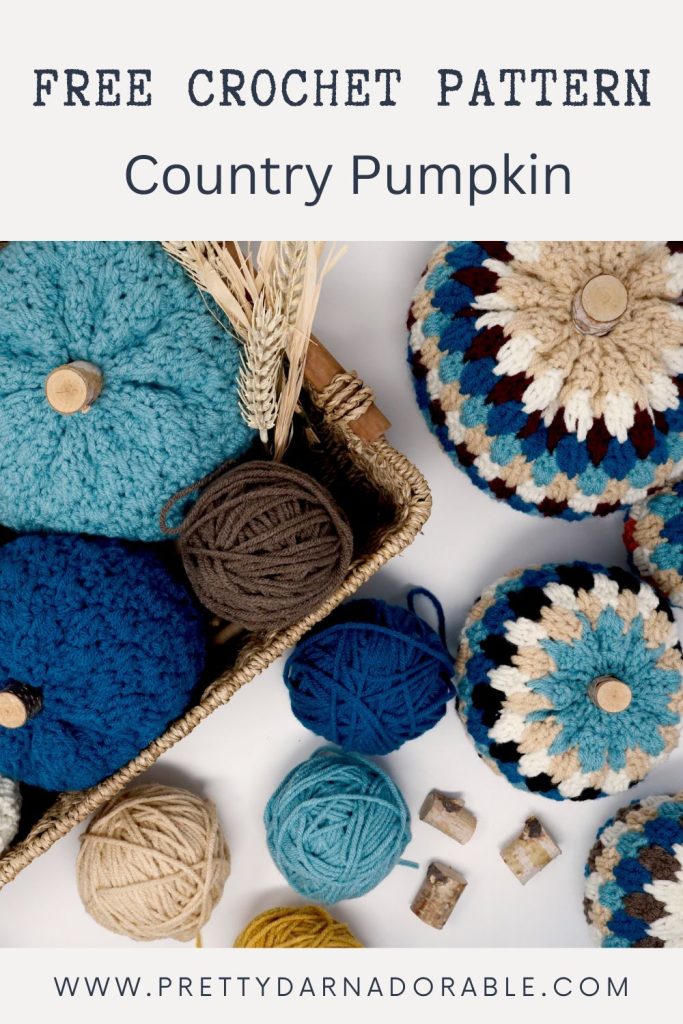
How cute are these little crochet pumpkins? Whether you’re a full-on pumpkin spice everything kinda person or just mildly obsessed with seasonal crafting, this free crochet pumpkin pattern is the perfect make for fall.
This free crochet pumpkin pattern is beginner-friendly, quick to work up, and ideal for using up leftover yarn in your stash. Make just one small pumpkin, or go wild and crochet a whole patch of larger pumpkins in different colours and yarn weights.
Pop a cinnamon stick in the top, toss them in a basket, or line them up on your windowsill and you have instant fall decor. No pressure, no fuss, just squishy cuteness and lots of cozy vibes.
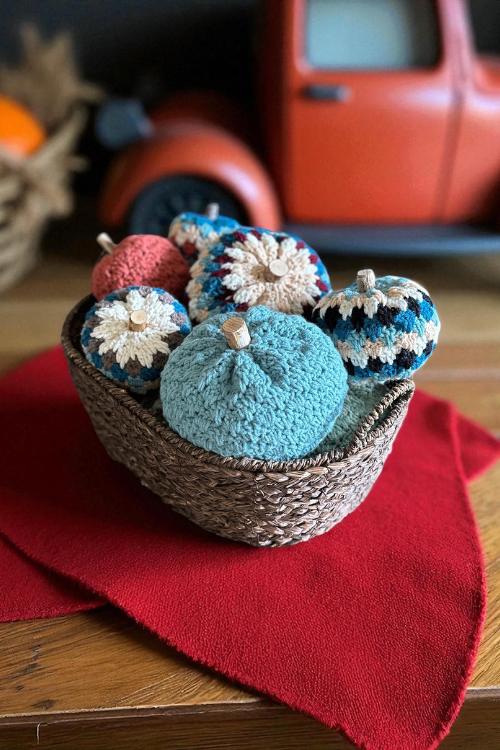
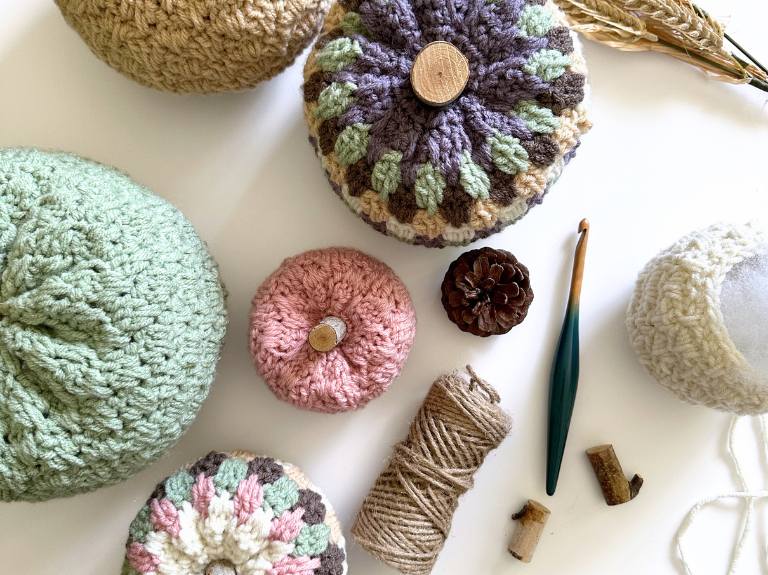
This free crochet pattern includes five sizes – Mini, Small, Medium, Large, and X-Large – so you can crochet just one or stitch up a whole patch in every size of the pumpkin.
What Makes This Easy Crochet Pumpkin Pattern So Great?
🧶 It uses basic crochet stitches like single crochet and double crochet
🧶 You’ll learn how to work in continuous rounds (with turning!)
🧶 Five sizes included: from small size to Xlarge pumpkins
🧶 You’ll practice colour changes
🧶 You can experiment with any type of yarn: chunky, bulky yarn, acrylic yarn, thinner yarn, or even green yarn for a wild twist
Love all things Fall? Try these crochet patterns next!
Rustic Farmhouse Free Crochet Pumpkin Pattern and Video Tutorial
Crochet Maple Leaf Free Pattern & Video
Free Chunky Crochet Pumpkin Pattern with Free Labels!
Rustic Rib Pumpkin – Free Crochet Pumpkin Pattern (Beginner-Friendly)
Free Beginner Crochet Pumpkin Hat Pattern with Video
How This Free Pumpkin Crochet Pattern Works
This easy crochet pumpkin pattern is worked in joined, continuous rounds, and you’ll turn at the end of each round to keep that beautiful texture nice and even. It’s kind of like making a tube, then you gather the bottom of the pumpkin, stuff it, and cinch the top of the pumpkin closed to get that perfect pumpkin shape.
Don’t worry about gauge or crochet hook size—just grab your favourite and go. It’s a low-stress, basic stitches kind of project.
What You Need for This Free Crochet Pumpkin Project
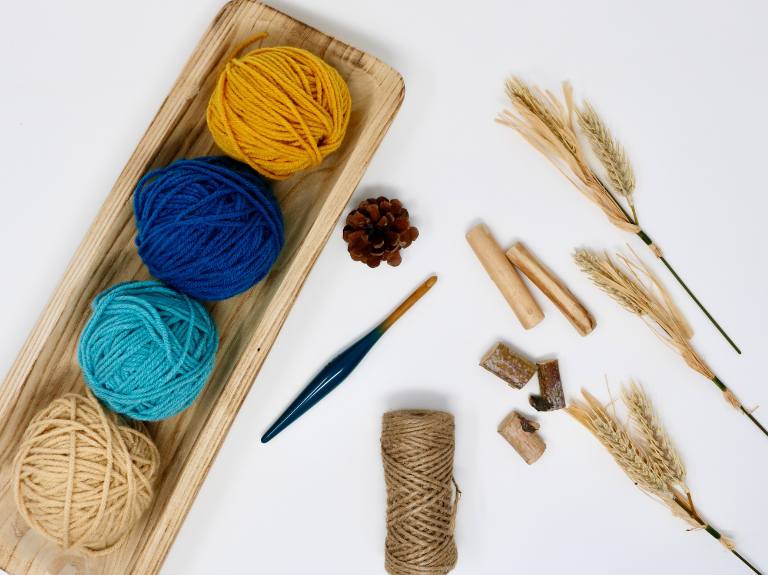
- Worsted weight yarn (amounts listed in pattern below)
- 5.5 mm crochet hook
- Yarn needle
- Scissors
- Fibre fill (or scrap yarn) for stuffing
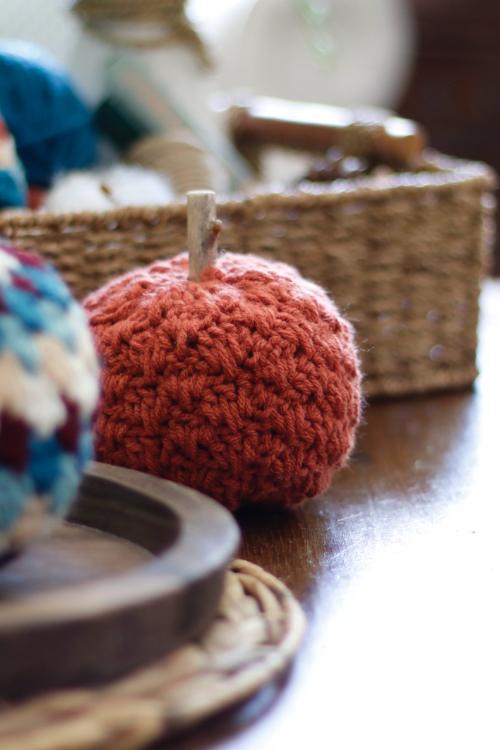
- Optional: cinnamon sticks, twigs, leather tags, wooden pegs for stems
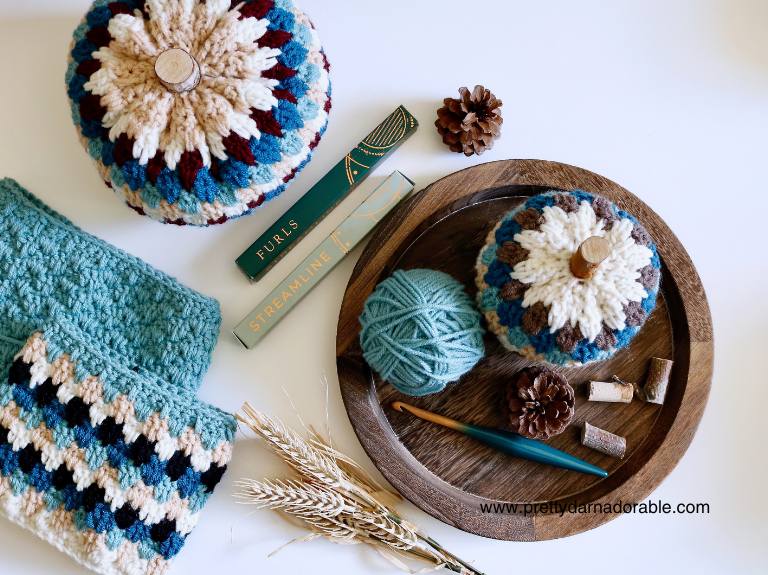
👉 Don’t forget to grab your favourite hook – I used a Furls Streamline for this one because it’s comfy and smooth as butter (and Furls kindly provided me with this hook).
Most Popular
Fall Favourites
Yarn Tips + Colour Help
You can make this pattern in one colour, or switch it up every round for fun stripes.
Want help choosing a different color combo?
🎨 Try my Random Stripe Generator! You can even upload your own photos to pull a palette from your living room, kitchen—or favourite fall outfit.
You’ll find yarn amounts for both multi-colour and solid colour pumpkins listed in the pattern. Pick your favourite yarn and adjust your hook accordingly.
Sizes & Yarn Requirements
Here’s the Medium Pumpkin as an example:
Colour A: 20 g / 0.71 oz / 32.7 m / 35.8 yd
Colour B: 15 g / 0.53 oz / 24.5 m / 26.8 yd
Colour C: 20 g / 0.71 oz / 32.7 m / 35.8 yd
Colour D: 10 g / 0.35 oz / 16.4 m / 17.9 yd
Colour E: 10 g / 0.35 oz / 16.4 m / 17.9 yd
Solid Option: 65 g / 2.29 oz / 106.4 m / 116.2 yd
🧶 Use thinner yarn for a smaller pumpkin and bulky yarn for big, chonky ones.
Yarn Recommendations for the Perfect Pumpkin
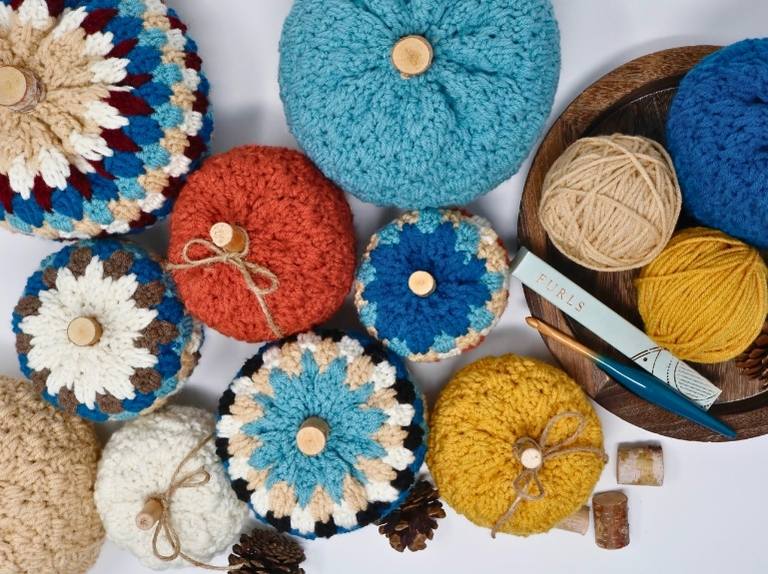
For my sample, I used Loops & Threads Soft Classic Solid Yarn. This yarn is a medium 4 / worsted weight yarn, made from 100% acrylic, and it’s both soft and sturdy, exactly what you want when making pumpkins that need to hold their perfect pumpkin shape.
Each skein comes with 315 yards, so there’s plenty of yarn for a few small pumpkins or even a couple of larger pumpkins. Plus, it’s machine washable and comes in a wide range of colours, making it easy to customize your fall decor with classic orange yarn, creamy neutrals, or even fun, unexpected colours.
If you don’t have access to this yarn, don’t worry, this free crochet pumpkin pattern works beautifully with almost any worsted weight yarn. Here are some great alternatives:
- Lily Sugar ’n Cream (cotton) – A fantastic option if you want a firmer texture and strong stitch definition.
- Bernat Super Value (acrylic) – Similar to Soft Classic, budget-friendly, and great for whipping up a patch of little pumpkins.
- Red Heart Super Saver (acrylic) – A tried-and-true yarn that’s available just about everywhere and comes in almost every colour you can imagine.
- Caron One Pound (acrylic) – Ideal if you plan to make multiple pumpkins in different sizes since one skein goes a long way.
- Paintbox Yarns Simply Aran (acrylic) – Sold online and available in a huge variety of shades—perfect if you want to coordinate your pumpkins with your fall home decor.
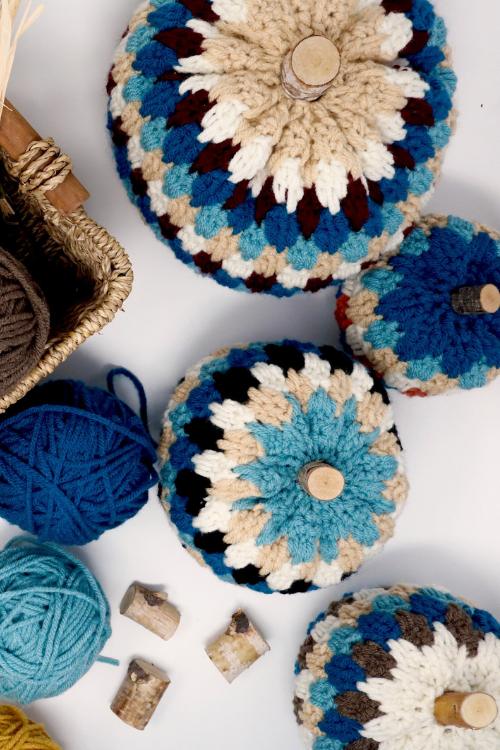
👉 Want to change things up? Try using a bulky yarn for an easy crochet pumpkin pattern that works up super quick and gives you extra squish. Or, for a fun twist, hold two strands of thinner yarn together to create a unique texture and a chunkier pumpkin shape.
Free Downloads
Gift Tags
No matter what yarn you choose, this free pumpkin crochet pattern is flexible and forgiving. Just remember – the size of your pumpkin will vary depending on your yarn weight, hook size, and how tightly you crochet.
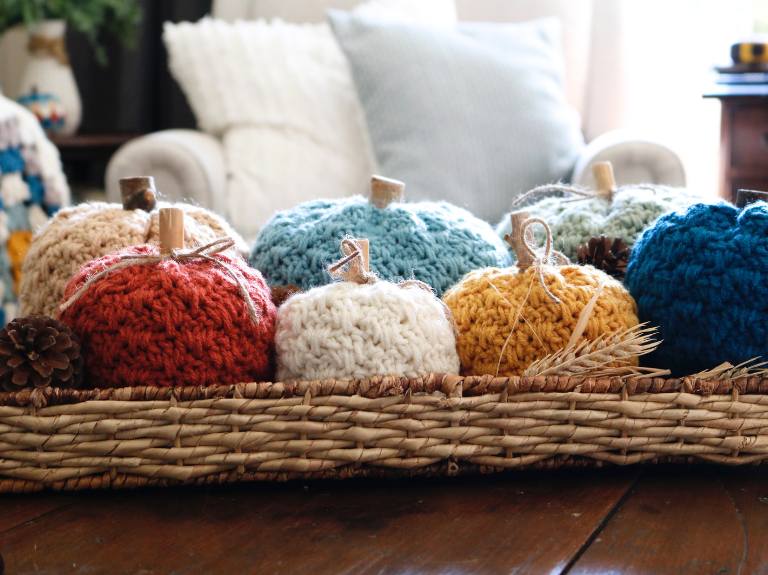
Special Stitches
- Long Double Crochet (ldc): A dc worked around the stitch from the row below.
- Cluster: (dc, ldc, dc) in the space between stitch groups.
These basic crochet stitches give your pumpkin its ribbed, textured look. No shaping, no problem.

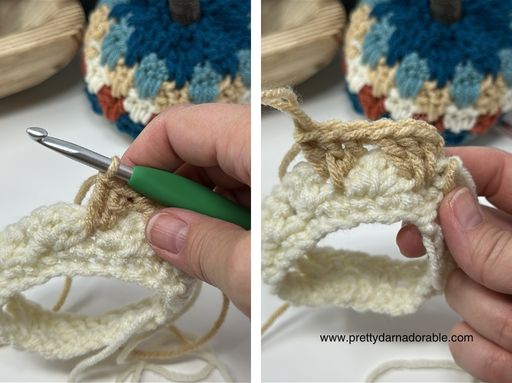
Colour Changes – The Easy Way
Each round is worked in a single colour. Change colours at the last slip stitch of the round. Here’s how:
- Stop before finishing your last sl st
- Add your new yarn and finish the stitch
- Chain 1 and turn—ready for the next round!
Make sure you pull yarn tails to the inside of the pumpkin (Round 1 is the outside). If you forget, no worries—just use your hook to tug it through.
How to Finish Your Crochet Pumpkin
Once you’ve reached the end of your rounds, here’s what to do:
- Close the bottom of the pumpkin using the long yarn tail
- Stuff the pumpkin with fibre fill or leftover yarn
- Weave the yarn through the top of the pumpkin and cinch it tight
- Leave a hole if you’re adding a cinnamon stick or pumpkin stem
- For more shaping, weave the tail from top to bottom through the center of the pumpkin a few times
- Fluff and enjoy your cute pumpkin
Step-by-Step Crochet Pumpkin VIDEO Tutorial
Prefer to watch and crochet along? 🎥 Here’s the full video tutorial for the Country Charm Pumpkin. If you like to follow step-by-step written instructions, keep scrolling – I’ve included those below too!
✨ What you’ll learn in this tutorial:
- How to create the stunning “Country Charm” mini pumpkin with a striped pattern.
- Step-by-step guidance on color changes and working in clusters for that perfect texture.
- Tips for achieving a professional finish, from yarn selection to shaping your pumpkin.
🎥 Full Video Tutorial
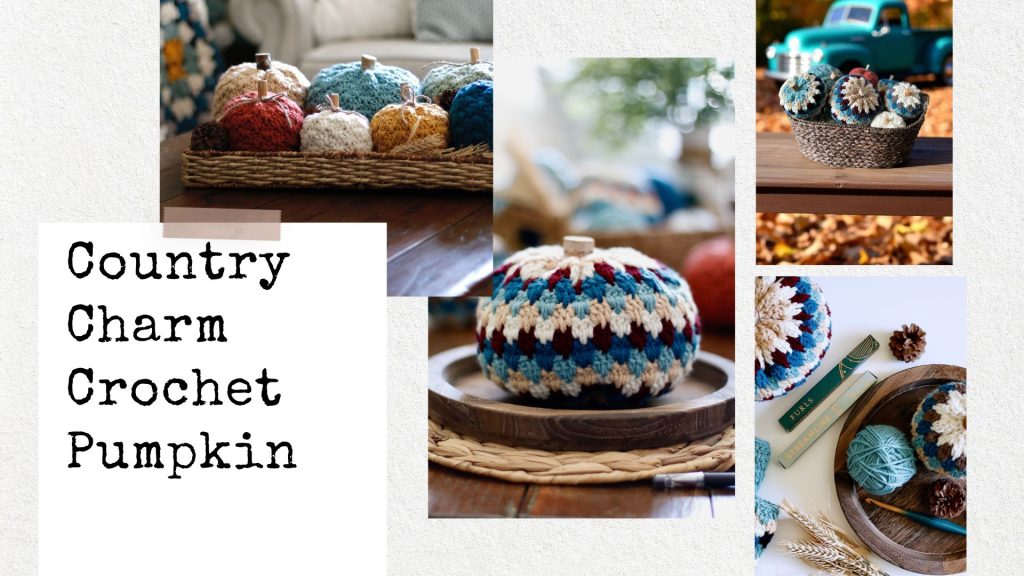
👉 Watch the full step-by-step tutorial here on YouTube
This video tutorial walks you through everything – perfect if you’re a visual learner or trying crochet patterns for the first time.

Where to Get the Printable PDF
Want the ad-free, printable free pattern to keep? Grab it in my Etsy shop.
It’s available for personal use only, and I may earn a small commission if you purchase through affiliate links.
Don’t Miss Out!
✨ Visit my VIP Library for more free crochet patterns, tags, printables & planners
📌 Follow along on Pinterest for more halloween crochet ideas
🎥 Watch more tutorials and walkthroughs on YouTube
Step-by-Step Crochet Pumpkin Tutorial
🧵 Frequently Asked Questions
1. Can beginners crochet pumpkins?
Absolutely! This free pumpkin crochet pattern uses only basic stitches and comes with a detailed video tutorial. It’s the perfect fall project if you’re comfortable with these stitches and locating stitches.
2. What yarn works best?
You can use worsted weight yarn, bulky yarn, or even acrylic yarn – whatever you’ve got! The type of yarn affects the size of the pumpkin, so experiment freely.
3. How do I shape the pumpkin?
After stuffing, weave your yarn end from top to bottom of the pumpkin, pulling tight to add those classic pumpkin ridges. This gives you that perfect pumpkin shape.
4. Can I sell these?
Yes! You’re welcome to sell finished little crochet pumpkins made using this pattern. Giving credit is appreciated but not required. Please do not share the pattern – link them here for the free crochet pattern instead.
5. How long does it take?
Smaller sizes take around an hour or less, while larger pumpkins might take 2–3 hours depending on your pace. Perfect for last-minute happy Halloween makes or gifts!
Hugs, yarn snuggles, and endless stitches,
Cyp 🧶
Purchase Ad Free Pattern – Instant Download!
Purchase the ad-free PDF for a smooth, distraction-free crocheting experience anytime, anywhere.
Already a subscriber? Check your latest email for your special discount code. Not subscribed yet? Sign up here to get yours!
Thanks so much for supporting my blog!
Country Charm Crochet Pumpkin
Skill Level
Easy
Abbreviations (US Terms)
- ch – chain
- dc – double crochet
- ldc – long double crochet (see special stitches)
- sc – single crochet
- sk – skip
- sp – space
- st – stitch
- sts – stitches
- sl st – slip stitch
Gauge
No swatching required for this project.
👉 Gauge isn’t important here, your pumpkin may just turn out a little bigger or smaller depending on your yarn and hook.
Finished Measurements
Please note that the actual amount of yarn needed may change depending on the yarn chosen always purchase a little more than you think you may need.
- Mini 3 ½” x 3 ½”
- Small 4 ½” x 4”
- Medium 5 ½” x 4 ½”
- Large 6 ½” x 5”
- X Large 7 ½” x 5 ½”
Materials Needed
- Worsted weight yarn – Loops & Threads Soft Classic (see amounts below) Colours Shown: A (Off White) B (Taupe) C (Arctic) D (Reef) E (Wine, Mustard, Dark Taupe, Black, Clay)
- 5.50 mm Crochet hook ( or size recommended for yarn)
- Yarn needle
- Scissors
- Fibre fill or scrap yarn for stuffing (optional)
Please note that the actual amount of yarn needed may change depending on the yarn chosen always purchase a little more than you think you may need.
Yarn Requirements for Free Crochet Pumpkin Pattern
Mini Pumpkin
Colour A: 10 g / 0.35 oz / 16.4 m / 17.9 yd
Colour B: 10 g / 0.35 oz / 16.4 m / 17.9 yd
Colour C: 10 g / 0.35 oz / 16.4 m / 17.9 yd
Colour D: 10 g / 0.35 oz / 16.4 m / 17.9 yd
Colour E: 5 g / 0.18 oz / 8.2 m / 8.9 yd
Solid Colour Option: 40 g / 1.41 oz / 65.5 m / 71.5 yd
Small Pumpkin
Colour A: 20 g / 0.71 oz / 32.7 m / 35.8 yd
Colour B: 10 g / 0.35 oz / 16.4 m / 17.9 yd
Colour C: 10 g / 0.35 oz / 16.4 m / 17.9 yd
Colour D: 10 g / 0.35 oz / 16.4 m / 17.9 yd
Colour E: 10 g / 0.35 oz / 16.4 m / 17.9 yd
Solid Colour Option: 45 g / 1.59 oz / 73.6 m / 80.5 yd
Medium Pumpkin
Colour A: 20 g / 0.71 oz / 32.7 m / 35.8 yd
Colour B: 15 g / 0.53 oz / 24.5 m / 26.8 yd
Colour C: 20 g / 0.71 oz / 32.7 m / 35.8 yd
Colour D: 10 g / 0.35 oz / 16.4 m / 17.9 yd
Colour E: 10 g / 0.35 oz / 16.4 m / 17.9 yd
Solid Colour Option: 65 g / 2.29 oz / 106.4 m / 116.2 yd
Large Pumpkin
Colour A: 20 g / 0.71 oz / 32.7 m / 35.8 yd
Colour B: 15 g / 0.53 oz / 24.5 m / 26.8 yd
Colour C: 15 g / 0.53 oz / 24.5 m / 26.8 yd
Colour D: 15 g / 0.53 oz / 24.5 m / 26.8 yd
Colour E: 20 g / 0.71 oz / 32.7 m / 35.8 yd
Solid Colour Option: 75 g / 2.65 oz / 122.7 m / 134.1 yd
X-Large Pumpkin
Colour A: 25 g / 0.88 oz / 40.9 m / 44.7 yd
Colour B: 25 g / 0.88 oz / 40.9 m / 44.7 yd
Colour C: 15 g / 0.53 oz / 24.5 m / 26.8 yd
Colour D: 15 g / 0.53 oz / 24.5 m / 26.8 yd
Colour E: 15 g / 0.53 oz / 24.5 m / 26.8 yd
Solid Colour Option: 90 g / 3.17 oz / 147.3 m / 160.9 yd
Please note that the actual amount of yarn needed may change depending on the yarn chosen always purchase a little more than you think you may need..
Note: These pumpkins can be made with any yarn weight and hook size you like. Just keep in mind that the texture, size, and overall look will change depending on what you choose.
This pattern is that it also comes with a video tutorial. This means that you can follow along step-by-step and have all your questions answered in real-time.
Whether you’re struggling to understand a particular stitch or just want to see how it should look, the video tutorial is a fantastic resource to have. You can pause, rewind, and re-watch as many times as you need to make sure you’re doing everything correctly.
Special Stitches
Long Double Crochet (ldc): Work double crochet around and in front of the previous Rnd and into the stitch indicated one Rnd below.
Cluster: In the space between groups of 3 dc, work (dc, ldc in middle st of cluster below, dc). When working ldc be sure to bring the height of the stitch up to match the height of the dc previously made in the space between the clusters.
Notes
- This pumpkin is worked in joined rounds, and you’ll turn at the end of each round to keep the texture even.
- Always leave a long tail at the beginning chain and at the end – these will be used to close the pumpkin later.
- Change colours on the final slip stitch of the round unless otherwise noted.
- Stitch counts are included at the end of each round in ( ).
- Written in US crochet terms.
- Long double crochet (ldc) in Round 3 and beyond is worked into the sc of Round 1 (or into the middle st of the cluster below in later rounds).
- Always join with sl st unless otherwise noted.
- Turning chain does not count as a stitch.
Using Colours in Your Pumpkin
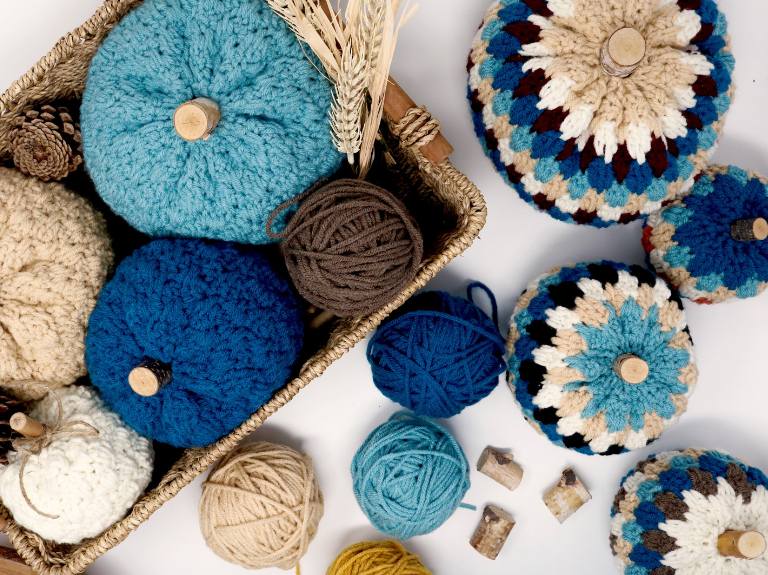
Follow the crochet pumpkin round instructions as written, and simply switch yarns according to the colour guide below. Each round is worked completely in a single colour. At the end of the listed rounds, change colours as instructed.
How to change colours below.
Colour Changes
- Rounds 1–2: Work with Colour A
- Round 3: Switch to Colour B
- Round 4: Switch to Colour C
- Round 5: Switch to Colour D
- Round 6: Switch to Colour E
- Finishing Round: Work in same colour as previous round.
💡 Adjusting for Different Colours
If you’d like to use fewer (or more) colours than shown, it’s easy to adjust! Just take the total yarn amount listed for your pumpkin size and divide it by the number of colours you plan to use.
For example, if the Medium Pumpkin uses about 65 g total and you want to use only two colours, plan for roughly 32–33 g of each colour. This is a rough calculation, so it’s always a good idea to have a little extra yarn on hand to make sure you don’t run short.
💡 Tip:
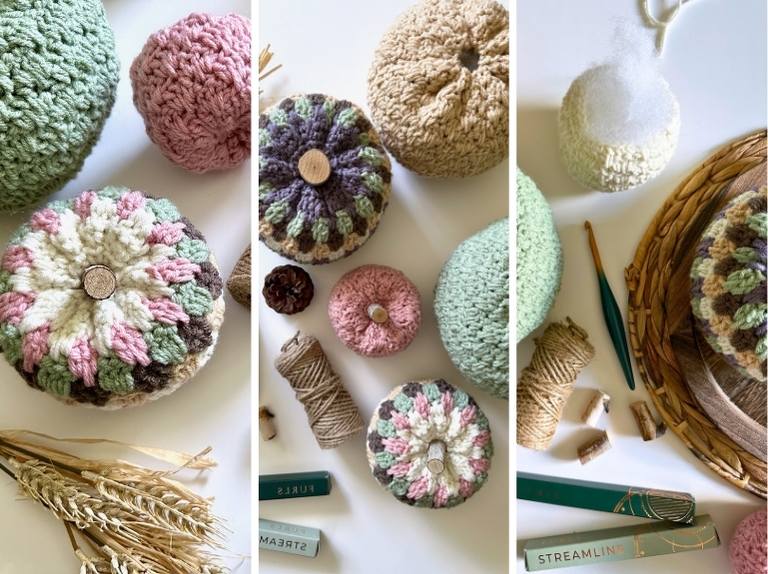
Not sure which colours to use? Try out my Random Stripe Generator on my blog Pretty Darn Adorable! It’s a fun tool that not only mixes and matches random stripes for you, but you can also upload your own photos and pull colour palettes directly from them. A super easy way to figure out the perfect stripe order for your pumpkin.
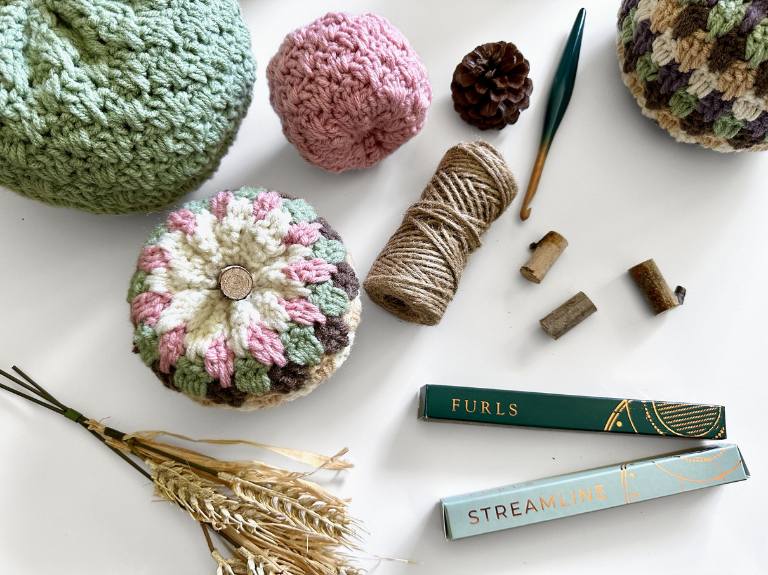
How to Make Colour Changes
Steps
- Work the round as written in the current colour.
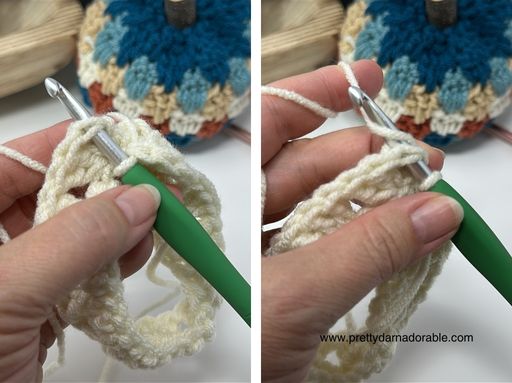
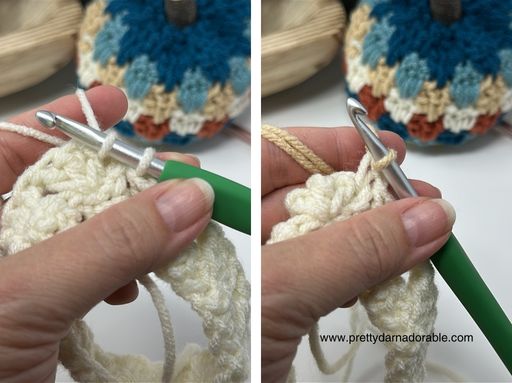
- When you get to the very last slip stitch (sl st) of the round, stop before completing it.
- Drop the old colour and place the new colour on your hook.
- Pull the new colour through to finish the slip stitch – this completes the join for that round.
- Chain 1 and turn (as pattern instructs), now working the next round in the new colour.
- No need to weave in – simply tie a knot and tuck them to the inside of the pumpkin.
Note: Make sure all yarn tails from your colour changes are pulled to the same side of the pumpkin. Round 1 is the outside of the pumpkin, so pull all tails to the inside. If you forget, no worries – just use your crochet hook to grab them through and pull them to the inside later.
Did you make any of these?
I would love to see what you have made be sure to mention @prettydarnadorable or tag me using #prettydarnadorable on Instagram so I can see your creations!
Free Crochet Pumpkin Pattern
Mini Pumpkin
Yarn Requirements
Colour A: 10 g / 0.35 oz / 16.4 m / 17.9 yd
Colour B: 10 g / 0.35 oz / 16.4 m / 17.9 yd
Colour C: 10 g / 0.35 oz / 16.4 m / 17.9 yd
Colour D: 10 g / 0.35 oz / 16.4 m / 17.9 yd
Colour E: 5 g / 0.18 oz / 8.2 m / 8.9 yd
Solid Colour Option: 40 g / 1.41 oz / 65.5 m / 71.5 yd
Leave a long tail at the beginning chain – this will be used later to close up your pumpkin.
Ch 27. Join with sl st to form a circle. Ch 1.
Rnd 1: Sc in 1st ch and each ch around. Join with sl st. Ch 1, turn. (27 sts)
Rnd 2: 3 dc in 1st sc, sk next 2 sts, 3 dc in next st, sk next 2 sts; repeat around. Skip last 2 sts. Join with sl st, ch 1, turn. (27 sts)
Rnd 3: In space before 1st cluster: (dc, ldc in sc below, dc). Sk next cluster, in space before next cluster (dc, ldc in sc below, dc). Repeat around. Skip last 2 sts. Join with sl st, ch 1, turn. (27 sts)
Rnd 4: Working in space before 1st cluster, (dc, ldc in middle st of cluster below, dc). *Sk next cluster, in space before next cluster (dc, ldc in 2nd st of cluster below, dc).* Repeat around. Skip last 2 sts. Join with sl st, ch 1, turn. (27 sts)
Rnds 5–10: Repeat Rnd 3. (27 sts each rnd)
Note for finishing round: You will no longer be working into the spaces. Work directly into stitches as instructed below.
Finishing Round: Dc in middle st of cluster below, sk next st, sc in next 2 sts. *dc in middle st of cluster below, sk next, sc in next 2 sts.* Repeat from *to* to last 3 sts. Skip next st, sc in the last 2 sts. (27 sts). Fasten off, leaving a long tail for closing the pumpkin.
👉 When finished, scroll down to Finishing (All Sizes) to close and stuff your pumpkin.
Small Pumpkin
Yarn Requirements
Colour A: 20 g / 0.71 oz / 32.7 m / 35.8 yd
Colour B: 10 g / 0.35 oz / 16.4 m / 17.9 yd
Colour C: 10 g / 0.35 oz / 16.4 m / 17.9 yd
Colour D: 10 g / 0.35 oz / 16.4 m / 17.9 yd
Colour E: 10 g / 0.35 oz / 16.4 m / 17.9 yd
Solid Colour Option: 45 g / 1.59 oz / 73.6 m / 80.5 yd
Leave a long tail at the beginning chain – this will be used later to close up your pumpkin.
Ch 33. Join with sl st to form a circle. Ch 1.
Rnd 1: Sc in 1st ch and each ch around. Join with sl st. Ch 1, turn. (33 sts)
Rnd 2: 3 dc in 1st sc, sk next 2 sts, 3 dc in next st, sk next 2 sts; repeat around. Skip last 2 sts. Join with sl st, ch 1, turn. (33 sts)
Rnd 3: In space before 1st cluster: (dc, ldc in sc below, dc). Sk next cluster, in space before next cluster (dc, ldc in sc below, dc). Repeat around. Skip last 2 sts. Join with sl st, ch 1, turn. (33 sts)
Rnd 4: Working in space before 1st cluster, (dc, ldc in middle st of cluster below, dc). *Sk next cluster, in space before next cluster (dc, ldc in 2nd st of cluster below, dc).* Repeat around. Skip last 2 sts. Join with sl st, ch 1, turn. (33 sts)
Rnds 5–12: Repeat Rnd 3. (33 sts each rnd)
Note for finishing round: You will no longer be working into the spaces. Work directly into stitches as instructed below.
Finishing Round: Dc in middle st of cluster below, sk next st, sc in next 2 sts. *dc in middle st of cluster below, sk next, sc in next 2 sts.* Repeat from *to* to last 3 sts. Skip next st, sc in the last 2 sts. (33 sts). Fasten off, leaving a long tail for closing the pumpkin.
👉 When finished, scroll down to Finishing (All Sizes) to close and stuff your pumpkin.
Medium Pumpkin
Yarn Requirements
Colour A: 20 g / 0.71 oz / 32.7 m / 35.8 yd
Colour B: 15 g / 0.53 oz / 24.5 m / 26.8 yd
Colour C: 20 g / 0.71 oz / 32.7 m / 35.8 yd
Colour D: 10 g / 0.35 oz / 16.4 m / 17.9 yd
Colour E: 10 g / 0.35 oz / 16.4 m / 17.9 yd
Solid Colour Option: 65 g / 2.29 oz / 106.4 m / 116.2 yd
Unlock Exclusive Content on Pretty Darn Adorable Crochet!
Quick heads-up before the sign-up form: some of my free crochet patterns and resources are now tucked behind a subscriber-only wall using a new feature called Grow’s Exclusive Content. This is to protect my content from being scraped by AI tools and popping up on random sites and being duplicated without permission. This new setup helps protect my work and keeps it available for actual crochet lovers like you.
If you’re already on my email list, you’re good, just sign in with a free Grow account when asked, and everything will unlock. And if you’re new, signing up gets you access to all the exclusive stuff (no unlocking things one by one). You can unsubscribe any time with one click right at the top of any email.
Thanks so much for all your support! 😊
Curious about all this AI business? I shared more about it in my post AI and the Crochet Community.
Finishing (All Sizes)
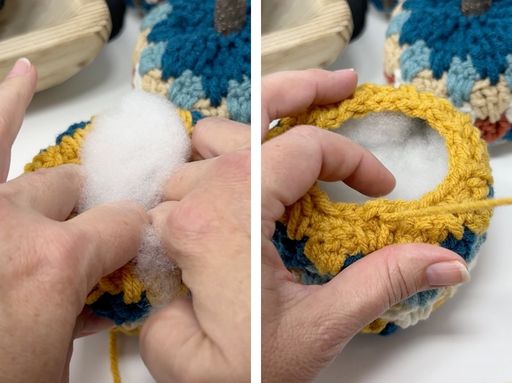
- Close the bottom: Using the long starting tail, weave in and out through the stitches along the bottom edge. Pull tightly to close and secure.
- Stuff your pumpkin: Add fibre fill (or stuffing of your choice) until it’s nice and plump.
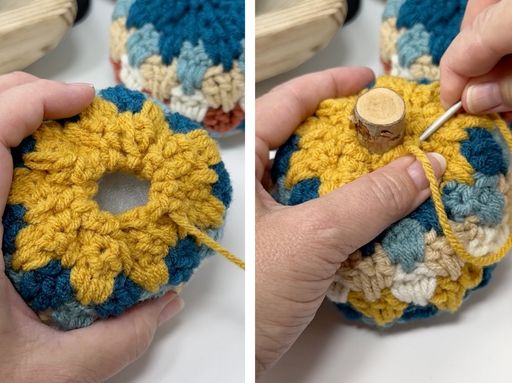
- Weave yarn through the top: This may feel a bit backwards, but it’s easier to do after stuffing – otherwise the needle tends to catch on the filling and things can get messy.
- Close the top: Pull the yarn snug to cinch the opening shut. If you are inserting a stem remember to leave a small opening to accommodate the stem.
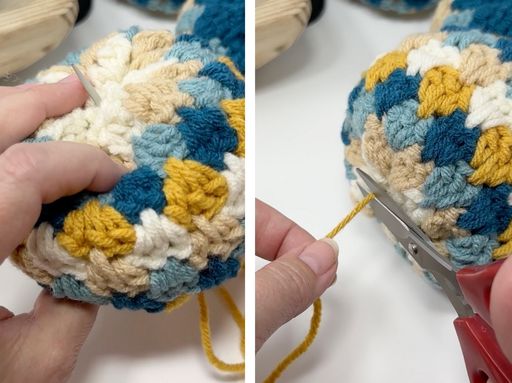
- Optional shaping: For extra definition, thread the yarn tail up and down through the centre of the pumpkin a few times, gently pulling to form sections. Adjust until you’re happy with the shape.
- Finishing touches: Weave in any remaining ends and add embellishments if you like.
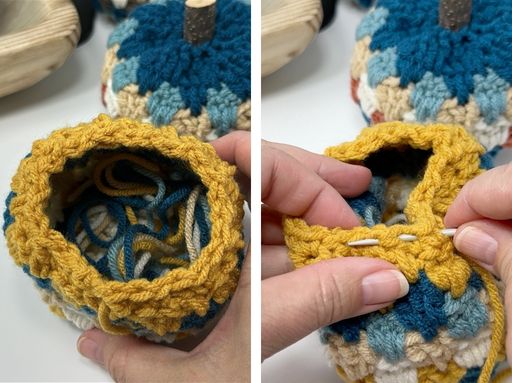
👉 Once you’ve closed it up, give your pumpkin a little squish and fluff until it looks just right. Then add a stem or leave it as is – either way it’s ready to show off!
Free Crochet Pumpkin Tag Download