


Stepping away from the larger pumpkins this year and leaning into smaller cutesy ones. Sometimes – as much as the big ones make a statement they are a little hard to decorate with especially if you don’t have a lot of flat surface space.
This is a beginner-friendly easy crochet pumpkin pattern made almost entirely from single crochet and chain stitch, in five sizes from Mini to X-Large. A simple, repetitive stitch pattern that turns into the sweetest little fall decor pumpkin you’ll want to make in every colour you own.
This is my newest free crochet pumpkin pattern, and, I think this one might be my favourite yet (yes I know I say that every year…). It has smaller sizes than my other ones and I love them and I hope you love it too!
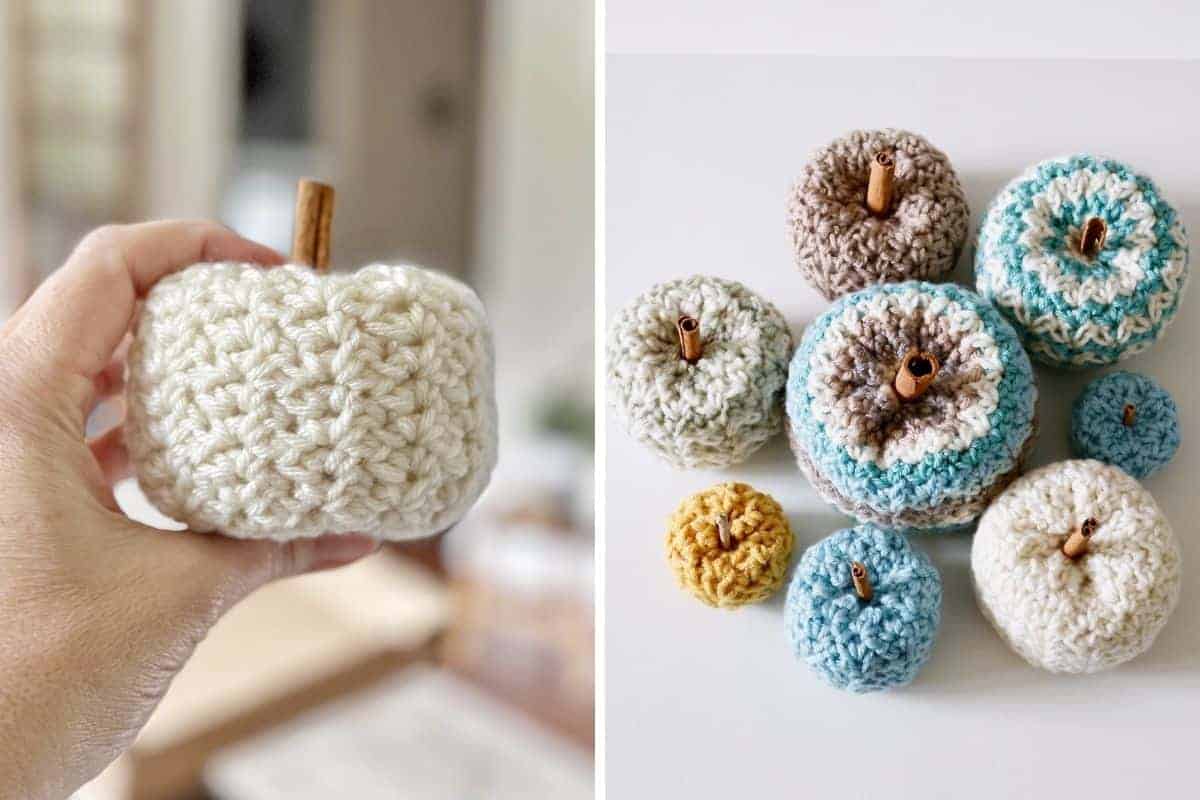
I just couldn’t decide which yarn I wanted to use, so I kept making more! I finally settled on some leftover yarn that matched my living room, and I really love how they turned out.
If you’ve made my Country Charm Crochet Pumpkin before, this one is a totally different design and a great next pumpkin to add to your collection! Country Charm uses double crochet clusters and long double crochet for a more textured, striped look. Cedar Ridge keeps things even simpler with just single crochet and chain spaces, so if you want something extra quick and beginner-friendly, or you just want a second style to mix into your fall display, this is the one.
I wanted a collection of smaller pumpkin choices that would be easy to style throughout your space. These free fall crochet patterns let you create different sizes, from Mini up to X-Large, perfect for tiered trays, bowls, baskets, shelves, or table scapes.

Why This Pattern Is Ideal for Beginners
If you’re new to crocheting, a seasonal project like this crochet autumn pattern is one of the best ways to practice:
🧶 Simple stitches and working in chains: No magic ring, no tunisian crochet, nothing fancy. You’ll stick to basic crochet stitches: single crochet, slip stitch, and chain spaces.
🧶 Easy stitch count and simple shaping: You work in continuous rounds for the base, then move into the textured body. The repeat row structure keeps things predictable, once you’ve got one round down, you’ve basically got them all.
🧶 Low-stress gauge and fast results: Gauge isn’t critical here. A little loose or a little tight tension still gives you an adorable pumpkin, and because of their size of your pumpkin being on the smaller side, you get a finished piece in a single sitting.
🧶 Forgiving texture: The stitch structure creates a rich, bumpy fabric that naturally hides minor tension inconsistencies or missed stitches.

Yarn and Hook Options
One of my favourite things about this free pattern is how flexible it is, you don’t need to buy anything new, just dig through your stash. Using different yarns changes the whole personality of the pumpkin: a thicker yarn gives you bigger pumpkins, while a lighter weight makes sweet little minis.
For my written pattern samples, I used worsted weight yarn with a 5.0mm hook and played with stripes in different colours.

Watch the Cedar Ridge Pumpkin Video Tutorial
Purchase Ad Free Pattern – Instant Download!
Purchase the ad-free PDF for a smooth, distraction-free crocheting experience anytime, anywhere.
Already a subscriber? Check your latest email for your special discount code. Not subscribed yet? Sign up here to get yours!
Thanks so much for supporting my blog!
Cedar Ridge Pumpkin
Skill Level
Beginner
Abbreviations
- ch – chain
- sc – single crochet
- sk – skip
- st – stitch
- sts – stitches
- sl st – slip stitch
- rpt – repeat
Gauge
Gauge is not critical for this project.
Finished Measurements (width x height)
- Mini: 2” x 1 1/4”
- Small: 2 1/2” x 2”
- Medium: 3” x 2 1/2”
- Large: 3 1/2” x 3”
- X-Large: 4” x 3 1/2”
Measurements are taken after stuffing. Final size may vary based on how much stuffing is used and how the pumpkin is shaped.

Materials Needed
- 5.00 mm hook – Be sure that your hook is either the same or smaller than recommended for your yarn.
- Tapestry needle
- Stitch markers
- Poly-fil
- Worsted weight yarn
Requirements listed below for solid pumpkin:
- Mini: 10 g / 0.35 oz / 16.9 m / 18.5 yd
- Small: 15 g / 0.53 oz / 25.1 m / 27.5 yd
- Medium: 20 g / 0.71 oz / 33.8 m / 37.0 yd
- Large: 25 g / 0.88 oz / 42.1 m / 46.0 yd
- XLarge: 40 g / 1.41 oz / 67.2 m / 73.5 yd
Yarn Amounts for 2-Colour Striping (50% Cream / 50% Accent)
Mini
Cream 5 g / 0.18 oz / 8.5 m / 9.25 yd
Accent 5 g / 0.18 oz / 8.5 m / 9.25 yd
Small
Cream 7.5 g / 0.26 oz / 12.6 m / 13.75 yd
Accent 7.5 g / 0.26 oz / 12.6 m / 13.75 yd
Medium
Cream 10 g / 0.35 oz / 16.9 m / 18.5 yd
Accent 10 g / 0.35 oz / 16.9 m / 18.5 yd
Large
Cream 12.5 g / 0.44 oz / 21.0 m / 23.0 yd
Accent 12.5 g / 0.44 oz / 21.0 m / 23.0 yd
XLarge:
Cream 20 g / 0.71 oz / 33.6 m / 36.75 yd
Accent20 g / 0.71 oz / 33.6 m / 36.75 yd
If using multiple accent colours, divide the total ACCENT AMOUNT ABOVE equally by the number of accent colours you are using.

Yarn Options
You can use any yarn weight and hook size you have in your stash for this project. Just be sure to choose a hook that is the same or smaller than what your yarn label calls for. This creates tight, neat stitches so your poly-fil stuffing doesn’t peek through.
Keep in mind that changing your yarn and hook size will directly change the final size of your pumpkin. Thinner yarns with smaller hooks will make sweet, mini pumpkins, while thick, bulky yarns will give you large, plush ones!
Notes:
- This pumpkin is crocheted from the bottom up.
- It is really important that you do not size your hook up for this pattern – it has somewhat of an open weave and if you go too large the stuffing will show through the chain 2 spaces.
- Use a stitch marker at the beginning of each round for easier counting.
- Rounds 1 – 6 are worked continuously in a spiral. Do not join unless noted.
- For the pumpkin body, all stitches are worked into the chain-2 spaces from the previous round, not into individual stitches.

How to Make Colour Changes
Steps
- Work the round as written in the current colour.
- When you get to the very last stitch of the round, stop before completing it.
- Drop the old colour and place the new colour on your hook.
- Pull the new colour through to finish the stitch.
- Join and chain 1 and turn (as pattern instructs), now working the next round in the new colour.
- No need to weave in – simply drop the current or tie a knot and tuck them to the inside of the pumpkin.
Note: Make sure all yarn tails from your colour changes are pulled to the same side of the pumpkin. Round 1 is the outside of the pumpkin, so pull all tails to the inside. If you forget, no worries – just use your crochet hook to grab them through and pull them to the inside later.
Two-Colour Stripes:
Alternate between Colour A and Colour B every round:
- Round 1: Colour A
- Round 2: Colour B
- Round 3: Colour A
- Round 4: Colour B
- Continue alternating in this way.
Instructions
Pumpkin is crocheted starting at the bottom working up. Use a stitch marker at the beginning of each round for easier counting. If making the striped version change colours at every round.
Chain 2
Important: Rounds 1–6 are worked continuously in a spiral. When the last round for desired size is complete, do not join. Continue to ‘Body of Pumpkin’.
Rnd 1: Work 6 sc in 2nd ch from hook. (6)
Rnd 2: 2 sc in each st around. (12) – Stop here for mini pumpkin and move onto Body of Pumpkin.
Rnd 3: 1 sc in 1st st *2 sc in next st, 1 sc in next st* rpt from * to * till end of rnd. (18) – Stop here for small pumpkin and move onto Body of Pumpkin.
Rnd 4: 1 sc in 1st 2 sts *2 sc in next st, 1 sc in next 2 sts* rpt from * to * till end of rnd. (24) – Stop here for medium pumpkin and move onto Body of Pumpkin.
Rnd 5: 1 sc in 1st 3 sts *2 sc in next st, 1 sc in next 3 sts* rpt from * to * till end of rnd. (30) – Stop here for large pumpkin and move onto Body of Pumpkin.
Rnd 6: 1 sc in 1st 4 sts *2 sc in next st, 1 sc in next 4 sts* rpt from * to * till end of rnd. (36) – Stop here for x-large pumpkin and move onto Body of Pumpkin.

Body of Pumpkin
Next, work the textured body of the pumpkin. Join and turn at the end of each round.
To begin Rnd 1, work into the first stitch of the final round of the bottom section, then continue as written.
Rnd 1: (Sc, ch 2, sc) in 1st sc, skip next sc. *(Sc, ch 2, sc) in next, skip next sc*. Repeat from * to * until end of rnd. Join with sl st to 1st sc. Ch 1, turn. (Mini: 6, Small: 9, Medium: 12, Large: 15, XLarge: 18 ch-2 spaces)
Rnd 2: (Sc, ch 2, sc) in 1st ch 2 space. *(sc, ch 2, sc) in next ch 2 space.* Repeat from * to * until end of rnd. Join with sl st to 1st sc. Ch 1, turn. (Mini: 6, Small: 9, Medium: 12, Large: 15, XLarge: 18 ch-2 spaces)
Repeat Rnd 2 as follows:
- Mini: 5 more times
- Small: 7 more times
- Medium: 9 more times
- Large: 11 more times
- XLarge: 13 more times
Final Round: Work a sc in each sc around. Join to 1st sc and fasten off, leaving a long tail for closing the pumpkin. (12, 18, 24, 30, 36)
Want a shorter, chubbier pumpkin? Stop a little sooner. Want a taller, slimmer pumpkin? Add a few more rounds.
Don’t worry if it isn’t perfectly even. A little wonkiness just makes it look more like a real pumpkin! 🎃
Finishing (All Sizes)
- Weave yarn through the top: This may feel a bit backwards, but it’s easier to do before stuffing, otherwise the needle tends to catch on the filling and things can get messy.
- Stuff your pumpkin: Add fibre fill (or stuffing of your choice) until it’s nice and plump.
- Close the top: Pull the yarn snug to cinch the opening shut. If you are inserting a stem remember to leave a small opening to accommodate the stem.
- Optional shaping: For extra definition, thread the yarn tail up and down through the centre of the pumpkin a few times, gently pulling to form. Adjust until you’re happy with the shape.
- Finishing touches: Weave in any remaining ends and add embellishments if you like.
👉 Once you’ve closed it up, give your pumpkin a little squish and fluff until it looks just right. Then add a stem or leave it as is – either way it’s ready to show off!
Creative Stem and Topper Ideas by Style
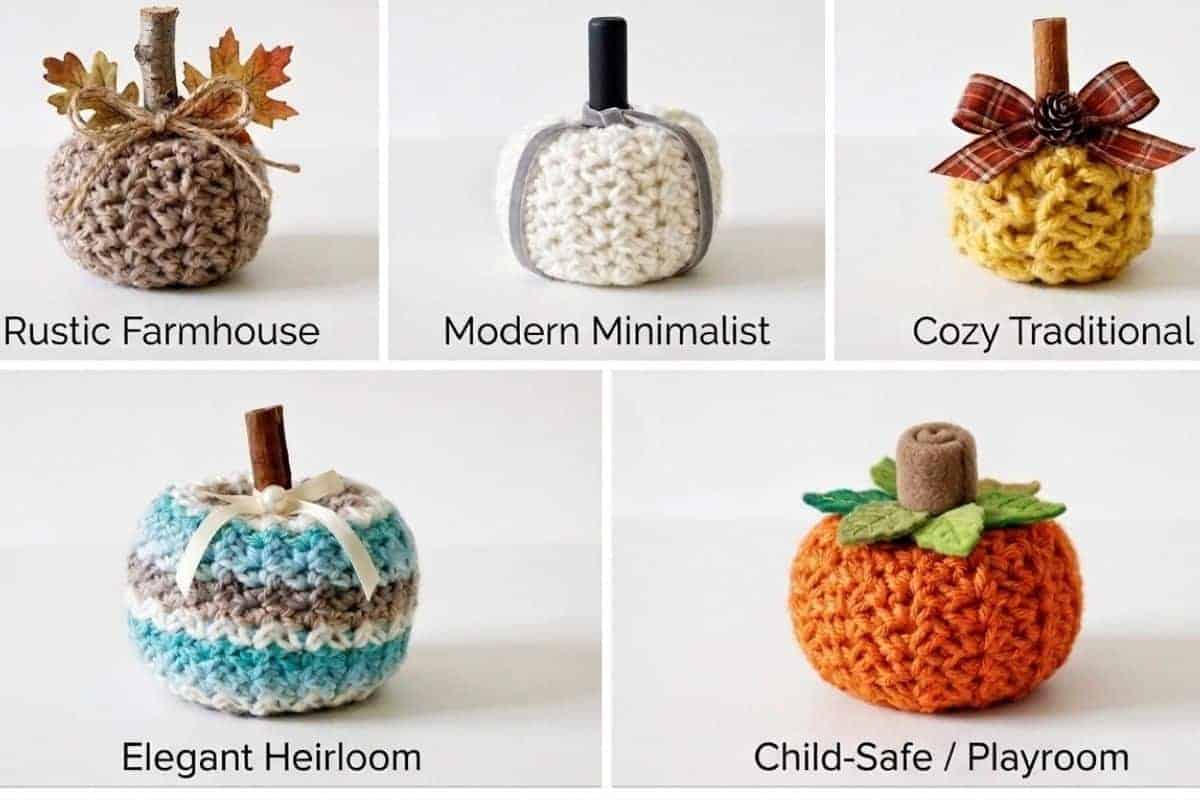
Rustic Farmhouse
- Stem: Insert a short piece of natural twig or birch branch into the top centre.
- Topper: Tie a small jute twine bow around the base of the stem and slip in a couple of faux leaves.
Modern Minimalist
- Stem: Use a short wooden dowel painted in solid gold or matte black.
- Topper: Wrap a single piece of thin velvet ribbon around the base of the stem for a clean finish.
Child-Safe / Playroom
- Topper: Stitch on small felt leaves with needle and thread, avoid hot glue or hard materials so it remains soft and fully washable.
Cozy Traditional
- Stem: Push a real cinnamon stick into the centre opening for a natural scent and warm look.
- Topper: Tie a bow around the stick using plaid ribbon and attach a mini pine cone.
Elegant Heirloom
- Stem: Use a smooth, sanded twig finished with a rich dark wood stain.
- Topper: Accent the base with a narrow silk ribbon and a single pearl bead or charm.
Safety Note
When using natural materials like twigs, wood, or cinnamon sticks, inspect them to ensure they are smooth and free of sharp edges or splinters. Keep small accents like pine cones, beads, and loose twigs out of reach of young children and pets, as these can pose a choking hazard. For safety in playrooms or children’s spaces, soft crocheted stems and sewn felt leaves are recommended instead of hard items or hot glue.
Decorating Ideas
The Cedar Ridge Pumpkins are small enough that you can use them in so many different ways around your home.
- Tiered trays: Mix several sizes and colours with your other fall decorations.
- Bowls and baskets: Fill a small bowl or basket with pumpkins for an easy autumn display.
- Table centrepieces: Arrange several pumpkins down the centre of your dining table with candles, greenery or other fall accents.
- Mantels and shelves: Tuck the smaller pumpkins around your existing décor.
- Place settings: A tiny pumpkin would make such a cute addition to a fall table.
- Baskets: Add a few pumpkins to a basket filled with blankets or other cosy fall items.
- Seasonal vignettes: Combine different sizes, colours and textures to create your own little fall display.
- Gift wrapping: Tie a small crochet pumpkin onto a wrapped gift for a handmade seasonal touch.
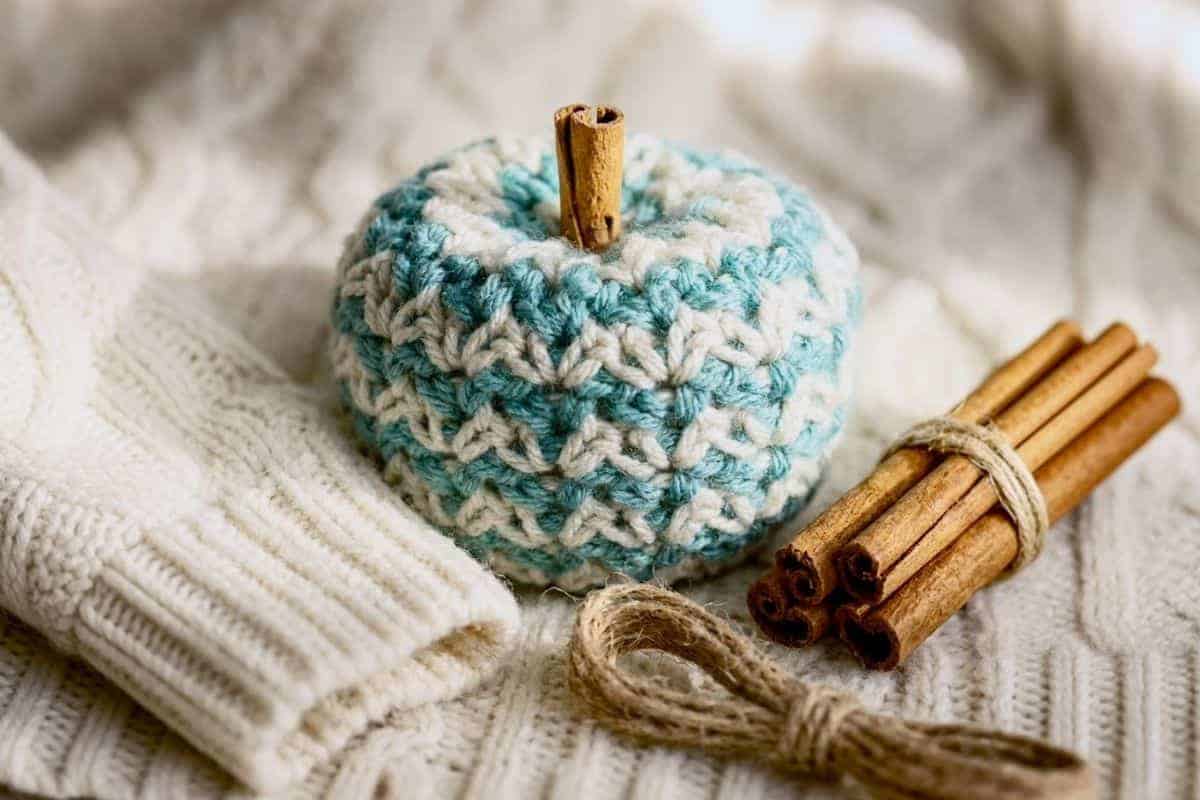
Cedar Ridge Pumpkins as Gifts
These pumpkins also make great little handmade gifts. Since they work up quickly and don’t require much yarn, you can make several at once.
Make a small collection in coordinating colours and package them in a basket, bowl or gift bag. They would also make a thoughtful hostess gift, housewarming gift or little fall surprise for a friend.
And because they can be made with leftover yarn, they’re an inexpensive handmade gift that still feels special.
You could even make a set of three or five pumpkins in different sizes and colours for a ready-to-display fall decorating set.
Thank you for purchasing my crochet pattern! Happy crocheting
Frequently Asked Questions
The pattern includes several sizes ranging from 2 inches to 6 inches, making it easy to create different sizes.
The written pattern samples use worsted weight yarn and a 5.0 mm crochet hook, but you can use bulky weight yarns or thinner yarn.
Yes! Switching to thicker yarn or bulky yarn with a larger hook will automatically create bigger pumpkins.
Yes! It uses basic stitches like single crochet and chains rather than advanced techniques like double crochet or a magic ring, making it the ultimate easy fall crochet project.
Yes, you may sell finished items made from this free crochet pumpkin pattern. Please do not redistribute the written pattern itself.
I hope this becomes one of your favourite pumpkin patterns and be sure to use up some of your stash – the size of your pumpkin will change with your yarn weight and size of your hook – have fun and be adventurous!
Warm Hugs
Cyp