


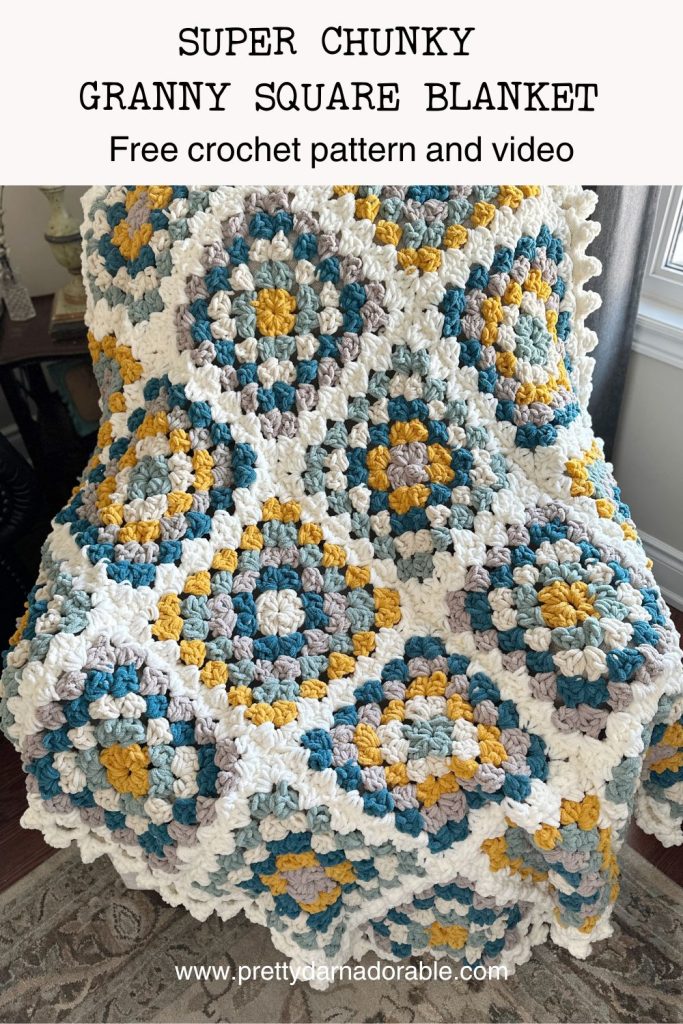


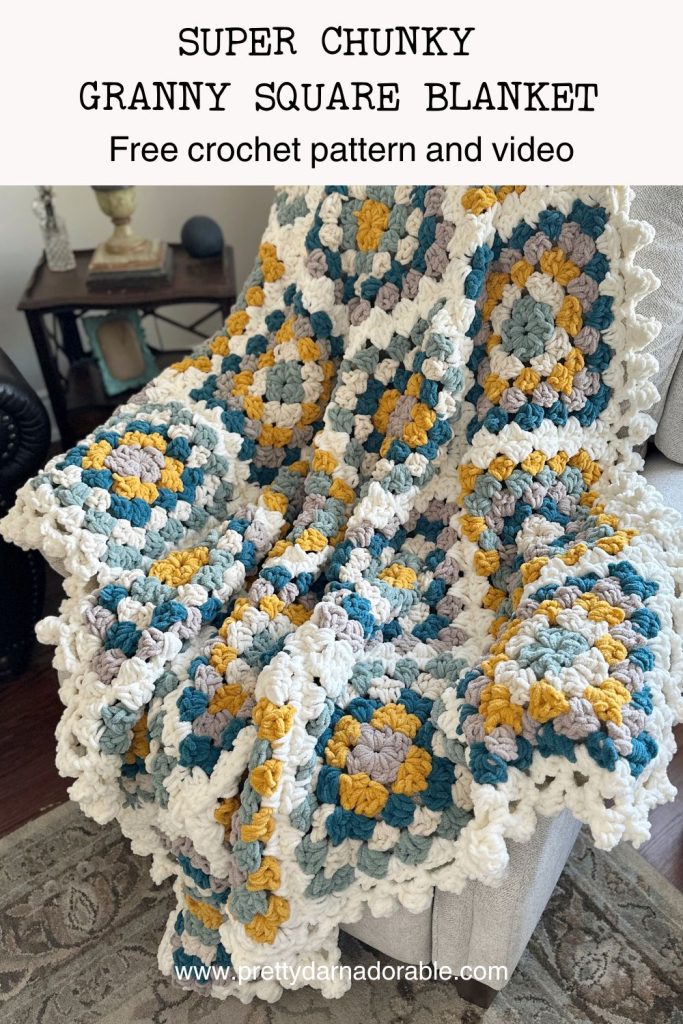
If you’re looking for a chunky crochet granny square blanket free pattern that’s simple, cozy, and works up fast, you’re in the right place! This modern granny square blanket is perfect for beginners and experienced crocheters alike. Plus, the ends are worked in continuously—so no endless weaving in of ends!
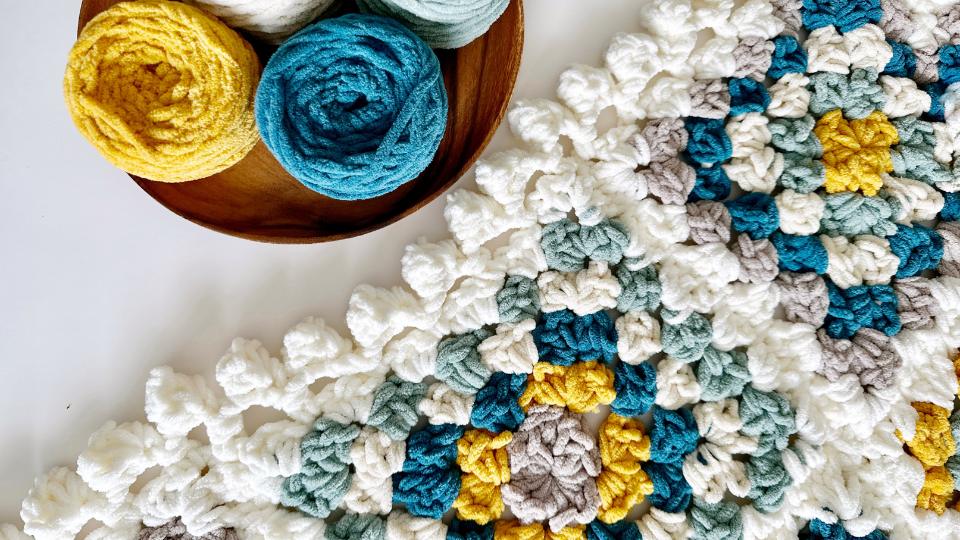
Using Bernat Blanket Yarn, this pattern creates a soft, squishy blanket that’s perfect for snuggling up on the couch or gifting as a baby blanket. You can also swap it out for worsted weight yarn if you prefer a lighter version. Either way, this chunky granny square pattern is super satisfying to make.
Oh, and there’s a video tutorial to walk you through it step by step!
What You’ll Love About This Pattern
✔ Beginner-Friendly – If this is your first time making a crochet blanket, this is a great place to start!
✔ Works Up Quickly – The chunky yarn makes it grow FAST.
✔ Customizable – Make it any size you like! Baby blanket, throw, or even a giant granny square blanket—you decide.
✔ Minimal Sewing – Since the ends are worked in continuously, you won’t have a ton of ends to deal with.
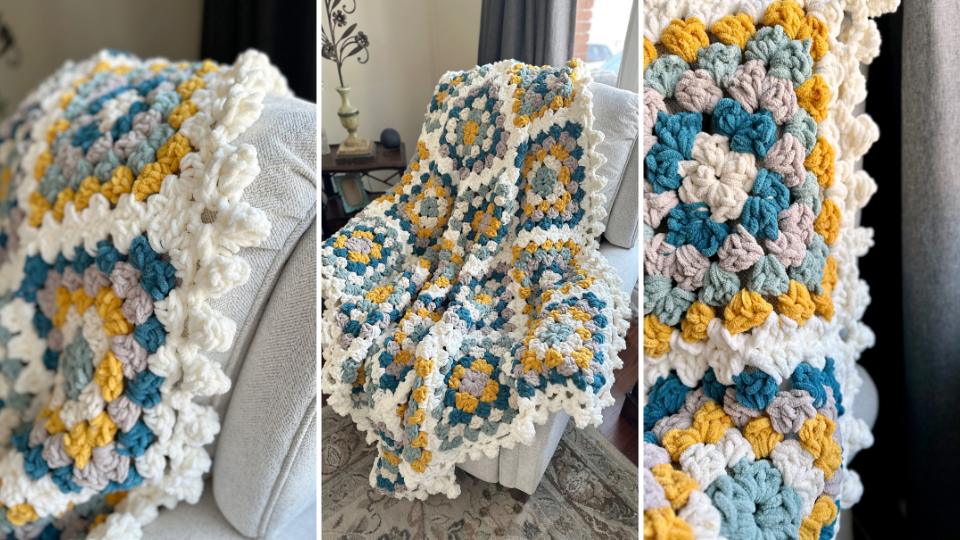
What You’ll Need
🧶 Yarn: Bernat Blanket Yarn (or any super bulky chenille yarn)
📏 Hook: 15 mm hook (exact amounts below)
📌 Other Supplies: Scissors, tapestry needle, measuring tape
Let’s Talk Granny Squares
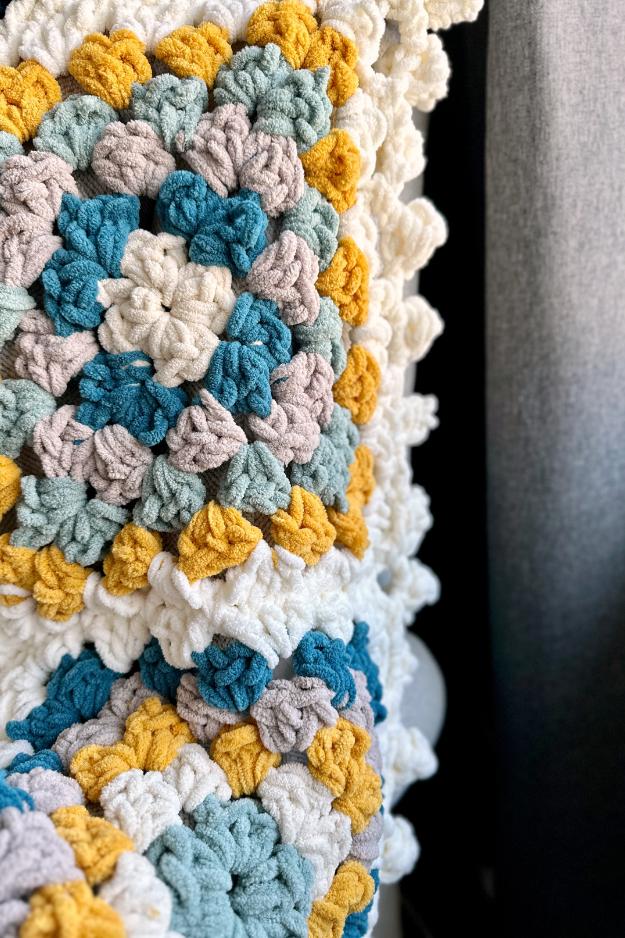
I wanted this chunky granny square blanket to have a soft, squishy, almost bubble-like texture, rather than the usual open, lacy feel of traditional granny squares.
To get that look, I swapped out the usual double crochet stitches for half double crochet, which gives the fabric a denser, more plush feel. Instead of adding ch-1 spaces between my dc clusters, I skipped them entirely, keeping everything snug and cozy.
At the corners, I only used one chain instead of the usual two, which helped maintain a tight weave while still allowing the blanket to lay flat. The result? A cloud-like, ultra-soft crochet blanket with a modern twist!

This blanket can start with a magic circle but I use the chain 4 method (don’t worry, I walk you through it in the video tutorial) and is worked in rounds using granny clusters but does not use ch-1 spaces between the clusters. You’ll be building your square by working into the next corner space.
Each round is built on the one before it, so you’ll see your chunky granny squares grow with each repeat round. The corners are formed with ch-1 spaces – not the usual ch-2 spaces, giving the blanket that classic granny square look.
Want to add some colour? Just switch to the next color whenever you feel like it!
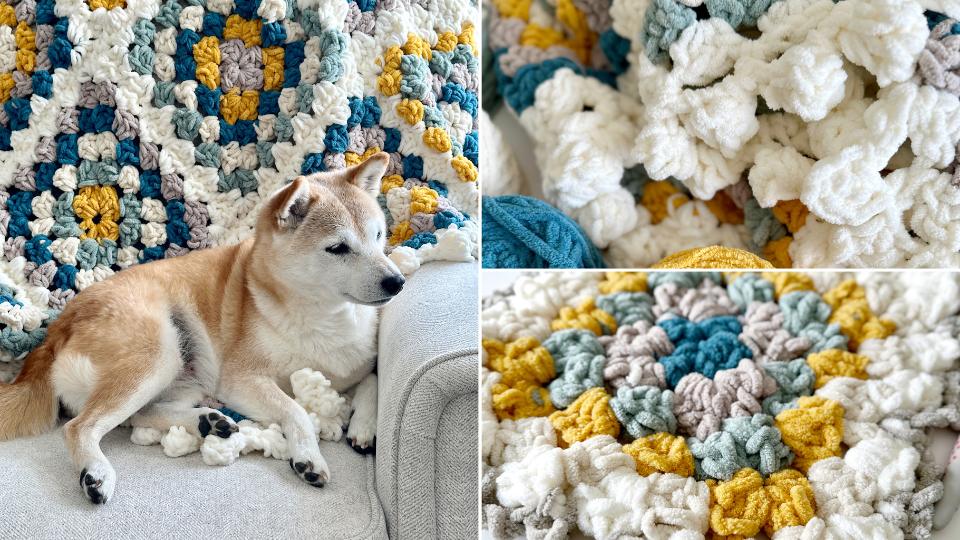
How Many Balls of Yarn Do You Need?
- You will need one skein each in 5 different colours
- Four skeins of the joining colour and edging colour
All the details on yarn are below.
Since Bernat Blanket Yarn is super chunky, it works up really fast. You’ll be cuddling up with your new crochet project in no time!
Watch the Video Tutorial!
If you’re a visual learner, check out the video tutorial where I walk through everything—from the slip knot and first ch to the final border.
Ready to Make Your Own?
I hope you love making this chunky crochet granny square blanket as much as I do! If you want more free patterns, be sure to check out these popular crochet throws below. You can also grab the ad-free PDF version of this pattern if you’d like a printable copy.
Purchase Ad Free Pattern – Instant Download!
Purchase the ad-free PDF for a smooth, distraction-free crocheting experience anytime, anywhere.
Already a subscriber? Check your latest email for your special discount code. Not subscribed yet? Sign up here to get yours!
Thanks so much for supporting my blog!
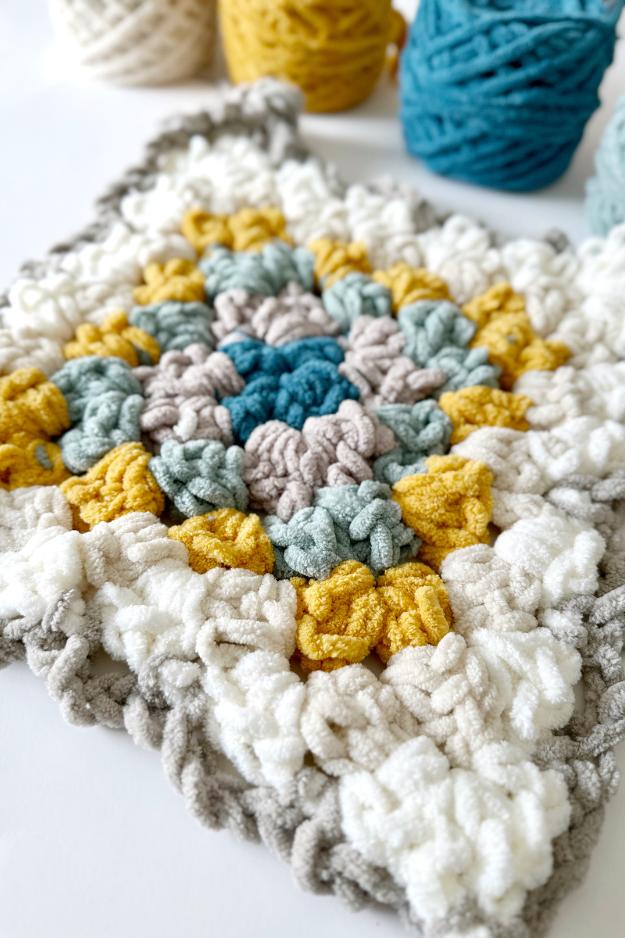
Did you make any of these?
I would love to see what you have made be sure to mention @prettydarnadorable or tag me using #prettydarnadorable on Instagram so I can see your creations!
Skill Level
Easy
Abbreviations
- Bo – bobble
- Ch – chain
- Hdc – half double crochet
- Sc – single crochet
- Sk – skip
- St – stitch
- Sts – sts
- Sl st – slip stitch
- Rpt – repeat
Gauge
Gauge matching for this project is not required. Size can be changed by simply adding or removing rounds as you go.
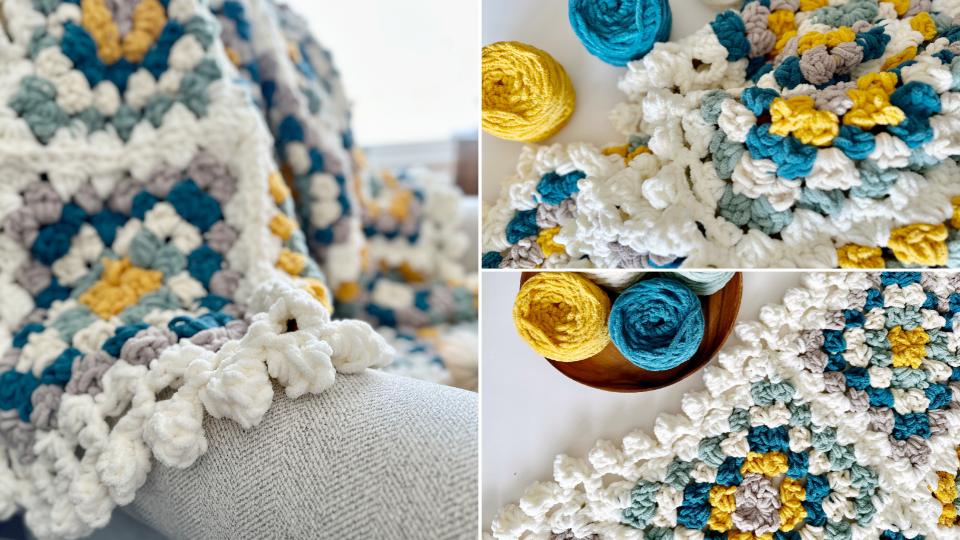
Finished Measurements
This cozy throw is made by joining 20 granny squares, each measuring 12″ x 12″, into a 4 x 5 layout.
Once joined, the blanket measures approximately 48″ x 60” not including edging.
Yarn Requirements
This cozy throw is made by joining 20 granny squares, each measuring 12″ x 12″, into a 4 x 5 layout.
Once joined, the blanket measures approximately 48″ x 60” not including edging.
Bernat Blanket Yarn Colours used for Granny Squares
- 1 skein Gold 10.5 oz / 300 g 220 yds , 201M
- 1 skein Birch 10.5 oz / 300 g 220 yds , 201M
- 1 skein Misty Green 10.5 oz / 300 g 220 yds , 201M
- 1 skein Dark Teal 10.5 oz / 300 g 220 yds , 201M
- 1 skein Pale Grey 10.5 oz / 300 g 220 yds , 201M
Joining and Border Colour
- 4 skeins Vintage White 42 oz / 1200 g 880 yds / 804 m
Please note that the actual amount of yarn needed may change depending on the yarn chosen always purchase a little more than you think you may need..
Notes
- This pattern is that it also comes with a video tutorial. This means that you can follow along step-by-step and have all your questions answered in real-time. Whether you’re struggling to understand a particular stitch or just want to see how it should look, the video tutorial is a fantastic resource to have. You can pause, rewind, and re-watch as many times as you need to make sure you’re doing everything correctly.
- This granny square uses half double crochet (hdc) stitches instead of the traditional double crochet, creating a denser, more textured fabric.
- Unlike classic granny squares, there are no chains between clusters. This allows the stitches to nestle closely together, resulting in a soft, rounded effect. This technique enhances the plush, bubble-like appearance of the square, adding depth and dimension—perfect for projects where you want extra squish!
- Colour changes are made at the end of each round by completing the slip stitch with the new colour. (More details below on colour changes)
- Instead of the usual chain-2 at the corners in traditional granny squares, we’ll only be chaining 1, keeping the design compact and cohesive.
- Instructions are included for how to weave in your yarn tails as you go.
Colour Changes and Yarn Ends.
When changing colours at the end of each round, you can easily crochet over the tails to keep things neat and avoid extra ends to weave in later. Here’s how you can do it:
- Colour changes are made at the end of each round by completing the slip stitch with the new colour. Secure the ends with a knot before moving onto step 2.
- As you start the next round, crochet over both the old and new yarn tails while making the first hdc cluster. Then, gently pull the tails to tighten them.
- Once the first cluster is complete, tie the tails in a tight knot, making sure it stays hidden under the stitches.
- Trim the excess, leaving one tail slightly longer to help identify the right and wrong sides of your blanket.
- Continue the round as usual—this keeps the colour change neat with no extra weaving in later!
This method ensures your blanket stays neat and your colour changes are hidden underneath the crochet fabric.
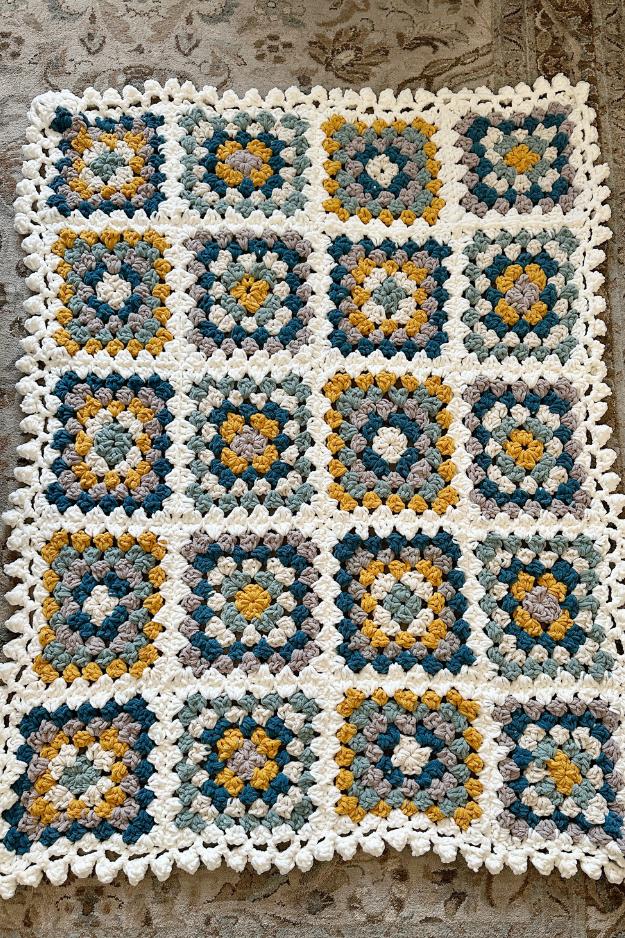
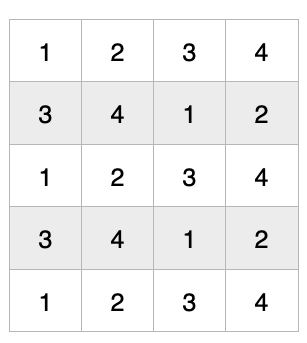
Colour Combinations – Make 5 of Each Square
| Square 1 | Square 2 | Square 3 | Square 4 |
| Misty Green | Pale Grey | Birch | Gold |
| Birch | Gold | Dark Teal | Misty Green |
| Gold | Dark Teal | Pale Grey | Birch |
| Pale Grey | Birch | Misty Green | Dark Teal |
| Dark Teal | Misty Green | Gold | Pale Grey |
| Vintage White | Vintage White | Vintage White | Vintage White |
Granny Square Instructions
Turning chain does not count as stitch.
Ch 4, join with a sl st to form a ring.
Rnd 1: Ch 1, 3 hdc in the ring, ch 1. Into the ring (3 hdc, ch 1) 3 times. Join with sl st to the top of the 1st hdc. Ch 1, turn.
Rnd 2: In the 1st corner space, (3 hdc, ch 1, 3 hdc). (3 hdc, ch 1, 3 hdc). In each remaining corner space. Join with sl st to the top of the 1st hdc. Ch 1, turn.
Rnd 3: 3 hdc in the 1st space. *(3 hdc, ch 1, 3 hdc) in the next corner space. 3 hdc in before the next corner.* Repeat from * to * around. Join with sl st to the top of the 1st hdc. Ch 1, turn.
Rnd 4: 3 hdc in each of the 1st 2 spaces. *(3 hdc, ch 1, 3 hdc) in the next corner space. 3 hdc in each space before the next corner.* Repeat from * to * around. Join with sl st to the top of the 1st hdc. Ch 1, turn.
Rnd 5: 3 hdc in each of the 1st 3 spaces. *(3 hdc, ch 1, 3 hdc) in the next corner space. 3 hdc in each space before the next corner.* Repeat from * to * around. Join with sl st to the top of the 1st hdc. Ch 1, turn.
Rnd 6: 3 hdc in each of the 1st 4 spaces. *(3 hdc, ch 1, 3 hdc) in the next corner space. 3 hdc in each space before the next corner.* Repeat from * to * around. Join with sl st to the top of the 1st hdc. Fasten off and weave in ends.
Layout
- Arrange your squares in 4 columns across and 5 rows down to achieve the 48″ x 60″ dimensions.
- Play around with the arrangement if using different colours or patterns before joining.
Joining the Squares
You can use slip stitch join, single crochet join, or whip stitch join. Below are instructions for joining using slip stitches – this is the method I used:
Notes: Since we’re using a large hook, make sure to catch all three loops of the hdc. If you miss any, the back side of the blanket might look messy due to the looseness of the loops.
- Lay out your squares with their right sides together.
- Slip stitch across each row: Insert your hook through all three loops of the stitches and spaces on the edge of two squares and slip stitch across. Continue until all squares in a row are joined. Note that you will be working through 2 hdc and 1 space.
- Join the columns: Once all rows are joined, work in the same manner to join the columns.
- Weave in ends to secure your work.
Finishing Border
Place a slip knot on your hook and join the yarn to any corner space of the blanket using the same colour you used to join the granny squares. Then, chain 3.
Rnd 1: Skip 1st 2 sts, *sc in space between clusters, ch 3, skip 2 hdc* repeat from * to* around. End with a sc in corner stitch, sl st in 1st st of starting chain and TURN.
Continue with bobble stitch round below.
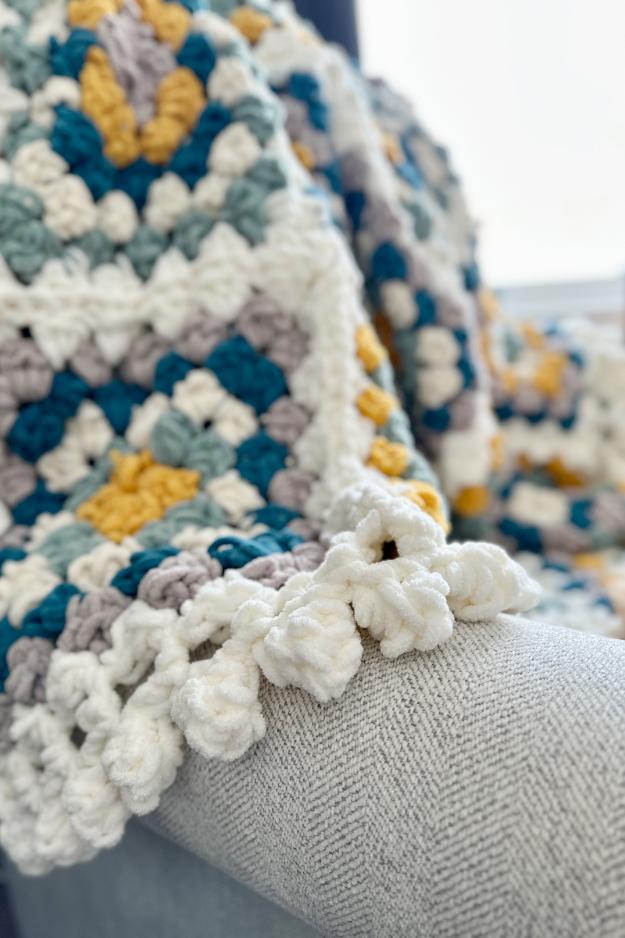
The cute little pom pom look border is made using bobble stitch (bo):
Here is how to make the Bobble Stitch (bo) for this border:
- Ch 3, Yarn over, insert hook into the 1st ch made, yarn over and pull up a loop. (you now have 3 loops on your hook).
- Yarn over and pull through two loops (you now have 2 loops on your hook).
- Yarn over, insert hook into the 1st ch made, yarn over and pull up a loop. (you now have 4 loops on your hook).
- Yarn over and pull through two loops (you now have 3 loops on your hook).
- Repeat steps 3-4, two more times (you now have 4 then 5 loops on your hook).
- Yarn over and pull through all 5 loops to complete the stitch.
- Slip stitch in chain 3 space to secure the bobble stitch in place.
Rnd 2 (Bobble Stitch Round): Join to ch 3 space with a slst. *Bo, join to next ch 3 space with sl st.* Repeat from * to * in each ch 3 space around.
End by joining to the same spot where you first attached the yarn. Fasten off and weave in ends.
Your 48″ x 60″ throw is now complete! 🎉 Enjoy your handmade blanket.
Most Popular
Blanket Patterns
Uh oh… sorry you missed it! 😬
This pattern download has expired, but don’t worry — I’m always WIP-ing up more! 🧶✨
Make sure you’re on my email list [right here] so you don’t miss the next freebie, pattern, or crochet-goodie I send out.
No spam, just yarny stuff you actually want. 💌
What size needle do you recommend? I am an infant in crochet world and I love the fact you don’t use a magic circle because I can’t do it right either!
Currently I’m making a blanket with jumbo cashmere yarn. Could this blanket be used with the larger yarn too?
Thank you.
I recommend using the hook size suggested on your yarn label, or going up one size for a slightly looser gauge.
Unfortunately, the yarn winder I used is no longer available, and it’s the only model I’ve personally tested. I’d suggest checking current listings and choosing one with high customer reviews!
Hope this helps 🙂
I figured out how to download the chunky granny blanket finally…thank you
Thank you so much. This looks like a good winter project.
Thank you! This blanket looks so cozy!