


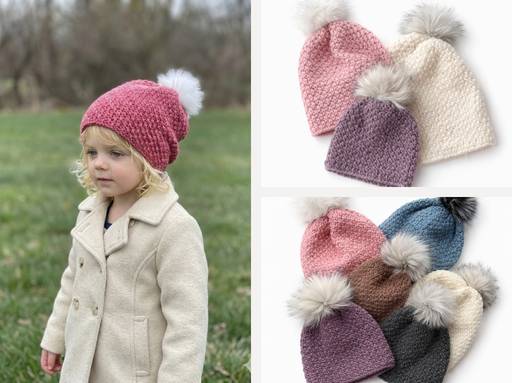
This Brighton Slouch Hat comes in six sizes from newborn to adult so it’s perfect for everyone. When I first designed it years ago, the stitch became popular for its knit-look texture, and now I’m excited to share this updated free crochet slouchy hat pattern.
This slouchy beanie looks great on men and women. Originally, I used a ribbed band and multicolors, but now the classic stitch flows from brim to top. It’s modern and still a beginner-friendly crochet beanie pattern.

Using worsted weight yarn, this easy crochet hat is ideal for in-between seasons. The slight slouch is adjustable, so you can customize how slouchy you want it.
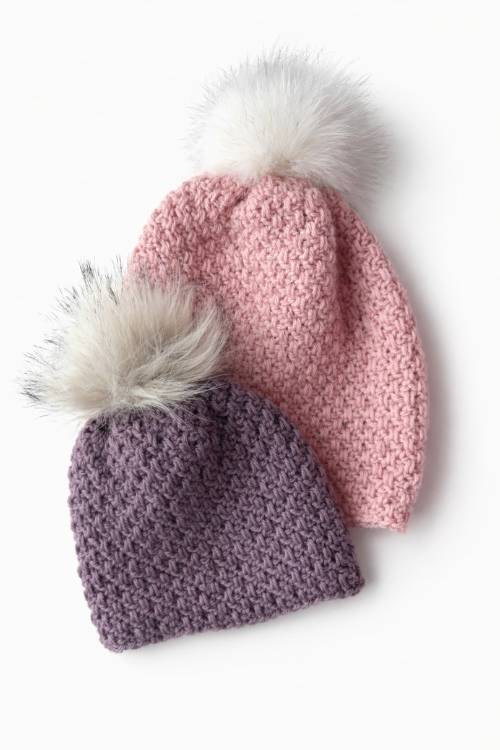
If you’re comfortable with basic stitches, this crochet slouchy beanie pattern is a breeze. The texture is a mix of chain stitches and double crochet. The texture might take a moment to get used to, but once you find your rhythm, the rest of the hat is easy peasy!
Construction of the Hat
This crochet slouch hat is worked top-down. To begin the crochet beanie, you’ll make a chain and join it to form a circle, creating the top. From there, you’ll add stitches and increase for a few rounds. This method prevents a bulky top when gathering stitches, ensuring a smooth crochet beanie top-down.
Once the increases are done, you’ll work the hat’s length. This is where you adjust for your style—whether you want a longer adjustable crochet slouchy hat or a shorter beanie.

Choosing the Right Worsted Weight Yarn
Not all worsted weight yarn is created equal.
I made this hat in a few different brands while testing, and I noticed a big difference in how the slouch turned out depending on the thickness of the yarn.
My favourite for this pattern was Lion Brand Wool-Ease, or any worsted weight yarn that leans slightly to the thinner side. The fabric stays soft, the stitches have beautiful definition, and most importantly, the hat drapes the way a true slouchy hat should.
When I tried a thicker worsted weight, the hat turned out much stiffer. It still fit, but it didn’t have that relaxed, effortless slouch. The thicker yarn creates a denser fabric, which makes the hat stand up more instead of gently folding over.
So if you’re choosing between two worsted weight yarns, go with the one that feels slightly thinner and softer in your hands.
You’ll get better drape, better slouch, and a more comfortable finished hat.

Purchase Ad Free Pattern – Instant Download!
Purchase the ad-free PDF for a smooth, distraction-free crocheting experience anytime, anywhere.
Already a subscriber? Check your latest email for your special discount code. Not subscribed yet? Sign up here to get yours!
Thanks so much for supporting my blog!

Brighton Slouch Hat
Skill Level
Easy
Abbreviations
- ch – chain
- dc – double crochet
- hdc – half double crochet
- rnd – round
- sc – single crochet
- sk – skip
- sp – space
- st – stitch
- sts – stitches
- sl st – slip stitch
- rpt – repeat
Gauge
14 stitches = 4″ in stitch pattern.
The number or rows is not needed for this swatch as you will be working the number of rounds based on a measurement and not a round count. But it is recommended to do at least 6 rows for your gauge swatch.
A gauge swatch is vital for a well-fitting crochet hat. It determines stitch tension and measures the number of stitches and rows. Comparing it to the pattern’s gauge ensures the final hat fits as desired. Adjust hook or tension if needed for a perfectly fitting hat
Materials Needed
6.50 mm hook
Worsted Weight Yarn (see sizing chart for exact amount required)
Finished Measurements & Yarn Requirements
Please note that the actual amount of yarn needed may change depending on the yarn chosen always purchase a little more than you think you may need.
See below for broken down amount for each size.
0 to 3 months:
Width: 14″
Height: 6″
65g, 138m, 2.29 oz, 151 yds
3 to 6 months:
Width: 15″
Height: 7″
70g, 148m, 2.47 oz, 162 yds
6 to 12 months:
Width: 16″
Height: 8″
90g, 191m, 3.17 oz, 209 yds
12 months to 3 years:
Width: 17″
Height: 9″
135g, 286m, 4.76 oz, 313 yds
3 to 10 years:
Width: 18″
Height: 10″
140g, 296m, 4.94 oz, 324 yds
Adult:
Width: 20″
Height: 11″
150g, 318m, 5.29 oz, 348 yds
Before You Start
- The hat is worked from the top down starting with a foundation chain that is later cinched closed. Leave a long tail at the beginning for closing the top.
- Every round is joined and turned. This keeps the seam straight and the texture aligned.
- The hat is designed to fit loose and slouchy.
- For a snugger fit, simply go down a hook size.
- Increase rounds happen within the textured stitch pattern.
- Some sizes include one extra single crochet at the end of an increase round to bring the stitch count to the correct number.
- To finish the hat, weave the starting tail around the foundation chain and pull tight to close the top.
- Increase rounds for each size can be different. Follow instructions as written.
- Turning chain(s) does not count as stitch unless otherwise noted.
- Crochet pattern written in US terms.
0 – 3 Months
Ch 20 join with sl st. Be careful not to twist, ch 1. Leave long tail for cinching hole closed.
Rnd 1: Sc in 1st and each st around. Join with sl st, ch 3, turn (20)
Rnd 2: Chain 3 of previous rnd counts as first (dc, ch1). Skip 1st st, *dc in next, ch 1 and skip next st* rpt from *to* until end of rnd. Join with sl st to the 2nd ch of ch 3. Ch 1, turn. (20)
Rnd 3: Working in 1st ch 1 space (sc, dc in skipped st under ch space, sc) repeat ( ) in each ch 1 space around. Join with sl st, to the 2nd ch of the ch 3. Ch 3, turn. (30)
Rnd 4: Chain 3 of previous rnd counts as first (dc, ch1). Skip 1st st, *dc in next, ch 1 and skip next st* rpt from *to* until end of rnd. Join with sl st to the 2nd ch of ch 3. Ch 1, turn. (30)
Rnd 5: Working in 1st ch 1 space (sc, dc in skipped st under ch space, sc) repeat ( ) in each ch 1 space around. Place one extra sc in last st. Join with sl st, ch 3 turn. (46)
Rnd 6: Chain 3 of previous rnd counts as first (dc, ch1). Skip 1st st, *dc in next, ch 1 and skip next st* rpt from *to* until end of rnd. Join with sl st to the 2nd ch of ch 3. Ch 1, turn. (46)
Height of hat can easily be adjusted by adding or removing rows here.
Rnd 7: Dc in 1st skipped st under ch space, ch 1, skip next st, *dc in skipped st under ch space, ch 1 skip next st* rpt from *to* until end of rnd. Join with sl st to ch 1. Ch 1, turn. (46)
Repeat Round 7 until hat measures 6 inches from crown to bottom of hat. After last round fasten off and weave in ends.
Close the Top of the Hat
Using a tapestry needle use tail left from beginning chain and weave yarn with needle in and out around starting round. Pull tight and fasten off.
3 – 6 Months
Ch 20 join with sl st. Be careful not to twist, ch 1. Leave long tail for cinching hole closed.
Rnd 1: Sc in 1st and each st around. Join with sl st, ch 1, turn (20)
Rnd 2: 2 hdc in 1st and each st around, join with sl st to 1st hdc, ch 3 turn (40)
Rnd 3: Chain 3 of previous rnd counts as first (dc, ch1). Skip 1st st. *Dc in next, ch 1 and skip next st* rpt from *to* until end of rnd. Join with sl st to the 2nd ch of ch 3. Ch 1, turn (40)
Rnd 4: Working in 1st ch 1 space (sc, dc in skipped st under ch space, sc) *in next ch 1 space (sc, dc in skipped st under ch space (no sc)) in next ch 1 space (sc, dc in skipped st of rnd below, sc)* rpt from *to* in all ch 1 spaces. Join with sl st, to ch 1. Ch 3, turn. (50)
Rnd 5: Chain 3 of previous rnd counts as first (dc, ch1). Skip 1st st. *Dc in next, ch 1 and skip next st* rpt from *to* until end of rnd. Join with sl st to the 2nd ch of ch 3. Ch 1, turn. (50)
Height of hat can easily be adjusted by adding or removing rows here.
Rnd 6: Dc in 1st skipped st under ch space, ch 1, skip next st, *dc in skipped st under ch space, ch 1 skip next st* rpt from *to* until end of rnd. Join with sl st to ch 1. Ch 1, turn. (50)
Repeat Round 6 until hat measures 7 inches from crown to bottom of hat. After last round fasten off and weave in ends.
Close the Top of the Hat
Using a tapestry needle use tail left from beginning chain and weave yarn with needle in and out around starting round. Pull tight and fasten off.
6 – 12 Months
Using K/6.5 mm hook
Ch 24 join with sl st. Be careful not to twist, ch 1. Leave long tail for cinching hole closed.
Rnd 1: Sc in 1st and each st around, join with sl st to 1st sc. Ch 3, turn. (24)
Rnd 2: Chain 3 of previous rnd counts as first (dc, ch1). Skip 1st st, *dc in next, ch 1 and skip next st* rpt from *to* until end of rnd. Join with sl st to the 2nd ch of ch 3. Ch 1, turn. (24)
Rnd 3: Working in 1st ch 1 space (sc, dc in skipped st under ch space, sc) repeat ( ) in each ch 1 space around. Join with sl st, ch 3 turn. (36)
Rnd 4: Chain 3 of previous rnd counts as first (dc, ch1). Skip 1st st, *dc in next, ch 1 and skip next st* rpt from *to* until end of rnd. Join with sl st to the 2nd ch of ch 3. Ch 1, turn. (36)
Rnd 5: Working in 1st ch 1 space (sc, dc in skipped st under ch space, sc) repeat ( ) in each ch 1 space around. Place one extra sc in last st. Join with sl st, ch 3 turn. (54)
Rnd 6: Chain 3 of previous rnd counts as first (dc, ch1). Skip 1st st, *dc in next, ch 1 and skip next st* rpt from *to* until end of rnd. Join with sl st to the 2nd ch of ch 3. Ch 1, turn. (54)
Height of hat can easily be adjusted by adding or removing rows here.
Rnd 7: Dc in 1st skipped st under ch space, ch 1, skip next st, *dc in skipped st under ch space, ch 1 skip next st* rpt from *to* until end of rnd join with sl st to ch 1. Ch 1, turn. (54)
Repeat Round 7 until hat measures 8 inches from crown to bottom of hat. After last round fasten off and weave in ends.
Close the Top of the Hat
Using a tapestry needle use tail left from beginning chain and weave yarn with needle in and out around starting round. Pull tight and fasten off.
Toddler 1 – 3 Years
Ch 20 join with sl st. Be careful not to twist, ch 1. Leave long tail for cinching hole closed.
Rnd 1: Sc in 1st and each st around. Join with sl st, ch 2, turn (20)
Rnd 2: 2 hdc in 1st and each st around, join with sl st to 1st hdc, ch 3 turn (40)
Rnd 3: Chain 3 of previous rnd counts as first (dc, ch1). Skip 1st st, *dc in next, ch 1 and skip next st* rpt from *to* until end of rnd. Join with sl st to the 2nd ch of ch 3. Ch 1, turn. (40)
Rnd 4: Dc in 1st skipped st under ch space, ch 1, skip next st, *dc in skipped st under ch space, ch 1 skip next st* rpt from *to* until end of rnd. Join with sl st to ch 1. Ch 1, turn. (40)
Rnd 5: Working in 1st ch 1 space (sc, dc in skipped st under ch space, sc) repeat ( ) in each ch 1 space around. Join with sl st, ch 3 turn. (60)
Rnd 6: Chain 3 of previous rnd counts as first (dc, ch1). Skip 1st st, *dc in next, ch 1 and skip next st* rpt from *to* until end of rnd. Join with sl st to the 2nd ch of ch 3. Ch 1, turn. (60)
Height of hat can easily be adjusted by adding or removing rows here.
Rnd 7: Dc in 1st skipped st under ch space, ch 1, skip next st, *dc in skipped st under ch space, ch 1 skip next st* rpt from *to* until end of rnd join with sl st to ch 1. Ch 1, turn. (60)
Repeat Round 7 until hat measures 9 inches from crown to bottom of hat. After last round fasten off and weave in ends.
Close the Top of the Hat
Using a tapestry needle use tail left from beginning chain and weave yarn with needle in and out around starting round. Pull tight and fasten off.
3 – 10 Years
Ch 28 join with sl st. Be careful not to twist, ch 1. Leave long tail for cinching hole closed.
Rnd 1: Sc in 1st and each st around, join with sl st to 1st sc. Ch 3, turn. (28)
Rnd 2: Chain 3 of previous rnd counts as first (dc, ch1). Skip 1st st, *dc in next, ch 1 and skip next st* rpt from *to* until end of rnd. Join with sl st to the 2nd ch of ch 3. Ch 1, turn. (28)
Rnd 3: Working in 1st ch 1 space (sc, dc in skipped st under ch space, sc) repeat ( ) in each ch 1 space around. Join with sl st, ch 3 turn. (42)
Rnd 4: Chain 3 of previous rnd counts as first (dc, ch1). Skip 1st st, *dc in next, ch 1 and skip next st* rpt from *to* until end of rnd. Join with sl st to the 2nd ch of ch 3. Ch 1, turn. (42)
Rnd 5: Dc in 1st skipped st under ch space, ch 1, skip next st, *dc in skipped st under ch space, ch 1 skip next st* rpt from *to* until end of rnd join with sl st to ch 1. Ch 1, turn. (42)
Rnd 6: Working in 1st ch 1 space (sc, dc in skipped st under ch space, sc) repeat ( ) in each ch 1 space around. Place one extra sc in last st. Join with sl st, ch 3 turn. (64)
Rnd 7: Chain 3 of previous rnd counts as first (dc, ch1). Skip 1st st, *dc in next, ch 1 and skip next st* rpt from *to* until end of rnd. Join with sl st to the 2nd ch of ch 3. Ch 1, turn. (64)
Height of hat can easily be adjusted by adding or removing rows here.
Rnd 8: Dc in 1st skipped st under ch space, ch 1, skip next st, *dc in skipped st under ch space, ch 1 skip next st* rpt from *to* until end of rnd. Join with sl st to ch 1. Ch 1, turn. (64)
Repeat Round 8 until hat measures 10 inches from crown to bottom of hat. After last round fasten off and weave in ends.
Close the Top of the Hat
Using a tapestry needle use tail left from beginning chain and weave yarn with needle in and out around starting round. Pull tight and fasten off.
Adult
Ch 20 join with sl st. Be careful not to twist, ch 1. Leave long tail for cinching hole closed.
Rnd 1: Sc in 1st and each st around. Join with sl st to 1st sc, ch 3, turn (20)
Rnd 2: Chain 3 of previous rnd counts as first (dc, ch1). Skip 1st st, *dc in next, ch 1 and skip next st* rpt from *to* until end of rnd. Join with sl st to the 2nd ch of ch 3. Ch 1, turn. (20)
Rnd 3: Working in 1st ch 1 space (sc, dc in skipped st under ch space, sc) repeat ( ) in each ch 1 space around. Join with sl st, ch 3 turn. (30)
Rnd 4: Chain 3 of previous rnd counts as first (dc, ch1). Skip 1st st, *dc in next, ch 1 and skip next st* rpt from *to* until end of rnd. Join with sl st to the 2nd ch of ch 3. Ch 1, turn. (30)
Rnd 5: Working in 1st ch 1 space (sc, dc in skipped st under ch space, sc) repeat ( ) in each ch 1 space around. Place one extra sc in last st. Join with sl st, ch 3 turn. (46)
Rnd 6: Chain 3 of previous rnd counts as first (dc, ch1). Skip 1st st, *dc in next, ch 1 and skip next st* rpt from *to* until end of rnd. Join with sl st to the 2nd ch of ch 3. Ch 1, turn. (46)
Rnd 7: Working in 1st ch 1 space (sc, dc in skipped st under ch space, sc) repeat ( ) in each ch 1 space around. Working in last ch1 space (sc, dc in skipped st under ch space (Note: no extra sc)) Join with sl st, ch 3 turn. (68)
Rnd 8: Chain 3 of previous rnd counts as first (dc, ch1). Skip 1st st, *dc in next, ch 1 and skip next st* rpt from *to* until end of rnd. Join with sl st to the 2nd ch of ch 3. Ch 1, turn. (68)
Height of hat can easily be adjusted by adding or removing rows here.
Rnd 9: Dc in 1st skipped st under ch space, ch 1, skip next st, *dc in skipped st under ch space, ch 1 skip next st* rpt from *to* until end of rnd. Join with sl st to ch 1. Ch 1, turn. (68)
Repeat Round 9 until hat measures 11 inches from crown to bottom of hat. After last round fasten off and weave in ends.
Close the Top of the Hat
Using a tapestry needle use tail left from beginning chain and weave yarn with needle in and out around starting round. Pull tight and fasten off.
Did you make any of these?
I would love to see what you have made be sure to mention @prettydarnadorable or tag me using #prettydarnadorable on Instagram so I can see your creations!
Just add or reduce rounds in the body section to customize the length.
The pattern includes six sizes from newborn to adult. Follow the stitch count guide for each size!
If your hat feels stiff or stands up instead of gently folding over, it’s usually one of two things:
• Your yarn may be slightly thicker than a typical worsted weight
• Your tension may be tighter than the pattern gauge
For a softer, more relaxed slouch, try using a worsted weight yarn that leans slightly thinner, or go up half a hook size. The fabric should feel flexible, not firm.
This pattern alternates between a dc + ch 1 row and a textured row worked into chain spaces. The most common mistake is skipping the wrong stitch or missing the extra single crochet included in some increase rounds.
Take a moment to count your stitches at the end of each increase round. Catching it early makes it much easier to fix.
How to Gift or Customize Your Brighton Slouch Hat
This hat makes a perfect gift! For a personal touch, you can add embellishments. One idea is crocheted roses You can also experiment with yarn colors or add buttons for extra flair!
Love this Texture?
There are plenty more patterns just like these! Check them all out HERE