


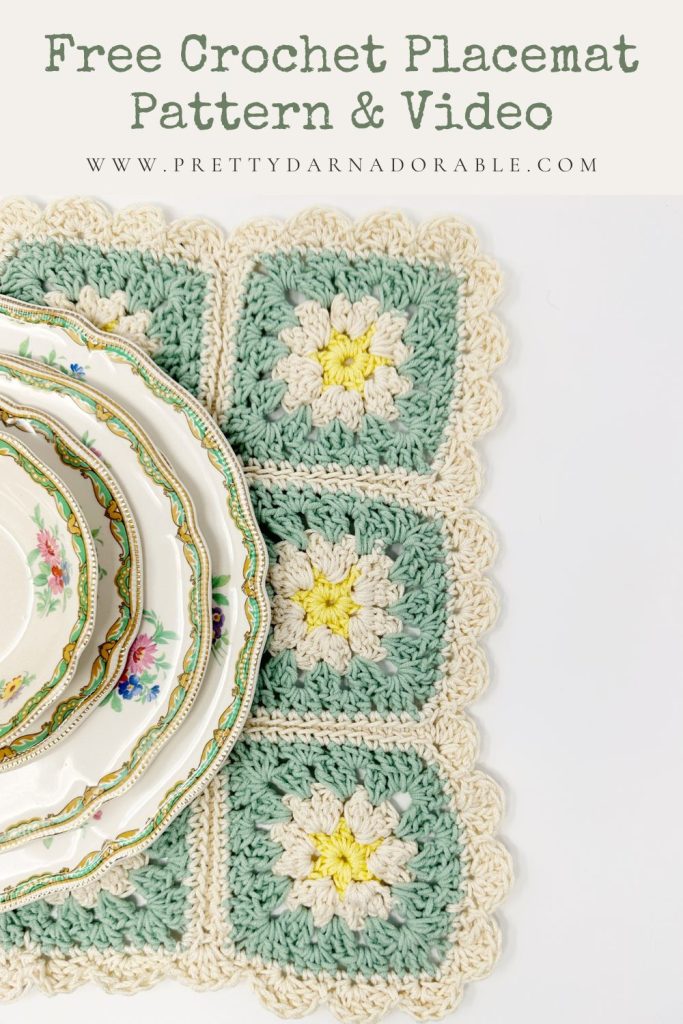


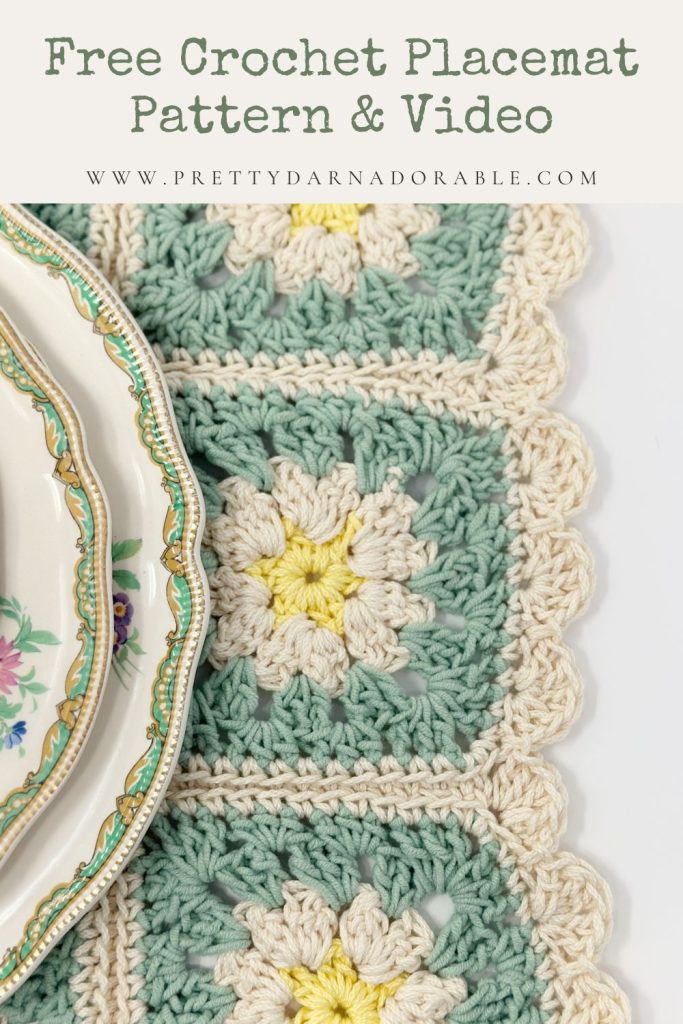

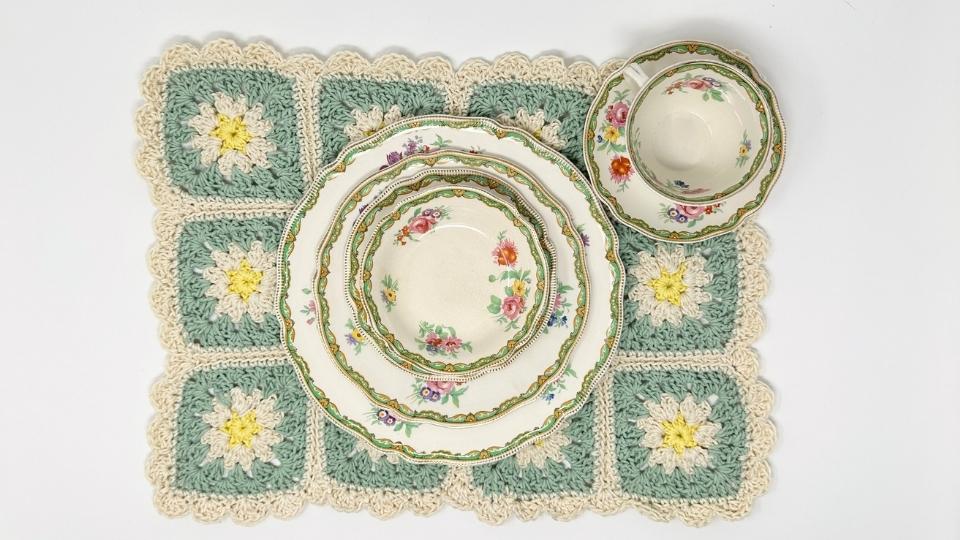
Last summer, I gave my kitchen a little makeover—freshly painted white cabinets, a few new decor pieces, and now, these granny square placemats are the perfect addition to my dining table! I love how easy it is to refresh a space with handmade pieces, and this free crochet pattern is a great way to add charm to any table setting.
If you enjoy crochet patterns that are simple yet versatile, this square placemat design is for you. The granny squares are joined with a simple join and a scalloped shell border option, and you can customize them in different colors to match any occasion—whether it’s for everyday use, a special event, or to create a matching table runner and crochet coasters.

I’ve also included a video tutorial to guide you through each step, from the first stitch to the final border option. Whether you’re a beginner or an experienced crocheter, this easy crochet placemat pattern will have you whipping up a whole set in no time!
Construction of this Design
This pattern is built with granny squares, making it an easy pattern to customize. You can make a small placemat with just a few squares or continue adding to create a large square pattern that fits your dining room table. The granny square design is a classic, and using cotton yarn ensures a durable, practical finish that’s perfect for everyday use.

Each square starts by chaining or with a magic ring, followed by half double crochet stitches and bobble clusters to create the classic granny stitch. The squares are then joined together with a border option, giving them a polished look. If you’re feeling creative, you can mix main colors to match your dinner table setup.
The best part? You can use this pattern as a foundation for your next crochet placemats, including granny circle placemats, or even a round placemat!
Yarn & Materials
To make this free crochet placemat pattern, you’ll need (full list below):
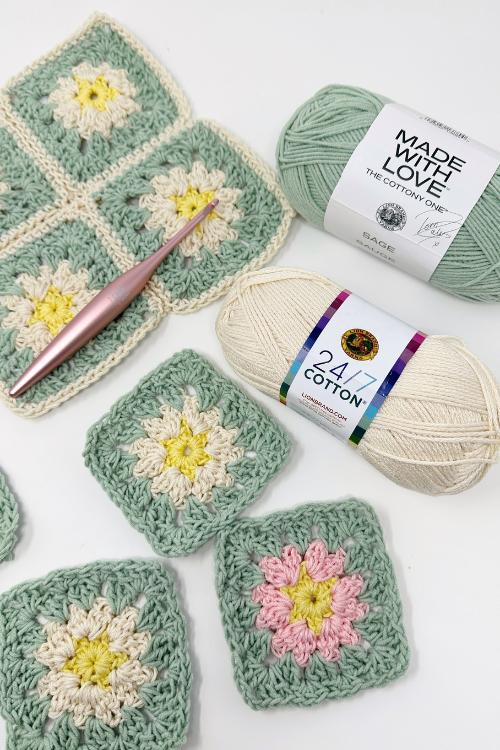
- Cotton yarn (#4 worsted weight) – I recommend Lily Sugar ‘n Cream or Lion Brand Yarn for their durability. Using natural fibers ensures that your place mats hold up well over time.
- 5.00 mm crochet hook – The right hook size helps maintain the correct tension.
Size Options & Adjustments
Want to make a matching placemat set? Adjust the number of granny squares to fit your dining room needs. You can also pair these placemats with a napkin ring or use them as the base for a round crochet placemat.
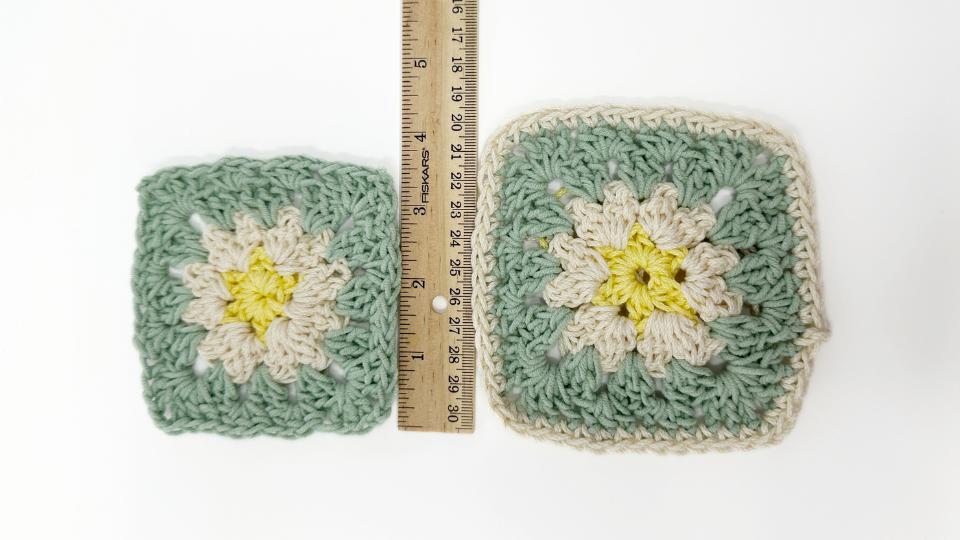
How to Change Colors
Switching colors can add a personal touch to your crochet project, and this method ensures a seamless transition:
- Work to the next stitch in your main color, stopping before completing the last stitch of the row.
- Insert hook, yarn over, and draw up a loop.
- Drop the main color and pick up Color B (your contrast color).
- Yarn over with Color B and pull through the loops to finish the stitch.
- Work the 2nd ch in the new color and continue with the stitch pattern.
- Repeat this for each color change.
For extra guidance, check out my video tutorial, where I walk through color changes step by step!
Perfect for Any Occasion
These crochet placemats make wonderful gifts and are a great way to add a handmade touch to your table setting. They’re perfect for everyday use, but you can easily adjust them for special occasions by switching up the border option or playing with seasonal colours for every holiday!

Video Tutorial & Ad-Free PDF
For detailed instructions, watch my video tutorial, where I go through each round, from the start to scalloped edging. Prefer a written version? Grab the ad-free PDF for easy reference.
This pattern includes US terms and is designed for crocheters of all skill levels. Whether it’s your first hdc or you’re looking to practice back loop stitches, this beginner crochet pattern will help you create something beautiful for your dining table.
Purchase Ad Free Pattern – Instant Download!
Purchase the ad-free PDF for a smooth, distraction-free crocheting experience anytime, anywhere.
Already a subscriber? Check your latest email for your special discount code. Not subscribed yet? Sign up here to get yours!
Thanks so much for supporting my blog!
Did you make any of these?
I would love to see what you have made be sure to mention @prettydarnadorable or tag me using #prettydarnadorable on Instagram so I can see your creations!
Skill Level
Easy
Abbreviations
- Blo – back loop only
- MBo – modified bobble stitch
- Ch – chain
- Hdc – half double crochet
- Dc – double crochet
- Sc – single crochet
- Sk – skip
- St – stitch
- Sts – stitches
- Sl st – slip stitch
- Rpt – repeat
Gauge
This project is decorative and does not require precise sizing.
Measurements
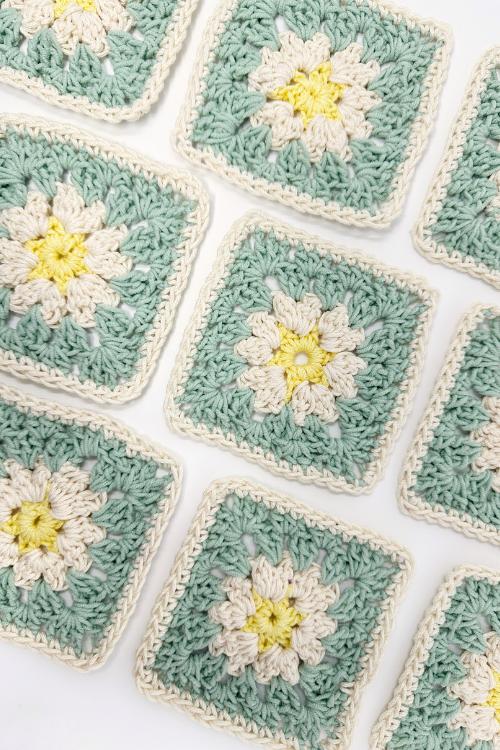
- Each Granny Square 4.25” x 4.25”
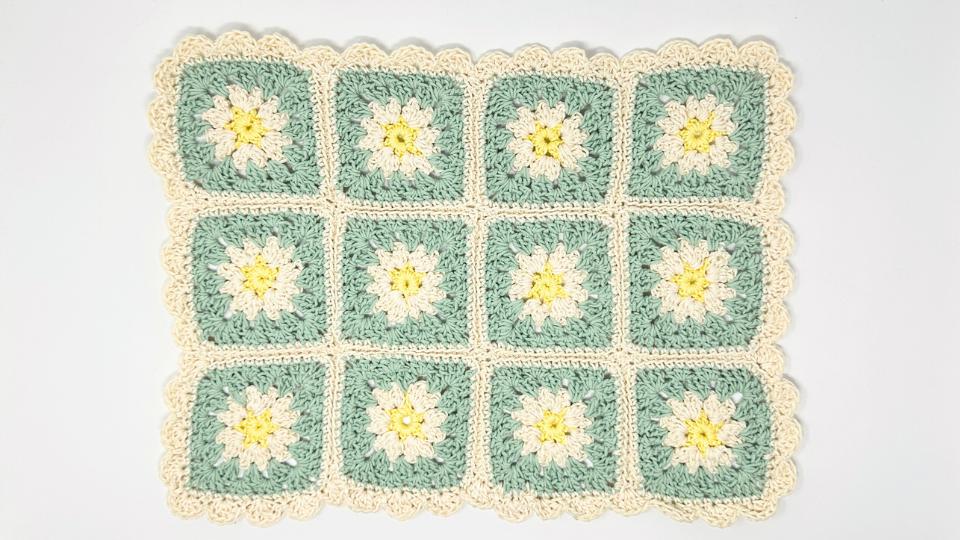
- Finished Placemat 18” x 13” including scalloped border
Materials Needed
- Colours used for Granny Squares
- Lion Brand: Tom Daley Made With Love: One Skien – Sage
- Lion Brand: 24/7 Cotton: One Skien – Ecru – Small Amount Lemon
- Tapestry Needle
- Stitch Marker (optional)
- Scissors
- Blocking Board (optional but recommended)
Notes
- Join rounds with a slip stitch and turn only when the pattern specifies.
- Make colour changes by completing the last stitch with the new colour and dropping the colour just used.
- When changing colours, always pull the yarn to the wrong side of the granny square to keep the front neat.
Special Stitch – Modified Bobble Stitch
This is a modified bobble stitch, different from the traditional version. After each partial bobble (steps 3-4), we work a chain-1 space. This chain separates each segment of the stitch, giving it a slightly more open and textured look in stead of the traditional chunky look.
Here is how to make the Modified Bobble Stitch (MBo) used in this pattern:
- Yarn over, insert hook into ch 1 space, yarn over and pull up a loop. (you now have 3 loops on your hook).
- Yarn over and pull through two loops (you now have 2 loops on your hook).
- Yarn over, insert hook into the ch 1 space, yarn over and pull up a loop. (you now have 4 loops on your hook).
- Yarn over and pull through two loops (you now have 3 loops on your hook).
- Repeat steps 3-4, (after step 4 you now have 4 loops on your hook).
- Yarn over and pull through all 4 loops to complete the stitch.
Colour Changes and Yarn Ends.
When changing colours at the end of each round, you can easily crochet over the tails to keep things neat and avoid extra ends to weave in later. Here’s how you can do it:
- Colour changes are made at the end of each round by completing the slip stitch with the new colour. Secure the ends with a knot before moving onto step 2.
- As you start the next round, crochet over both the old and new yarn tails while making the first stitch or cluster. Then, gently pull the tails to tighten them.
- Once the first cluster is complete, tie the tails in a tight knot, making sure it stays hidden under the stitches.
- Trim the excess, leaving one tail slightly longer to help identify the right and wrong sides of your project.
- Continue the round as usual—this keeps the colour change neat with no extra weaving in later!
Video Tutorial
Click below to Watch Video
Granny Square Placemat Instructions
Starting Chain (Yellow):
Ch 5, join with sl st to form a ring. Ch 2 – Counts as 1st hdc in rnd 1.
Rnd 1 (Yellow) Work into the ring.
- Hdc, ch 1 (2 hdc, ch 1) repeat () 5 times.
- Join with sl st to 2nd ch. Ch 1, turn.
(12 hdc, 6 ch-1 spaces)
Rnd 2 (Ecru):
- (MBo, ch 1, MBo, ch1) in each ch-1 space around.
- Join with sl st to 1st st. Ch 1, turn.
(12 modified bobble stitches, 12 ch-1 spaces)
Rnd 3 (Green): (Work all stitches in ch-1 spaces)
- 3 dc in each ch-1 space around.
- Join with sl st to first dc. Ch 1. Do not turn.
(36 dc, 12 ch-1 spaces)
Rnd 4 (Green): Slst over next 2 sts and in ch 1 space.
- 3 hdc in each of the first two ch-1 spaces. (3 dc, ch 2, 3 dc) in next space.
- 3 hdc in next two ch-1 spaces, (3 dc, ch 2, 3 dc) in next space. Repeat until the end of the round. Join with sl st to first stitch.
(24 hdc, 24 dc, 4 ch-2 spaces) Do not turn.
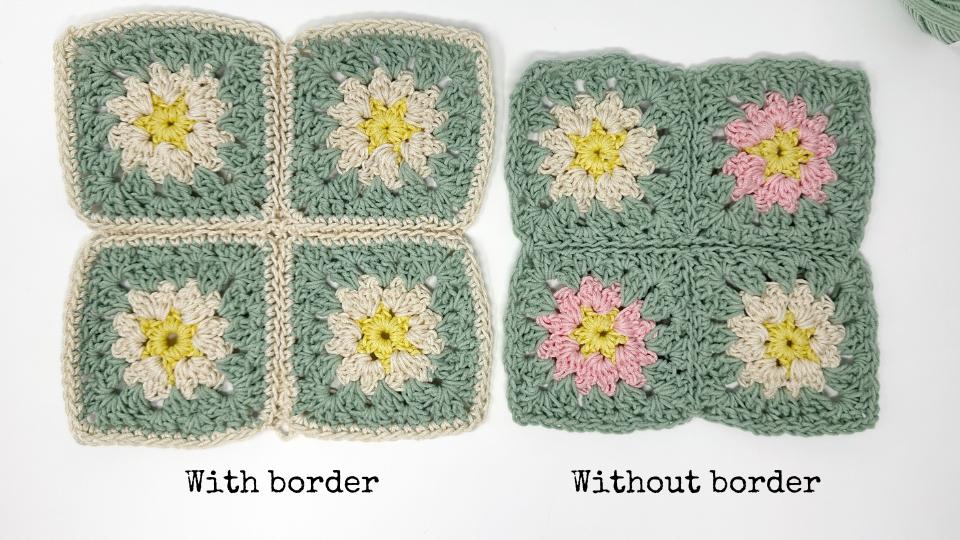
Rnd 5 (Ecru) – Single Crochet Boarder (optional)
Sc in each st around, placing 2 sc in each ch-2 corner sp. Fasten off.
Blocking (Optional but recommended)
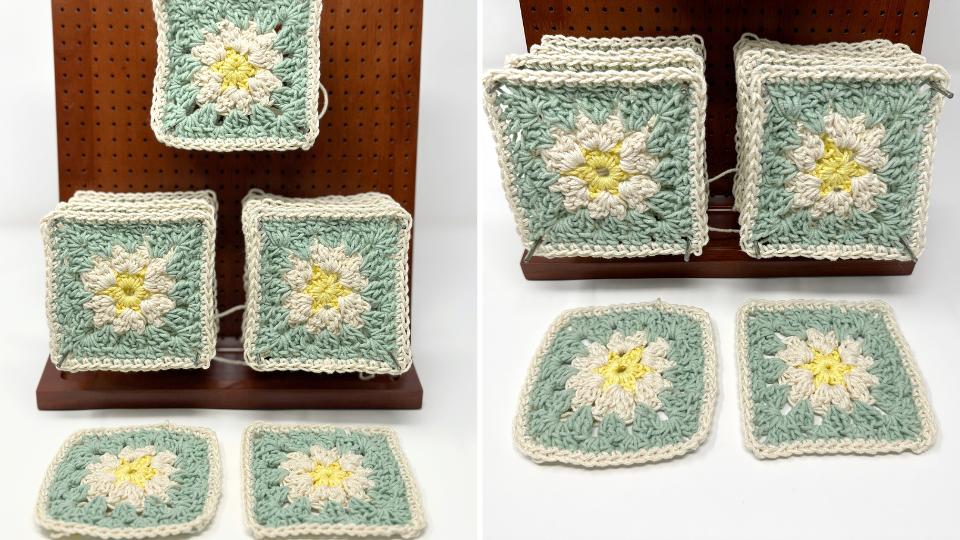
To block a project using a blocking square:
- Prepare your space: Lay your blocking square on a flat surface.
- Dampen your project: Lightly mist your crochet project with water using a spray bottle.
- Shape your project: Place your damp project onto the blocking square. Stretch and arrange it into the desired shape, making sure the edges are even.
- Pin it: Use rust-resistant pins to pin the edges of your project into place, making sure to secure all sides.
- Allow to dry: Let your project dry completely.
Joining Granny Squares
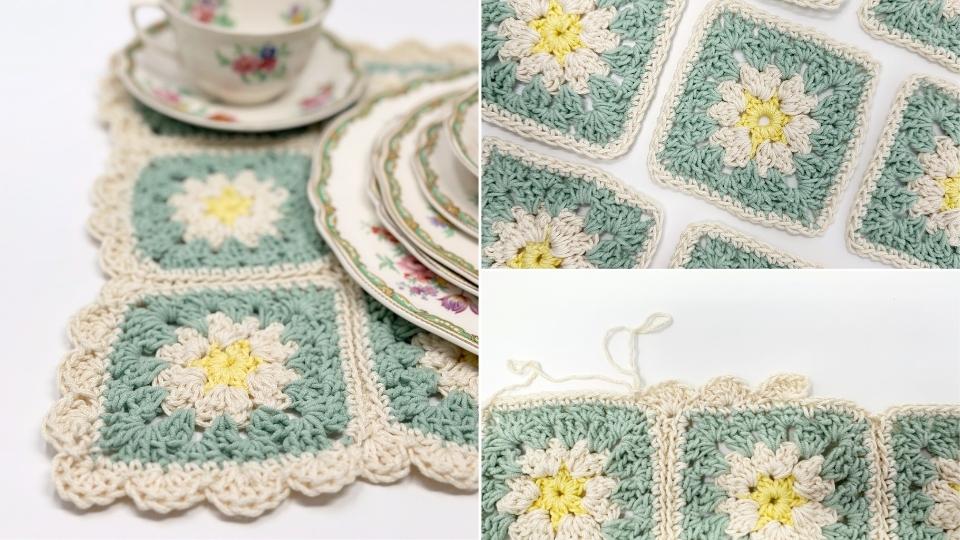
There are different ways to join granny squares, like using a slip stitch, single crochet, or whip stitch.
For this pattern, the granny squares will be joined using a slip stitch worked through the back loop only.
Tips:
✔ Keep your chains consistent for an even look.
✔ Work in sections, always positioning your squares the same way before joining.
✔ Use a larger hook size if your join feels too tight.
Joining Squares with Slip Stitch (Back Loop Only)
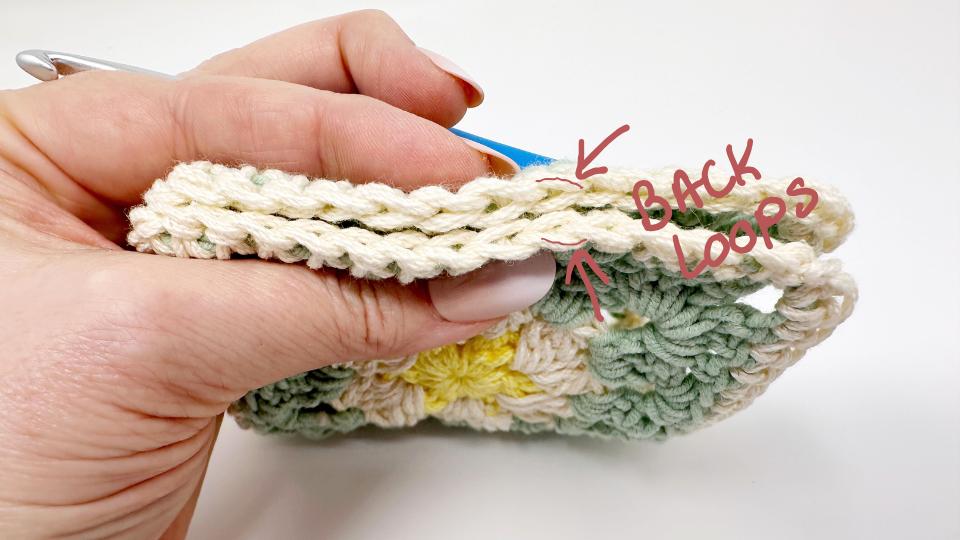
Lay the squares with the right sides facing (the side of the placemat that will be facing up while in use) each other. Identify the back loop of the bottom square (farthest from you) and the back loop of the top square (closest to you, which may appear as a front loop). Work the slip stitch through these loops.
- Lay Out Your Squares: Arrange your squares in rows of 4 across and 3 down (or your desired layout). This helps you see how they’ll be joined before you start.
- Position the Squares: Working two rows at a time – lay the squares with the right sides facing each other. Identify the back loop of the bottom square (farthest from you) and the back loop of the top square (closest to you, which may appear as a front loop). Work the slip stitch through these loops.
- Slip Stitch in 1st and each st across: Start at one corner. Insert your hook through the back loop of the top square (appearing as a front loop) and the back loop of the bottom square.
- Keep Your Stitches Loose: Slip stitches naturally tighten, so try not to pull too hard. A loose seam will help your squares lay flat and keep the project flexible.
- Join All Squares:
- Work across one row at a time, joining squares side by side.
- Then, go back and join the rows together using the same method.
Finishing Border
Attach the yarn to any stitch on the placemat with a slip stitch.
Start the round: Ch 2 (counts as first dc) 4 dc in same st as slst. *Skip next st, sl st in next st, skip next st, 5 dc in next st* repeat from * to * around. Join with a sl st to first st.
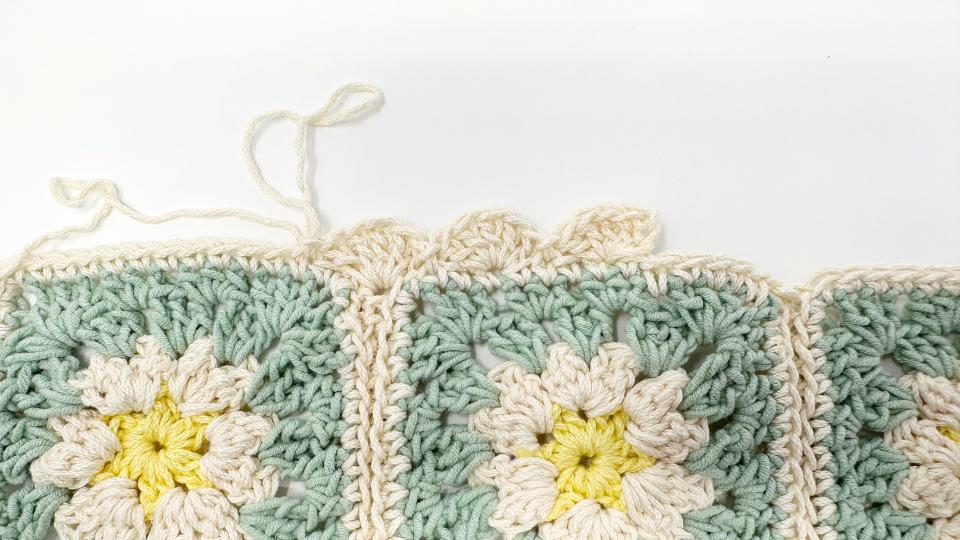
Fasten off and weave in ends.
Note: If the stitch pattern does not align perfectly at the end of the round, fasten off at the nearest natural stopping point.

This is so beautiful thank you for sharing! I cannot wait to create this!
Got it
got it in my grow account……Thanks