


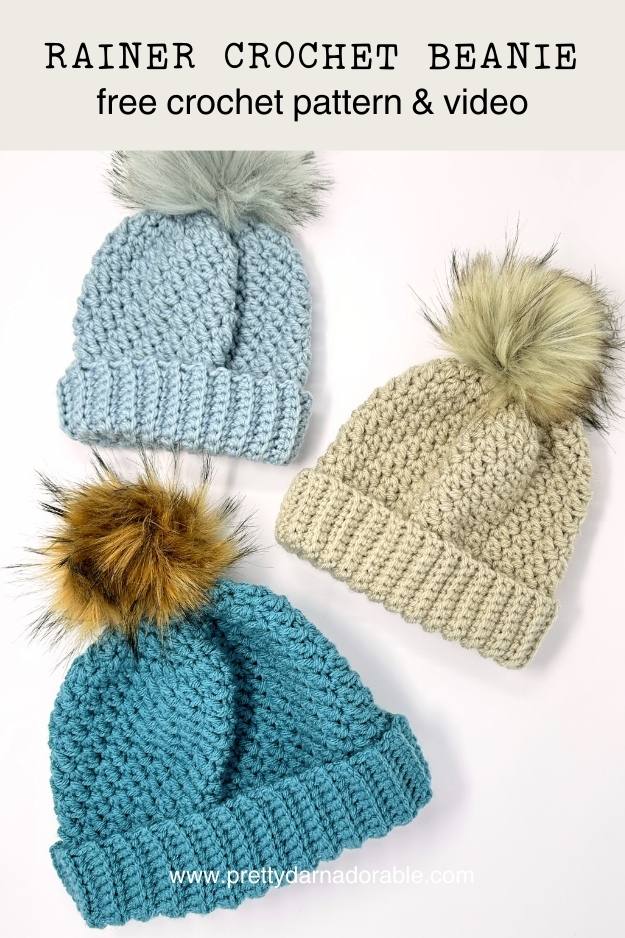


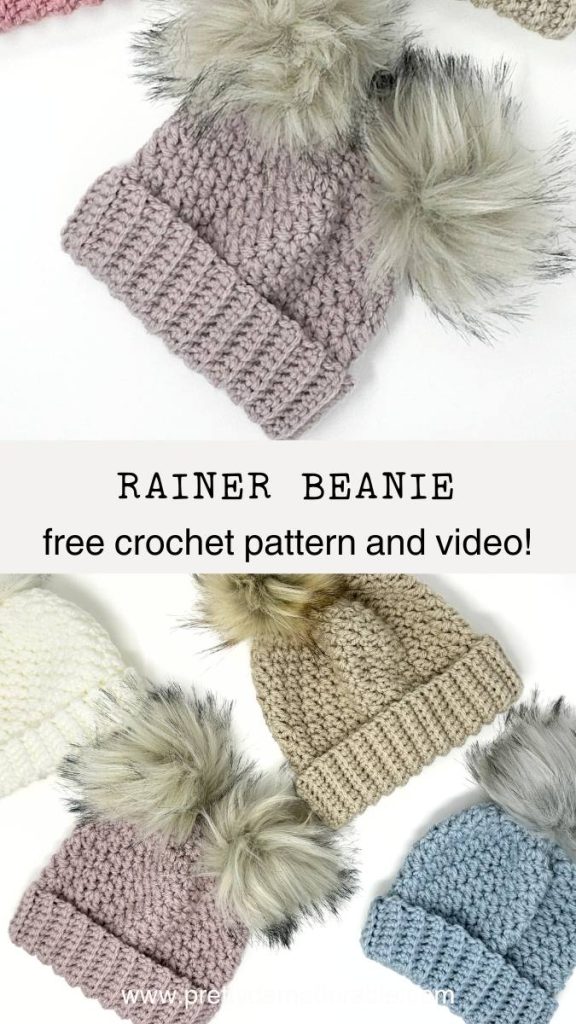
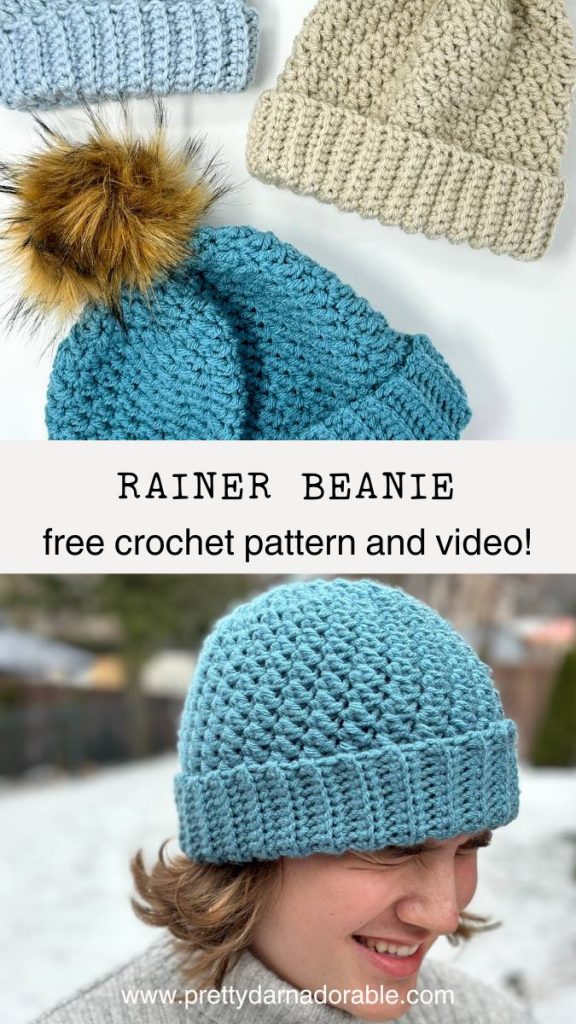
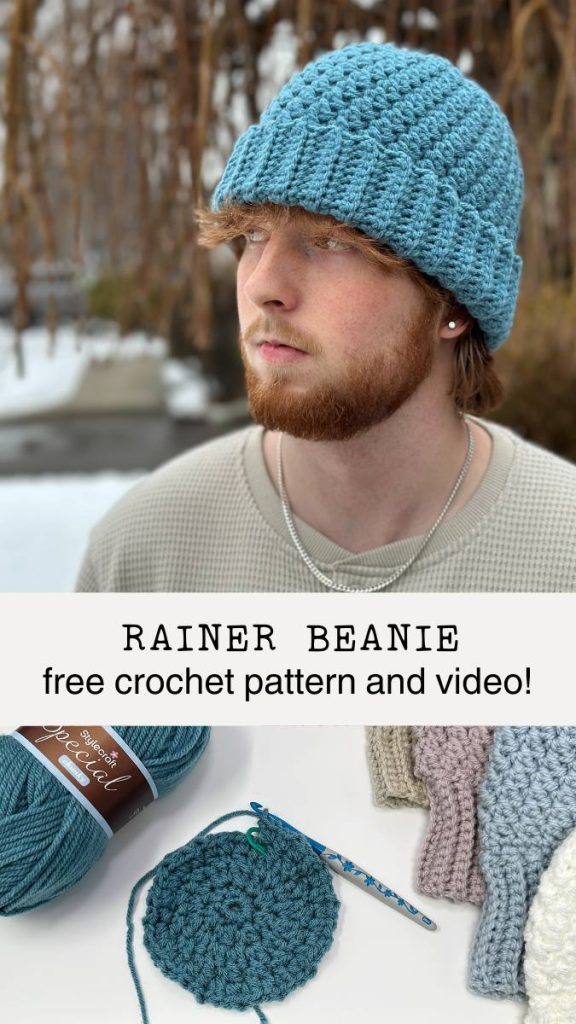
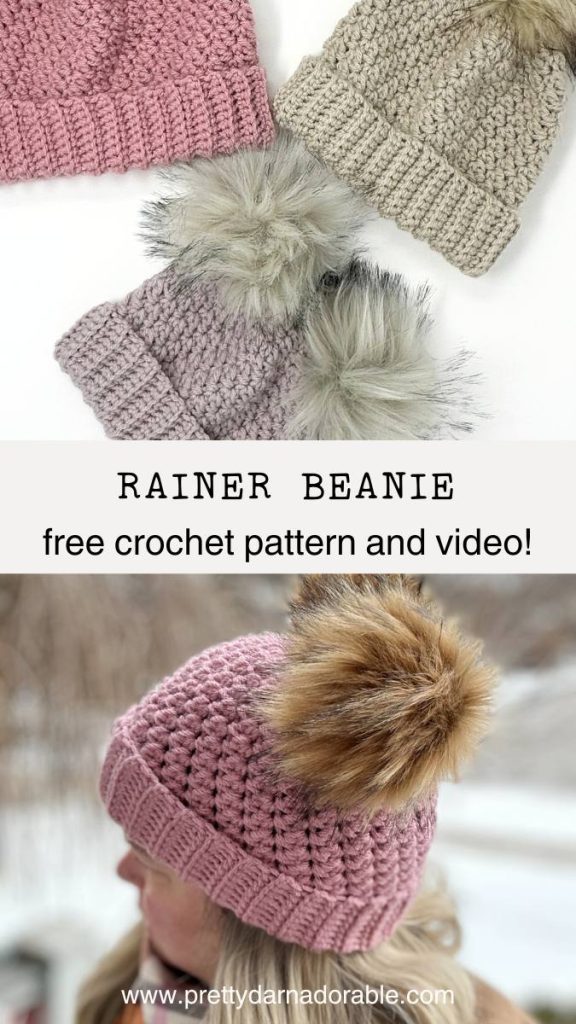

The Rainer Beanie is the perfect hat as we head into winter. Today’s pattern is a free crochet beanie pattern made with bulky yarn, featuring a cozy folded brim. This beanie hat is as stylish as it is practical, and with instructions for different sizes in this blog post—from newborn to adult sizes—it’s a great project to make for the whole family.
This free crochet beanie pattern uses basic crochet stitches like single crochet, double crochet and slip stitches (sl st) to create a versatile design. The hat is worked in continuous rounds, which gives the top of the hat a seamless, polished look.
The folded brim not only adds warmth but gives the beanie hat a nice stretch not common for crochet hats. The pattern works best with chunky/bulky yarn, but you can experiment with different yarns as long as you match the gauge.

This easy crochet hat pattern is perfect for all skill levels, from beginners to seasoned crocheters. Using basic crochet stitches. The brim is created with rows of sl st blo (back loop only), giving it a stretchy ribbed texture that keeps that hat snug and your ears warm.

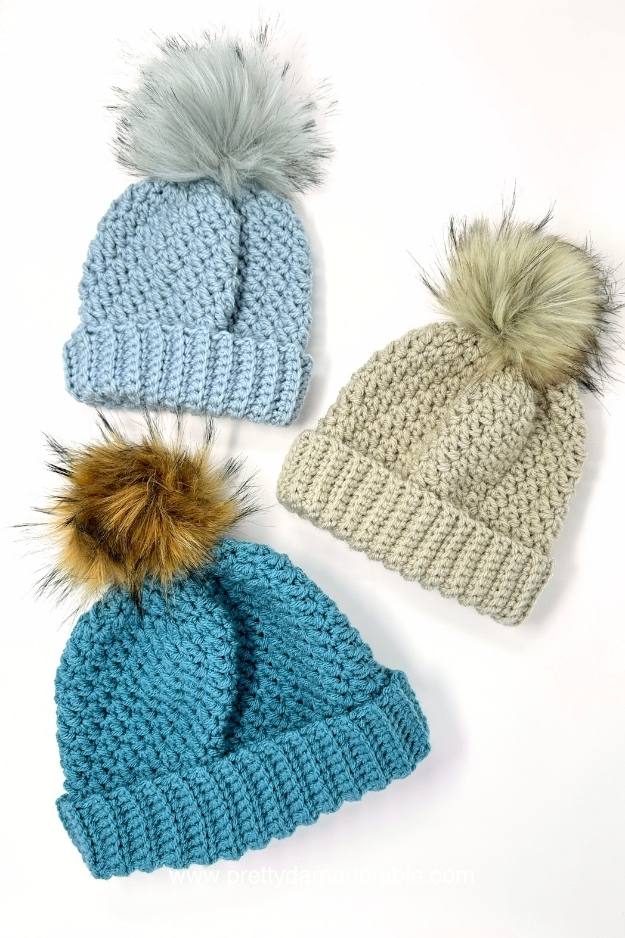
One of the best things about this simple beanie is that it’s adaptable. You can use different colours to create a customized look (looks incredible in stripes), or add a faux fur pom pom or a yarn pom pom (or two!) to the top of the hat for a cute finish.
The written pattern below is in us terms.
And don’t forget, this hat makes great gifts for winter markets, birthdays, or holiday presents. When you’re done, be sure to share your finished projects on social media and tag me—I love seeing your creations! Whether you’re making this for yourself or someone else, this beanie hat is a perfect hat for staying cozy and stylish all winter long.
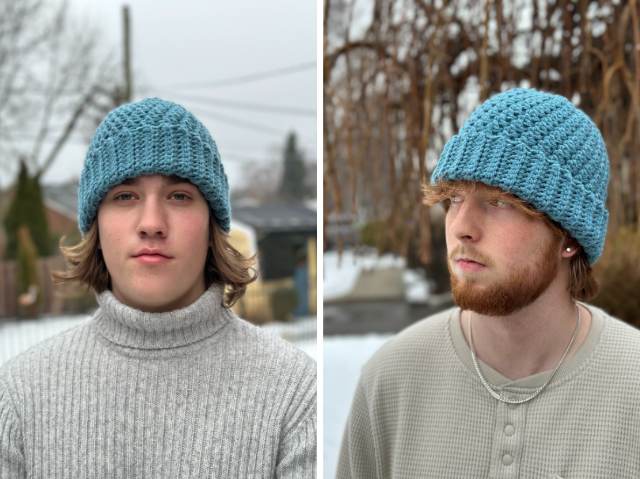
So grab your chunky yarn, pick your favourite crochet hook, and let’s dive into this free crochet beanie pattern. Don’t forget to check the pattern notes and adjust the length as needed for the perfect hat. Happy crocheting, and I can’t wait to see how yours turns out!
Did you make any of these?
I would love to see what you have made be sure to mention @prettydarnadorable or tag me using #prettydarnadorable on Instagram so I can see your creations!
Rainer Beanie – Free Crochet Pattern
Skill Level
Beginner
Abbreviations
- blo – back loop only
- ch – chain
- dc – double crochet
- Sc – half double crochet
- sc – single crochet
- slst – slip stitch
- st – stitch
- sts – stitches
- rpt – repeat
Gauge
A gauge swatch is vital for a well-fitting crochet hat. It determines stitch tension and measures the number of stitches and rows. Comparing it to the pattern’s gauge ensures the final hat fits as desired. Adjust hook or tension if needed for a perfectly fitting hat.
Because the texture of this hat can only be worked in rounds the gauge will be based on a swatch of rows made in single crochet.
It is recommended to do at least 6 rows for your gauge swatch.
Using 6.5mm hook and #5 Bulky Yarn
4” x 4” = 12sc x 6 rows

Finished Measurements & Yarn Requirements
Newborn to Adult Sizes
0 to 3 months:
Width: 15.5”
Height: 5”
Yarn: 75g, 108m, 2.65 oz, 118 yds
3 to 6 months:
Width: 16.5”
Height: 6”
Yarn: 90g, 129.6m, 3.17 oz, 141.7 yds
6 to 12 months:
Width: 17.5”
Height: 6.5”
Yarn: 95g, 136.8m, 3.35 oz, 149.6 yds
1 to 3 years:
Width: 18.5”
Height: 7”
Yarn: 100g, 144m, 3.53 oz, 157.5 yds
3 to 10 years:
Width: 19.5”
Height: 7.5”
Yarn: 110g, 158.4m, 3.88 oz, 173.2 yds
Adult:
Width: 21”
Height: 8”
Yarn: 130g, 187.2m, 4.59 oz, 204.9 yds
Please note that the actual amount of yarn needed may change depending on the yarn chosen always purchase a little more than you think you may need..
Materials Needed
Yarn used in pattern (see sizing chart for exact amount required): Stylecraft Premier Chunky
- Tapestry Needle
- Stitch Markers
- Scissors
- Measuring Tape
- Crochet Hooks
- 5.50 mm crochet hook for the band
- 6.50 mm crochet hook for the main part of the hat
Notes
- This pattern is that it also comes with a video tutorial. This means that you can follow along step-by-step and have all your questions answered in real-time. Whether you’re struggling to understand a particular stitch or just want to see how it should look, the video tutorial is a fantastic resource to have. You can pause, rewind, and re-watch as many times as you need to make sure you’re doing everything correctly.
- Entire base of the hat is worked in continuous rounds there is no joining and no turning until indicated in the pattern.
- The ribbed band is worked joining as you go.


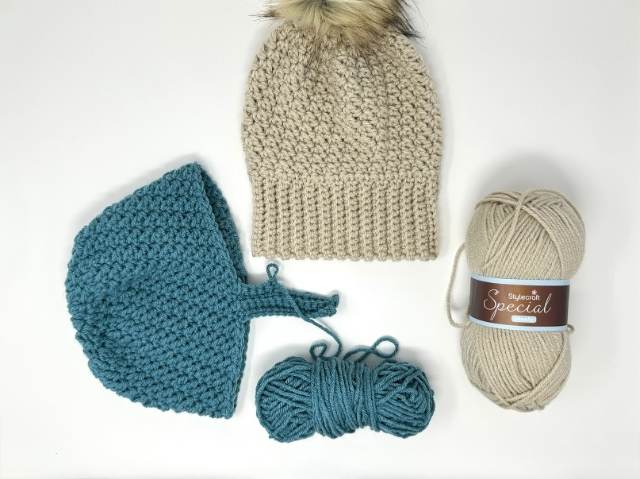
Video Tutorial
Click below to Watch Video
Purchase Ad Free Pattern – Instant Download!
Purchase the ad-free PDF for a smooth, distraction-free crocheting experience anytime, anywhere.
Already a subscriber? Check your latest email for your special discount code. Not subscribed yet? Sign up here to get yours!
Thanks so much for supporting my blog!
Baby 0 – 3 Months
The entire hat is worked in continuous rounds without joining. Use a stitch marker in the first stitch of each round to mark the beginning.
Hat Body
Using 6.50 mm hook Ch 3
Rnd 1: Work 10 dc in 3rd ch from hook. (10)
Rnd 2: (Sc, dc) in 1st st and each st around (20)
Rnd 3: (Sc, dc) in 1st st and each st around (40)
Rnds 4-12: (Sc, dc) in 1st sc *sk next st (sc, dc) in next sc* rpt from *to* end of rnd (40)
Ribbed Band
Switch to a 5.50 mm crochet hook. The ribbed band is worked in vertical rows, attaching to the bottom edge of the hat as you go.
📌 Tip for Beginners: On Row 2 and every odd-numbered row, use a stitch marker to mark the last stitch. This makes it easier to find the first stitch of the next row.
- Ch 10
- Row 1: Sc in 3rd ch from hook and in each ch across. (9 sts)
Now working into the stitches of the last round of the hat: Sl st in next 2 stitches of the hat. Keep these slip stitches loose to prevent the bottom of the hat from shrinking. Turn. - Row 2: Sc in blo (back loop only) in first and each stitch across. (9 sts) Ch 1, turn.
- Row 3: Sc in blo of first and each stitch across. (9 sts)
Mark the last stitch with a stitch marker.
Now working into the stitches of the last round of the hat: Sl st loosely in next 2 stitches of the hat. Turn. - Row 4: Sc in blo in first and each stitch across. (9 sts) Ch 1, turn.
- Repeat Rows 3 and 4 until the ribbing is complete around the entire edge of the hat.
Joining the Cuff
- After the last ribbing row, bring the short edges of the ribbing together.
- Ensure the right side of the hat is facing you.
- Slip stitch across the first and last rows of the ribbing to join them, working into both loops of each stitch for a secure seam.
- Fasten off and weave in the ends.
Final Touch
Turn the ribbed cuff up. The right side of the seam will now be on the outside of the hat.
Baby 3 – 6 Month
The entire hat is worked in continuous rounds without joining. Use a stitch marker in the first stitch of each round to mark the beginning.
Hat Body
Using 6.50 mm hook Ch 2
Rnd 1: Work 6 sc in 2nd ch from hook (6)
Rnd 2: Sc in 1st st, (sc, dc) in each st around (11)
Rnd 3: (Sc, dc) in 1st st and each st around (22)
Rnd 4: (Sc, dc) in 1st st and each st around (44)
Rnds 5 -13: (Sc, dc) in next sc *sk next st (sc, dc) in next sc* rpt from *to* end of rnd (44)
Ribbed Band
Switch to a 5.50 mm crochet hook. The ribbed band is worked in vertical rows, attaching to the bottom edge of the hat as you go.
📌 Tip for Beginners: On Row 2 and every odd-numbered row, use a stitch marker to mark the last stitch. This makes it easier to find the first stitch of the next row.
- Ch 11
- Row 1: Sc in 3rd ch from hook and in each ch across. (10 sts)
Now working into the stitches of the last round of the hat: Sl st in next 2 stitches of the hat. Keep these slip stitches loose to prevent the bottom of the hat from shrinking. Turn. - Row 2: Sc in blo (back loop only) in first and each stitch across. (10 sts) Ch 1, turn.
- Row 3: Sc in blo of first and each stitch across. (10 sts)
Mark the last stitch with a stitch marker.
Now working into the stitches of the last round of the hat: Sl st loosely in next 2 stitches of the hat. Turn. - Row 4: Sc in blo in first and each stitch across. (10 sts) Ch 1, turn.
- Repeat Rows 3 and 4 until the ribbing is complete around the entire edge of the hat.
Joining the Cuff
- After the last ribbing row, bring the short edges of the ribbing together.
- Ensure the right side of the hat is facing you.
- Slip stitch across the first and last rows of the ribbing to join them, working into both loops of each stitch for a secure seam.
- Fasten off and weave in the ends.
Final Touch
Turn the ribbed cuff up. The right side of the seam will now be on the outside of the hat.
Baby 6 – 12 Months
Entire hat is worked in continuous rounds. For best results, use a marker in the first stitch
of each round to indicate the beginning of the round.
Hat Body
Using 6.50 mm hook Ch 2
Rnd 1: Work 6 sc in ch 2nd st from hook (6)
Rnd 2: (Sc, dc) in 1st and each st around (12)
Rnd 3: (Sc, dc) in 1st and each st around (24)
Rnd 4: (Sc, dc) in 1st sc *sk next st (sc, dc) in next sc* rpt from *to* end of rnd (24)
Rnd 5: (Sc, dc) in 1st and each st around (48)
Rnd 6: (Sc, dc) in next sc *sk next st (sc, dc) in next sc* rpt from *to* end of rnd (48)
Rnds 7-14: (Sc, dc) in next sc *sk next st (sc, dc) in next sc* rpt from *to* end of rnd (48)
Ribbed Band
Switch to a 5.50 mm crochet hook. The ribbed band is worked in vertical rows, attaching to the bottom edge of the hat as you go.
📌 Tip for Beginners: On Row 2 and every odd-numbered row, use a stitch marker to mark the last stitch. This makes it easier to find the 1st st of the next row.
- Ch 12
- Row 1: Sc in 3rd ch from hook and in each ch across. (11 sts)
Now working into the stitches of the last round of the hat: Sl st in next 2 sts of the hat. Keep these slip stitches loose to prevent the bottom of the hat from shrinking. Turn. - Row 2: Sc in blo (back loop only) in 1st st and each st across. (11 sts) Ch 1, turn.
- Row 3: Sc in blo of 1st st and each st across. (11 sts)
Mark the last stitch with a stitch marker.
Now working into the stitches of the last round of the hat: Sl st loosely in next 2 sts of the hat. Turn. - Row 4: Sc in blo in 1st st and each st across. (11 sts) Ch 1, turn.
- Repeat Rows 3 and 4 until the ribbing is complete around the entire edge of the hat.
Joining the Cuff
- After the last ribbing row, bring the short edges of the ribbing together.
- Ensure the right side of the hat is facing you.
- Slip stitch across the first and last rows of the ribbing to join them, working into both loops of each st for a secure seam.
- Fasten off and weave in the ends.
Final Touch
Turn the ribbed cuff up. The right side of the seam will now be on the outside of the hat.
Toddler – 1 to 3 Years
Hat Body
Using 6.50 mm hook Ch 2
Rnd 1: Work 7 sc in 2nd st from hook (7)
Rnd 2: 1 hdc in 1st st, (sc, dc) in each st around (13)
Rnd 3: (Sc, dc) in 1st st, and each st around (26)
Rnd 4: (Sc, dc) in 1st sc *sk next st (sc, dc) in next sc* rpt from *to* end of rnd (26)
Rnd 5: (Sc, dc) in 1st and each st around (52)
Rnd 6: (Sc, dc) in 1st st *sk next, (sc, dc) in next sc* rpt from *to* end of rnd (52)
Rnds 7-15: (Sc, dc) in 1st st *sk next, (sc, dc) in next sc* rpt from *to* end of rnd (52)
Ribbed Band
Switch to a 5.50 mm crochet hook. The ribbed band is worked in vertical rows, attaching to the bottom edge of the hat as you go.
📌 Tip for Beginners: On Row 2 and every odd-numbered row, use a stitch marker to mark the last stitch. This makes it easier to find the 1st st of the next row.
- Ch 13
- Row 1: Sc in 3rd ch from hook and in each ch across. (12 sts)
Now working into the stitches of the last round of the hat: Sl st in next 2 sts of the hat. Keep these slip stitches loose to prevent the bottom of the hat from shrinking. Turn. - Row 2: Sc in blo (back loop only) in 1st st and each st across. (12 sts) Ch 1, turn.
- Row 3: Sc in blo of 1st st and each st across. (12 sts)
Mark the last stitch with a stitch marker.
Now working into the stitches of the last round of the hat: Sl st loosely in next 2 sts of the hat. Turn. - Row 4: Sc in blo in 1st st and each st across. (12 sts) Ch 1, turn.
- Repeat Rows 3 and 4 until the ribbing is complete around the entire edge of the hat.
Joining the Cuff
- After the last ribbing row, bring the short edges of the ribbing together.
- Ensure the right side of the hat is facing you.
- Slip stitch across the first and last rows of the ribbing to join them, working into both loops of each st for a secure seam.
- Fasten off and weave in the ends.
📌 Tip: For an invisible seam, use a yarn needle and whipstitch the ends together instead of slip stitching.
Final Touch
Turn the ribbed cuff up. The right side of the seam will now be on the outside of the hat.
3 to 10 Years
Entire hat is worked in continuous rounds. For best results, use a marker in the first stitch
of each round to indicate the beginning of the round.
Hat Body
Using 6.50 mm hook Ch 2
Rnd 1: Work 7 sc in 2nd st from hook (7)
Rnd 2: (Sc, dc) in 1st st and each st around (14)
Rnd 3: (Sc, dc) in 1st and each st around (28)
Rnd 4: (Sc, dc) in 1st st *sk next, (sc, dc) in next sc* rpt from *to* end of rnd (28)
Rnd 5: (Sc, dc) in 1st and each st around (56)
Rnds: 6-16: (Sc, dc) in 1st st *sk next, (sc, dc) in next sc* rpt from *to* end of rnd (56)
Ribbed Band
Switch to a 5.50 mm crochet hook. The ribbed band is worked in vertical rows, attaching to the bottom edge of the hat as you go.
📌 Tip for Beginners: On Row 2 and every odd-numbered row, use a stitch marker to mark the last stitch. This makes it easier to find the 1st st of the next row.
- Ch 14
- Row 1: Sc in 3rd ch from hook and in each ch across. (13 sts)
Now working into the stitches of the last round of the hat: Sl st in next 2 sts of the hat. Keep these slip stitches loose to prevent the bottom of the hat from shrinking. Turn. - Row 2: Sc in blo (back loop only) in 1st st and each st across. (13 sts) Ch 1, turn.
- Row 3: Sc in blo of 1st st and each st across. (13 sts)
Mark the last stitch with a stitch marker.
Now working into the stitches of the last round of the hat: Sl st loosely in next 2 sts of the hat. Turn. - Row 4: Sc in blo in 1st st and each st across. (13 sts) Ch 1, turn.
- Repeat Rows 3 and 4 until the ribbing is complete around the entire edge of the hat.
Joining the Cuff
- After the last ribbing row, bring the short edges of the ribbing together.
- Ensure the right side of the hat is facing you.
- Slip stitch across the first and last rows of the ribbing to join them, working into both loops of each st for a secure seam.
- Fasten off and weave in the ends.
Final Touch
Turn the ribbed cuff up. The right side of the seam will now be on the outside of the hat.

Adult
Entire hat is worked in continuous rounds. For best results, use a marker in the first stitch of each round to indicate the beginning of the round.
Hat Body
Using 6.50 mm hook Ch 2
Rnd 1: Work 8 sc in 2nd st from hook (8)
Rnd 2: Sc in 1st st. (Sc, dc) in each of the remaining sts around (15)
Rnd 3: (Sc, dc) in 1st and each st around (30)
Rnd 4: (Sc, dc) in 1st st *sk next, (sc, dc) in next sc* rpt from *to* end of rnd (30)
Rnd 5: (Sc, dc) in 1st and each st around (60)
Rnd 6: (Sc, dc) in 1st st *sk next, (sc, dc) in next sc* rpt from *to* end of rnd (60)
Rnds 7-17: (Sc, dc) in 1st st *sk next, (sc, dc) in next sc* rpt from *to* end of rnd (60)
Ribbed Band
Switch to a 5.50 mm crochet hook. The ribbed band is worked in vertical rows, attaching to the bottom edge of the hat as you go.
📌 Tip for Beginners: On Row 2 and every odd-numbered row, use a stitch marker to mark the last stitch. This makes it easier to find the 1st st of the next row.
- Ch 15
- Row 1: Sc in 3rd ch from hook and in each ch across. (14 sts)
Now working into the stitches of the last round of the hat: Sl st in next 2 sts of the hat. Keep these slip stitches loose to prevent the bottom of the hat from shrinking. Turn. - Row 2: Sc in blo (back loop only) in 1st st and each st across. (14 sts) Ch 1, turn.
- Row 3: Sc in blo of 1st st and each st across. (14 sts)
Mark the last stitch with a stitch marker.
Now working into the stitches of the last round of the hat: Sl st loosely in next 2 sts of the hat. Turn. - Row 4: Sc in blo in 1st st and each st across. (14 sts) Ch 1, turn.
- Repeat Rows 3 and 4 until the ribbing is complete around the entire edge of the hat.
Joining the Cuff
- After the last ribbing row, bring the short edges of the ribbing together.
- Ensure the right side of the hat is facing you.
- Slip stitch across the first and last rows of the ribbing to join them, working into both loops of each st for a secure seam.
- Fasten off and weave in the ends.
Final Touch
Turn the ribbed cuff up. The right side of the seam will now be on the outside of the hat.
Hugs, yarn snuggles, and endless stitches,
Cyp