


Warmer weather is coming and this free crochet granny stitch sun hat pattern is the perfect beach hat to add to your summer wardrobe.
The Chloe crochet sun hat pattern with video tutorial includes all different sizes from baby to child to adult and is my favourite floppy hat to make for any little girl.
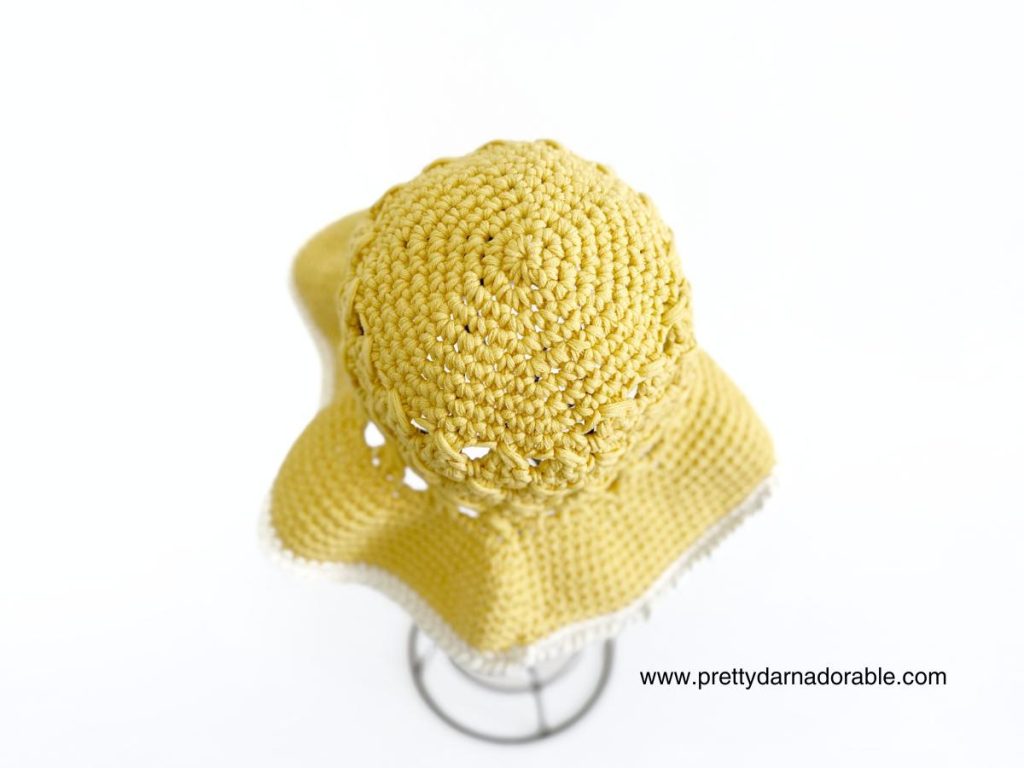
Although not made using the iconic granny squares typically associated with the term ‘granny’ this sun hat features granny shells made from the same double crochet stitches but with a unique twist.
This pattern is a great option for beginner crocheters who want to try their hand at the stylish crochet shell stitch without the complexity of traditional granny squares.

While I love the look of granny squares I wanted something that was going to work up quicker. I know, I can hear it now. “But Cyp… that huge brim that isn’t quick.” And to that I say… True oh so true! BUT you don’t need to make the brim that big – more on that later.
Scroll down for free pattern
This sun hat is started by working single crochet increase rounds from the crown of the hat – and this is what makes the sizing of this pattern so easy! With the ability to increase at every round it takes the guesswork out of sizing crochet granny squares. And if you have followed me for any length of time I think you know by now I LOVE EASY!
When I think of crochet summer hats I think of a wide brim and protection from the sun. I think of little kids playing on the beach wearing floppy sun hats and how the hats get tossed around. This is why I have only added wire the the adult hats and made the toddler size with the floppy brim and I feel it is safer to omit the wire for little ones.
This hat isn’t just for summer though, made with either acrylic or cotton yarn, this hat is also great for those transitional months when the weather is getting warmer or cooler.
If you love the style but just want a beanie – check out the Chloe Beanie Pattern which also includes a video tutorial.
Watch Video Tutorial Below
How to print this pattern
If you’re looking for a crochet pattern that you can take with you anywhere, and that is easy to read and follow, then look no further!
I’ve created an INEXPENSIVE ad-free version of my popular crochet pattern that you can easily download from Etsy. This way, you can mark up the pattern as needed without any distractions, and enjoy crocheting it wherever you go.
Thanks so much for supporting my blog!
- Add Pattern to your Ravelry Library
- Download on Etsy
- Pin Now Make Later

Newest Posts to the Blog
- Free Beginner Crochet Acorn Pattern in 4 Sizes – Cedar Ridge
- Cedar Ridge Pumpkins: A Free Crochet Pumpkin Pattern
- Free Crochet Lapghan Pattern: Country Charm Lapghan
- Gardenlace Free Crochet Dishcloth Pattern PDF Download
- Free Montero Crochet Basket Pattern
Designers Notes
💕 Skill Level is Easy
💕 Skills Needed double crochet, single crochet
💕 Sizes Newborn to Adult
💕 Made with worsted weight yarn great for cotton or acrylic
💕 All sizes written individually
💕 Written in Standard American terms
Best yarn for this pattern
Cotton yarn
When it comes to making summer hats, cotton yarn is a great choice because it’s breathable and lightweight. Here are a few cotton yarns that I recommend for making summer hats:
- Lily Sugar ‘n Cream: This affordable 100% cotton yarn comes in a wide range of colors and is great for making hats that can withstand wear and tear. It’s easy to work with and machine washable.
- Lion Brand 24/7 Cotton: This mercerized cotton yarn is both durable and breathable, making it a great choice for summer hats. It comes in a range of bright and pastel colors and has a slight sheen that adds a touch of elegance to your project.
No matter which cotton yarn you choose, make sure to check the recommended hook size and gauge before you start your project to ensure that you get the right tension and fit for your summer hat.
Acrylic Yarn
The closed-top design with insulating properties will keep you warm and toasty when the snow starts to fall. And let’s be real, who doesn’t love easy-care yarn that won’t shrink in the wash? But hold on tight – save the acrylic yarn for winter! Its insulating properties make it less-than-ideal for summer wear, as it can lead to some serious overheating.
Remember, the type of yarn you choose can make or break your crochet project. Whether you’re going for the ultimate winter hat with acrylic yarn or a cool and comfortable summer beanie with cotton, consider the season and how you’ll wear it.
Substituting yarn
When substituting yarns for a crochet pattern, it’s crucial to keep the gauge as close as possible to the original yarn. Gauge refers to the number of stitches and rows in a given area of the crochet fabric, and it affects the size and shape of the finished project.
If the gauge of the substitute yarn is significantly different from the original yarn, the project’s feel and look may be affected. To ensure that the finished project looks and feels as close to the original design as possible, make a swatch with the substitute yarn and compare it to the original yarn swatch to match the gauge.
Be sure to visit www.yarnsub.com to help you choose the right substitute.
What’s the best yarn for a crochet sun hat?
For me, cotton is the way to go! Not only is it durable and able to withstand frequent washing, but it’s also breathable, which means you won’t have to worry about feeling sweaty and uncomfortable in the sun.
Plus, with so many colours and textures to choose from, you can easily find a cotton yarn that matches your personal style and the look of your sun hat. Trust me, using cotton yarn will help you create a beautiful and functional sun hat that will make heads turn!
Recommended Cotton Yarns
If you’re making this project and wondering what yarn to use, I’ve got you covered! I almost always reach for worsted weight 100% cotton yarns—they’re durable, absorbent, and hold up beautifully over time. Whether you’re making home decor, accessories, or baby items, these cottons are a great choice.
Bernat Handicrafter Cotton
The Bernat Handicrafter Cotton—thick, sturdy, and great for washcloths, coasters, and more. It has a matte texture and a dense feel, which gives your stitches really nice definition. If you’ve used it before, you know it’s a solid workhorse yarn.
Knit Picks Dishie
Dishie is probably the closest match to Handicrafter in terms of texture and weight. It’s a worsted weight 100% cotton that’s slightly smoother than Handicrafter, but still super durable. It also comes in a huge range of colours.
Lily Sugar’n Cream
Another long-time favourite, is Lily Sugar’n Cream in both weight and texture. It’s also 100% cotton and super sturdy, with a slightly more rustic feel. It works up nicely for everything from dishcloths to baskets and is widely available in stores.
You can’t go wrong with any of these! If you’re not sure what to choose, Knit Picks Dishie is a top pick when people want something super close to Bernat Handicrafter, especially for beginner-friendly projects.
🛒 Where to Buy Cotton Yarn Online
How to care for your crochet sun hat.
Once you’ve crocheted your sun hat, it’s important to take care of it properly to ensure it lasts for many summers to come. Hand washing with mild detergent and lukewarm water is the way to go, avoiding harsh chemicals that can damage the yarn fibres.
Reshape your sun hat and lay it flat to dry away from direct sunlight or heat sources. And if it loses its shape, don’t worry! You can use an iron to reshape it, just don’t scorch or melt the yarn fibres. With proper care and maintenance, your crochet sun hat will be your go-to accessory for all your summer activities.
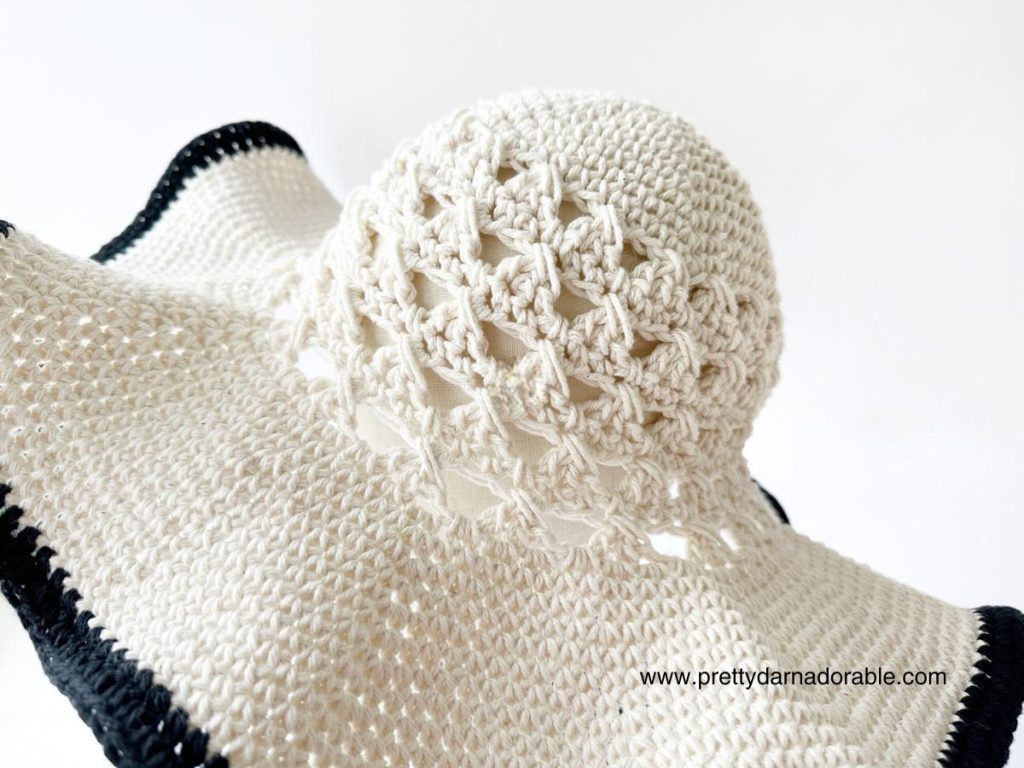
Free Crochet Pattern Instructions for Chloe Sun Hat
This crochet sun hat pattern draws inspiration from the ever so popular granny square and is perfect any fall or sunny warm day in the park. The hat features a ruffled floppy brim and a tight weave at the top to provide excellent sun protection for your head, while the big brim shields your eyes from the bright sun.
Skill Level
Easy
Abbreviations
- ch – chain
- dc – double crochet
- sc – single crochet
- st – stitch
- sts – stitches
- sl st – slip stitch
- rpt – repeat
Gauge
Using 6.50 mm hook and #4 worsted weight yarn
12 rows + 12 sts across of sc = 4″ x 4″
A gauge swatch is vital for a well-fitting crochet hat. It determines stitch tension and measures the number of stitches and rows. Comparing it to the pattern’s gauge ensures the final hat fits as desired. Adjust hook or tension if needed for a perfectly fitting hat.
To do a crochet gauge swatch using a single crochet stitch, start by using the same type of yarn and crochet hook that you plan to use for your hat.
Begin crocheting a square approximately 4” x 4” using the single crochet stitch, making sure to maintain an even tension throughout. Once your swatch is complete, measure it using a ruler or measuring tape to determine the number of stitches and rows per inch.
Even though the hat is made using a different stitch, this gauge swatch will give you an idea of how your tension will affect the overall size of your finished product.
PLEASE NOTE THAT THIS POST CONTAINS AFFILIATE LINKS – Read more
Materials Needed
Finished Measurements & Yarn Requirements
Please note that the actual amount of yarn needed may change depending on the yarn chosen always purchase a little more than you think you may need.
Note the measurements in chart DO NOT include the brim.
| Sizing | Worsted Weight Yarn Requirements | |||||
| Width | Height | G | M | O | Y | |
| 0 to 6 months | 16” | 5” | 100 | 212 | 3.53 | 232 |
| 6 to 12 months | 18 | 6” | 120 | 254 | 4.23 | 278 |
| 12 months to 3 yrs | 19” | 6.5” | 140 | 296 | 4.94 | 324 |
| 3 to 10 yrs | 20” | 7” | 170 | 360 | 6.00 | 394 |
| Adult | 22” | 7.5” | 200 | 424 | 7.05 | 463 |
Some items below click through to an affiliate link at no extra cost to you.
You can check out all my favourites HERE
Yarn Gauge:
Gauge must be matched for the correct fit of this hat, matching the recommended yarn gauge can assist in successful substitution and result in a more accurate finished product.
Recommend Cotton Worsted Weight Yarns
Recommended Acrylic Worsted Weight Yarns
Lions Brand – Wool Ease
50” Millinery Wire OR Plastic Memory Wire OR Metal Wire 12 to 15 Gauge recommended.
Choose one of the following for securing your wire in place
Hot glue gun and glue or. Clear floral tape or
Wire crimp connectors – be sure that the size you choose is correct for your wire size. You will also need pliers to close.
Crochet Hooks
5.00 mm crochet hook used for brim of hat
6.50 mm crochet hook used for main part
Notes
This hat will be worked in rounds, use a marker in first stitch of each round to indicate the beginning of each round.
When working rounds of single crochet all loops between crossed cluster should be picked up. See reference photo below.

Options for Finishing Brim
After completing your crochet hat with a floppy brim, it’s time to give it a finishing touch. First, make sure to weave in all the ends to give your project a neat appearance.
Ultimately, the method you choose will depend on your personal preference and the look you’re going for with your sun hat.
Using a fabric stiffener or starch spray will provide added structure and help the hat maintain its shape. However, this is recommended for baby and toddler sizes only. The brim is quite large so a stiffening spray will do little to hold the brim up on the adult size.
Also note that the stiffener will need to be reapplied after washing.
By following these finishing steps, you can create a crochet hat that looks great and can be worn for many seasons to come.
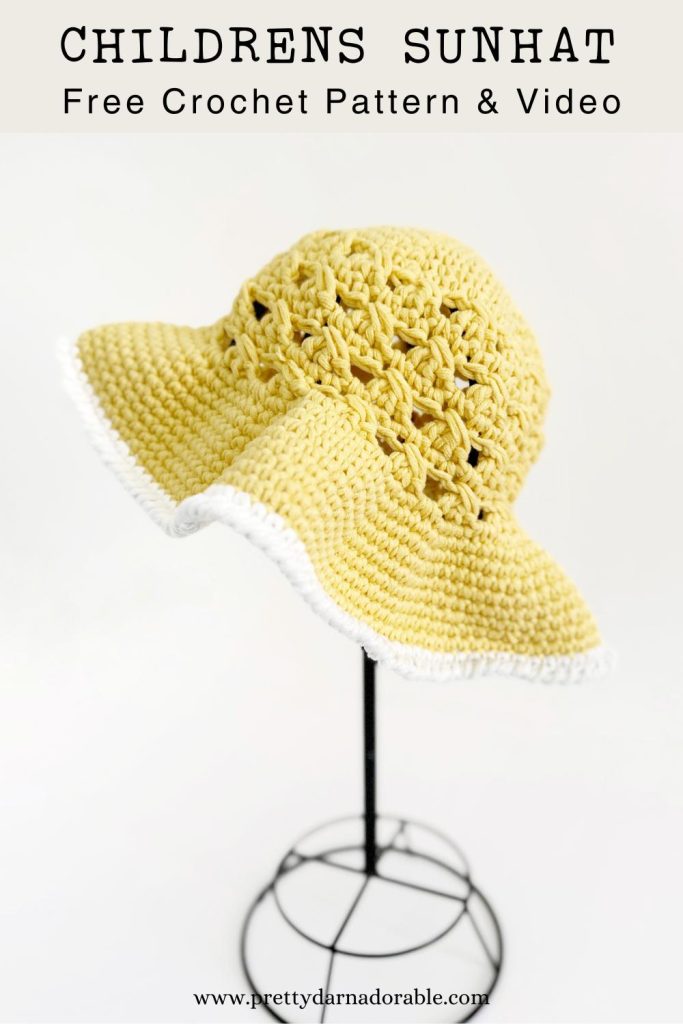
Fabric stiffener spray (smaller sizes only)

The white baby sun hat was treated with fabric stiffener spray, which made the brim stiff but still lightweight and flexible.
If you want your hat to have a bit more structure and hold its shape better, you can use a fabric stiffener or starch spray. Fabric stiffener is a liquid product that is applied to fabric or yarn to make it firmer and more rigid. The product works by coating the fibres of the fabric or yarn and drying to create a stiff layer.
To use fabric stiffener on your hat, simply spray it onto the brim of the hat and let it dry completely. Once the product dries, it will create a stiff layer that will help the brim hold its shape. This is particularly useful for hats that are intended to be worn frequently, as it will help the brim stay in place and prevent it from drooping or becoming misshapen over time.
Do nothing and enjoy (smaller sizes only)
The pink and purple sun hat were made without any wire or fabric stiffener, giving it a more casual and floppy look.
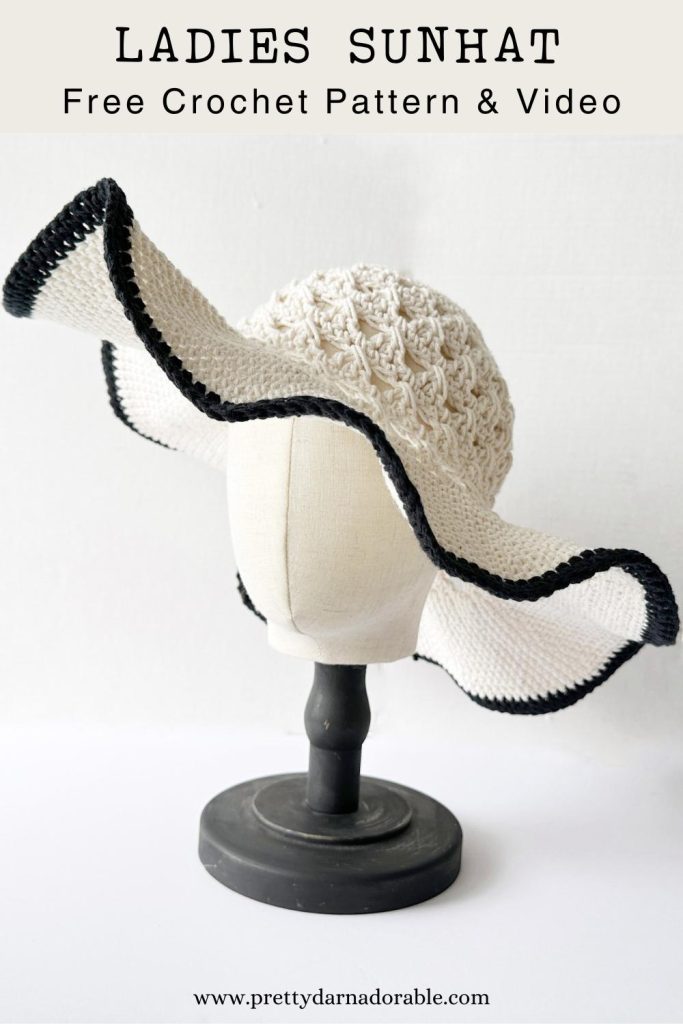
Wire Edging – A must for the adult size
If you are adding wire to the brim this will need to be done while working the final round of the brim regardless of which size you are making.

The cream adult sun hat was stiffened with wire, which gave it a more structured and formal look.
Use wire or floral stem: You can insert a piece of wire or a floral stem around the edge of the brim to help it hold its shape. Simply insert the wire or stem into the crochet stitches along the edge of the brim and shape it as desired.
Wire edging
Measure around brim of hat and then cut wire allowing for a 3-4 inch overlap. We will trim this at the end, it is better to have extra wire so that it is easier to work with.
Work sc around the wire in each single crochet around, stopping before you work the last 8 – 10 stitches.

At this point you want to secure the wire and this can be done a number of ways. Pick which ever works best for you. My favourite method is using the hot glue gun but all work well.
Securing wire in place
No matter the method you choose this next step is important. We need to mark the wire so that when we are securing it, it stays the exact size that it needs to be.
This is really easy, but there are just a couple of steps to make sure to get it in the right place.
Step 1. Lay your hat flat, and smooth the brim down with your hands. The goal here is to make sure that the wire is completely covered in sc. Your brim will still be rippled and not completely flat so do your best to make sure it is covered.

Step 2. Make sure the wires are over lapping at least one inch.
Step 3. Get a permanent marker and mark both wires in the middle of the overlap.

Step 4. Trim wires so that the overlap is no larger than 1” to 1 ½”.

At this point, you will want to choose the method of securing the wire in place. The two I recommend are either the floral tape or hot glue.
When using the hot glue, you will need to hold the wire in place as it cools and starts to set. I did the top part of the wire, then flipped the hat over to do the underside next.

If you are using the tape, start in the middle where we marked with the black marker and work to each end wrapping the tape continually around the wire until then ends are covered. You want to make sure that there are no sharp ends exposed.

Once you have worked to one end, cut the tape and start from the middle again working back to the opposite end.
Once the wire is secure, continue to work sc around the unfinished stitches of the round.
This method requires one additional finishing round.
For the final round, work a spike stitch or long single crochet into round all the way around the brim. Fasten off.
Free Crochet Sun Hat Pattern Instructions
0 – 6 Months
Using 6.50 mm hook Ch 2
Rnd 1: Work 6 sc in 2nd st from hook. (6)
Rnd 2: 2 sc in 1st st and each st around. (12)
Rnd 3: 1 sc in 1st st *2 sc in next st, 1 sc in next st* rpt from * to * to 2nd last st, work 2 sc in last st. (18)
Rnd 4: 1 sc in 1st 2 sts *2 sc in next st, 1 sc in next 2 sts* rpt from * to * to 2nd last st, work 2 sc in last st. (24)
Rnd 5: 1 sc in 1st 3 sts *2 sc in next st, 1 sc in next 3 sts* rpt from * to * to 2nd last st, work 2 sc in last st. (30)
Rnd 6: 1 sc in 1st 4 sts *2 sc in next st, 1 sc in next 4 sts* rpt from * to * to 2nd last st, work 2 sc in last st. (36)
Rnd 7: 1 sc in 1st 5 sts *2 sc in next st, 1 sc in next 5 sts* rpt from * to * to 2nd last st, work 2 sc in last st. (42)
Rnd 8: Sk 1st 2 sts, *2dc in next, dc in 2nd skipped stitch, sk next 2 sts*, rpt from *to* till end of rnd, sk last st (42)
Rnd 9: Sc in 1st and each st around (42)
Rnd 10: Sk 1st st, 2dc in next, dc in skipped stitch *sk next 2 sts, 2dc in next st, dc in 2nd skipped stitch*, rpt from *to* till end of rnd, sk last st (42)
Rnd 11: Sc in 1st and each st around (42)
Rnd 12: Sk 1st st, 2dc in next, dc in skipped stitch *sk next 2 sts, 2dc in next st, dc in 2nd skipped stitch*, rpt from *to* till end of rnd, sk last st (42)
BRIM
Note about resizing the brim: If at any point you find the brim is getting to a size you like simply stop adding increase rounds and add one final round of single crochet.
Change to 5.00 mm hook
Rnd 13: 2 sc in 1st and each st around (84)
Rnd 14: Sc in 1st 11 sts, 2 sc in next, *sc in next 11 st, 2 sc in next* rpt from * to * to 2nd last st, work 2 sc in last st. (91)
Rnd 15: Sc in 1st 12 sts, 2 sc in next, *sc in next 12 sts, 2 sc in next* rpt from * to * to 2nd last st, work 2 sc in last st. (98)
Rnd 16: Sc in 1st and each st around (98)
Rnd 17: Sc in 1st 7 sts, 2 sc in next, *sc in next 13 sts, 2 sc in next* rpt from * to * to last 6 sts, sc in last 6 sts (106)
If using contrast colour for finishing the brim change to that colour now.
Rnd 18: Sc in 1st 14 sts, 2 sc in next, *sc in next 14 sts, 2 sc in next* rpt from * to * to 2nd last st, work 2 sc in last st. (112)
Rnd 19: Sc in 1st and each st around (112)
Fasten off and weave in ends.
6–12 Months
Using 6.50 mm hook ch 2
Rnd 1: Work 8 sc in 2nd st from hook. (8)
Rnd 2: 2 sc in each st around (16)
Rnd 3: 1 sc in first st *2 sc in next st, 1 sc in next st* rpt from * to * to 2nd last st, work 2 sc in last st. (24)
Rnd 4: 1 sc in first 2 sts *2 sc in next st, 1 sc in next 2 sts* rpt from * to * to 2nd last st, work 2 sc in last st. (32)
Rnd 5: 1 sc in first 3 sts *2 sc in next st, 1 sc in next 3 sts* rpt from * to * to 2nd last st, work 2 sc in last st. (40)
Rnd 6: 1 sc in first 4 sts *2 sc in next st, 1 sc in next 4 sts* rpt from * to * to 2nd last st, work 2 sc in last st. (48)
Rnd 7: Sk 1st 2 sts, *2dc in next, dc in 2nd skipped stitch, sk next 2 sts*, rpt from *to* till end of rnd, sk last st (48)
Rnd 8: Sc in 1st and each st around (48)
Rnd 9: Sk 1st st, 2dc in next, dc in skipped stitch *sk next 2 sts, 2dc in next st, dc in 2nd skipped stitch*, rpt from *to* till end of rnd, sk last st (48)
Rnd 10: Sc in 1st and each st around (48)
Rnd 11: Sk 1st st, 2dc in next, dc in skipped stitch *sk next 2 sts, 2dc in next st, dc in 2nd skipped stitch*, rpt from *to* till end of rnd, sk last st (48)
Rnd 12: Sc in 1st and each st around (48)
Rnd 13: Sk 1st st, 2dc in next, dc in skipped stitch *sk next 2 sts, 2dc in next st, dc in 2nd skipped stitch*, rpt from *to* till end of rnd, sk last st (48)
BRIM
Note about resizing the brim: If at any point you find the brim is getting to a size you like simply stop adding increase rounds and finish by adding two final rounds of single crochet.
Change to 5.00 mm hook
Rnd 14: 2 sc in 1st and each st around (96)
Rnd 15: Sc in 1st 11 sts, 2 sc in next, *sc in next 11 st, 2 sc in next* rpt from * to * to 2nd last st, work 2 sc in last st. (104)
Rnd 16: Sc in 1st 6 sts, 2 sc in next, *sc in next 12 sts, 2 sc in next* rpt from * to * to last 6 sts, sc in last 6 sts (112)
Rnd 17: Sc in 1st 13 sts, 2 sc in next, *sc in next 13 sts, 2 sc in next* rpt from * to * to 2nd last st, work 2 sc in last st. (120)
Rnd 18: Sc in 1st and each st around (120)
Rnd 19: Sc in 1st 14 sts, 2 sc in next, *sc in next 14 sts, 2 sc in next* rpt from * to * to 2nd last st, work 2 sc in last st. (128)
Rnd 20: Sc in 1st 15 sts, 2sc in next, *sc in next 15 sts, 2 sc in next* rpt from * to * to 2nd last st, work 2 sc in last st. (136)
Rnd 21: Sc in 1st 8 sts, 2sc in next, *sc in next 16 sts, 2 sc in next* rpt from * to * to last 8 sts, sc in last 8 sts (144)
If using contrast colour for finishing the brim change to that colour now.
Rnds 22 – 23: Sc in 1st and each st around (144)
Fasten off and weave in ends.
1 – 3 Years
Using 6.50 mm hook Ch 2
Rnd 1: Work 8 sc in 2nd st from hook. (8)
Rnd 2: 2 sc in each st around (16)
Rnd 3: 1 sc in first st *2 sc in next st, 1 sc in next st* rpt from * to * till end of rnd (24)
Rnd 4: 1 sc in first 2 sts *2 sc in next st, 1 sc in next 2 sts* rpt from * to * till end of rnd (32)
Rnd 5: 1 sc in first 3 sts *2 sc in next st, 1 sc in next 3 sts* rpt from * to * till end of rnd (40)
Rnd 6: 1 sc in first 4 sts *2 sc in next st, 1 sc in next 4 sts* rpt from * to * till end of rnd (48)
Rnd 7: 1 sc in first 11 sts *2 sc in next st, 1 sc in next 11 sts* rpt from *to* till end of rnd (52)
Rnd 8: Sk 1st 2 sts, *2dc in next, dc in 2nd skipped stitch, sk next 2 sts*, rpt from *to* till end of rnd, sk last st (51)
Rnd 9: Sc in 1st and each st around (51)
Rnd 10: Sk 1st st, 2dc in next, dc in skipped stitch *sk next 2 sts, 2dc in next st, dc in 2nd skipped stitch*, rpt from *to* till end of rnd, sk last st (51)
Rnd 11: Sc in 1st and each st around (51)
Rnd 12: Sk 1st st, 2dc in next, dc in skipped stitch *sk next 2 sts, 2dc in next st, dc in 2nd skipped stitch*, rpt from *to* till end of rnd, sk last st (51)
Rnd 13: Sc in 1st and each st around (51)
Rnd 14: Sk 1st st, 2dc in next, dc in skipped stitch *sk next 2 sts, 2dc in next st, dc in 2nd skipped stitch*, rpt from *to* till end of rnd, sc in last st (52)
BRIM
Note about resizing the brim: If at any point you find the brim is getting to a size you like simply stop adding increase rounds and finish by adding two final rounds of single crochet.
Change to 5.00 mm hook
Brim instructions on next page…
Rnd 15: 2 sc in 1st and each st around (104)
Rnd 16: Sc in 1st 12 sts, 2 sc in next, *sc in next 12 st, 2 sc in next* rpt from * to * to 2nd last st, work 2 sc in last st. (112)
Rnd 17: Sc in 1st 7 sts, 2 sc in next, *sc in next 13 sts, 2 sc in next* rpt from * to * to last 6 sts. Sc in last 6 sts (120)
Rnd 18: Sc in 1st 14 sts, 2 sc in next, *sc in next 14 sts, 2 sc in next* rpt from * to * to 2nd last st, work 2 sc in last st. (128)
Rnd 19: Sc in st and each st around (128)
Rnd 20: Sc in 1st 7 sts, 2 sc in next, *sc in next 15 sts, 2 sc in next* rpt from * to * to last 8 sts, sc in last 8 sts of rnd (136)
Rnd 21: Sc in 1st and each st around (136)
Rnd 22: Sc in 1st 16 sts, 2 sc in next, *sc in next 16 sts, 2 sc in next* rpt from * to * to 2nd last st, work 2 sc in last st. (144)
Rnd 23: Sc in 1st 17 sts, 2 sc in next, *sc in next 17 sts, 2 sc in next* rpt from * to * to 2nd last st, work 2 sc in last st. (152)
If using contrast colour for finishing the brim change to that colour now.
Rnds 24 – 25: Sc in 1st and each st around (152)
3 – 10 Years
Using 6.50 mm hook Ch 2
Rnd 1: Work 6 sc in 2nd st from hook. (6)
Rnd 2: 2 sc in 1st st and each st around. (12)
Rnd 3: 1 sc in 1st st *2 sc in next st, 1 sc in next st* rpt from * to * to 2nd last st, work 2 sc in last st. (18)
Rnd 4: 1 sc in 1st 2 sts *2 sc in next st, 1 sc in next 2 sts* rpt from * to * to 2nd last st, work 2 sc in last st. (24)
Rnd 5: 1 sc in 1st 3 sts *2 sc in next st, 1 sc in next 3 sts* rpt from * to * to 2nd last st, work 2 sc in last st. (30)
Rnd 6: 1 sc in 1st 4 sts *2 sc in next st, 1 sc in next 4 sts* rpt from * to * to 2nd last st, work 2 sc in last st. (36)
Rnd 7: 1 sc in 1st 5 sts *2 sc in next st, 1 sc in next 5 sts* rpt from * to * to 2nd last st, work 2 sc in last st. (42)
Rnd 8: 1 sc in 1st 6 sts *2 sc in next st, 1 sc in next 6 sts* rpt from * to * to 2nd last st, work 2 sc in last st. (48)
Rnd 9: 1 sc in 1st 7 sts *2 sc in next st, 1 sc in next 7 sts* rpt from * to * to 2nd last st, work 2 sc in last st. (54)
Rnd 10: Sk 1st 2 sts, *2dc in next, dc in 2nd skipped stitch, sk next 2 sts*, rpt from *to* till end of rnd sk last st (54)
Rnd 11: Sc in 1st and each st around (54)
Rnd 12: Sk 1st st, 2dc in next, dc in skipped stitch *sk next 2 sts, 2dc in next st, dc in 2nd skipped stitch*, rpt from *to* till end of rnd, sk last st (54)
Rnd 13: Sc in 1st and each st around (54)
Rnd 14: Sk 1st st, 2dc in next, dc in skipped stitch *sk next 2 sts, 2dc in next st, dc in 2nd skipped stitch*, rpt from *to* till end of rnd, sk last st (54)
Rnd 15: Sc in 1st and each st around (54)
Rnd 16: Sk 1st st, 2dc in next, dc in skipped stitch *sk next 2 sts, 2dc in next st, dc in 2nd skipped stitch*, rpt from *to* till end of rnd, sk last st (54)
BRIM
Note about resizing the brim: If at any point you find the brim is getting to a size you like simply stop adding increase rounds and finish by adding two final rounds of single crochet.
Change to 5.00 mm hook
Rnd 17: 2 sc in 1st and each st around (108)
Rnd 18: Sc in 1st 17 sts, 2 sc in next, *sc in next 17 st, 2 sc in next* rpt from * to * to 2nd last st, work 2 sc in last st. (114)
Rnd 19: Sc in 1st 18 sts, 2 sc in next, *sc in next 18 sts, 2 sc in next* rpt from * to * to 2nd last st, work 2 sc in last st. (120)
Rnd 20: Sc in 1st 19 sts, 2 sc in next, *sc in next 19 sts, 2 sc in next* rpt from * to * to 2nd last st, work 2 sc in last st. (126)
Rnd 21: Sc in 1st 10 sts, 2 sc in next, *sc in next 20 sts, 2 sc in next* rpt from * to * to last 10 sts, sc in last 10 sts (132)
Rnd 22: Sc in 1st 21 sts, 2 sc in next, *sc in next 21 sts, 2 sc in next* rpt from * to * to 2nd last st, work 2 sc in last st. (138)
Rnd 23: Sc in 1st 11 sts, 2 sc in next, *sc in next 22 sts, 2 sc in next* rpt from * to * to last 11 sts, sc in last 11 sts (144)
Rnd 24: Sc in 1st 23 sts, 2 sc in next, *sc in next 23 sts, 2 sc in next* rpt from * to * to 2nd last st, work 2 sc in last st. (150)
Rnd 25: Sc in 1st and each st around (150)
Rnd 26: Sc in 1st 12 sts, 2sc in next, *sc in next 24 sts, 2 sc in next* rpt from * to * to last 12 sts, sc in last 12 sts (156)
Rnd 27: Sc in 1st 25 sts, 2sc in next, *sc in next 25 sts, 2 sc in next* rpt from * to * to 2nd last st, work 2 sc in last st. (162)
If using contrast colour for finishing the brim change to that colour now.
Rnds 28 – 29: Sc in 1st st and each st around. Fasten off and weave in ends. (162)
Ladies
Using 6.50 mm hook Ch 2
Rnd 1: Work 6 sc in 2nd st from hook. (6)
Rnd 2: 2 sc in 1st st and each st around. (12)
Rnd 3: 1 sc in 1st st *2 sc in next st, 1 sc in next st* rpt from * to * to 2nd last st, work 2 sc in last st. (18)
Rnd 4: 1 sc in 1st 2 sts *2 sc in next st, 1 sc in next 2 sts* rpt from * to * to 2nd last st, work 2 sc in last st. (24)
Rnd 5: 1 sc in 1st 3 sts *2 sc in next st, 1 sc in next 3 sts* rpt from * to * to 2nd last st, work 2 sc in last st. (30)
Rnd 6: 1 sc in 1st 4 sts *2 sc in next st, 1 sc in next 4 sts* rpt from * to * to 2nd last st, work 2 sc in last st. (36)
Rnd 7: 1 sc in 1st 5 sts *2 sc in next st, 1 sc in next 5 sts* rpt from * to * to 2nd last st, work 2 sc in last st. (42)
Rnd 8: 1 sc in 1st 6 sts *2 sc in next st, 1 sc in next 6 sts* rpt from * to * to 2nd last st, work 2 sc in last st. (48)
Rnd 9: 1 sc in 1st 7 sts *2 sc in next st, 1 sc in next 7 sts* rpt from * to * to 2nd last st, work 2 sc in last st. (54)
Rnd 10: 1 sc in 1st 8 sts *2 sc in next st, 1 sc in next 8 sts* rpt from * to * to 2nd last st, work 2 sc in last st. (60)
Rnd 11: Sk 1st st, 2dc in next, dc in skipped stitch *sk next 2 sts, 2dc in next st, dc in 2nd skipped stitch*, rpt from *to* till end of rnd, sk last st (60)
Rnd 12: Sc in 1st and each st around (60)
Rnd 13: Sk 1st st, 2dc in next, dc in skipped stitch *sk next 2 sts, 2dc in next st, dc in 2nd skipped stitch*, rpt from *to* till end of rnd, sk last st (60)
Rnd 14: Sc in 1st and each st around (60)
Rnd 15: Sk 1st st, 2dc in next, dc in skipped stitch *sk next 2 sts, 2dc in next st, dc in 2nd skipped stitch*, rpt from *to* till end of rnd, sk last st (60)
Rnd 16: Sc in 1st and each st around (60)
Rnd 17: Sk 1st st, 2dc in next, dc in skipped stitch *sk next 2 sts, 2dc in next st, dc in 2nd skipped stitch*, rpt from *to* till end of rnd, sk last st (60)
BRIM
Note about resizing the brim:
If at any point you find the brim is getting to a size you like simply stop adding increase rounds and finish by adding two final rounds of single crochet.
Change to 5.00 mm hook
Rnd 18: 2 sc in 1st and each st around (120)
Rnd 19: Sc in 1st 14 sts, 2 sc in next, *sc in next 14 st, 2 sc in next* rpt from * to * to 2nd last st, work 2 sc in last st. (128)
Rnd 20: Sc in 1st 15 sts, 2 sc in next, *sc in next 15 sts, 2 sc in next* rpt from * to * to 2nd last st, work 2 sc in last st. (136)
Rnd 21: Sc in 1st 8 sts, 2 sc in next, *sc in next 16 sts, 2 sc in next* rpt from * to * to last 8 sts, sc in last 8 sts (144)
Rnd 22: Sc in 1st 17 sts, 2 sc in next, *sc in next 17 sts, 2 sc in next* rpt from * to * to 2nd last st, work 2 sc in last st. (152)
Rnd 23: Sc in 1st 18 sts, 2 sc in next, *sc in next 18 sts, 2 sc in next* rpt from * to * to 2nd last st, work 2 sc in last st. (160)
Rnd 24: Sc in 1st 19 sts, 2 sc in next, *sc in next 19 sts, 2 sc in next* rpt from * to * to 2nd last st, work 2 sc in last st. (168)
Rnd 25: Sc in 1st 10 sts, 2 sc in next, *sc in next 20 sts, 2 sc in next* rpt from * to * to last 10 sts, sc in last 10 sts (176)
Rnd 26: Sc in 1st 21 sts, 2sc in next, *sc in next 21 sts, 2 sc in next* rpt from * to * to 2nd last st, work 2 sc in last st. (184)
Rnd 27: Sc in 1st and each st around (184)
Rnd 28: Sc in 1st 11 sts, 2sc in next, *sc in next 22 sts, 2 sc in next* rpt from * to * to last 11 sts, sc in last 11 sts (192)
Rnd 29: Sc in 1st 23 sts, 2sc in next, *sc in next 23 sts, 2 sc in next* rpt from * to * to 2nd last st, work 2 sc in last st. (200)
Rnd 30: Sc in 1st 24 sts, 2sc in next, *sc in next 24 sts, 2 sc in next* rpt from * to * to 2nd last st, work 2 sc in last st. (208)
If using contrast colour for finishing the brim change to that colour now.
Rnds 31 – 32: Sc in 1st st and each st around. Fasten off and weave in ends. (208)
- Add Pattern to your Ravelry Library
- Download on Etsy
- Pin Now Make Later
