


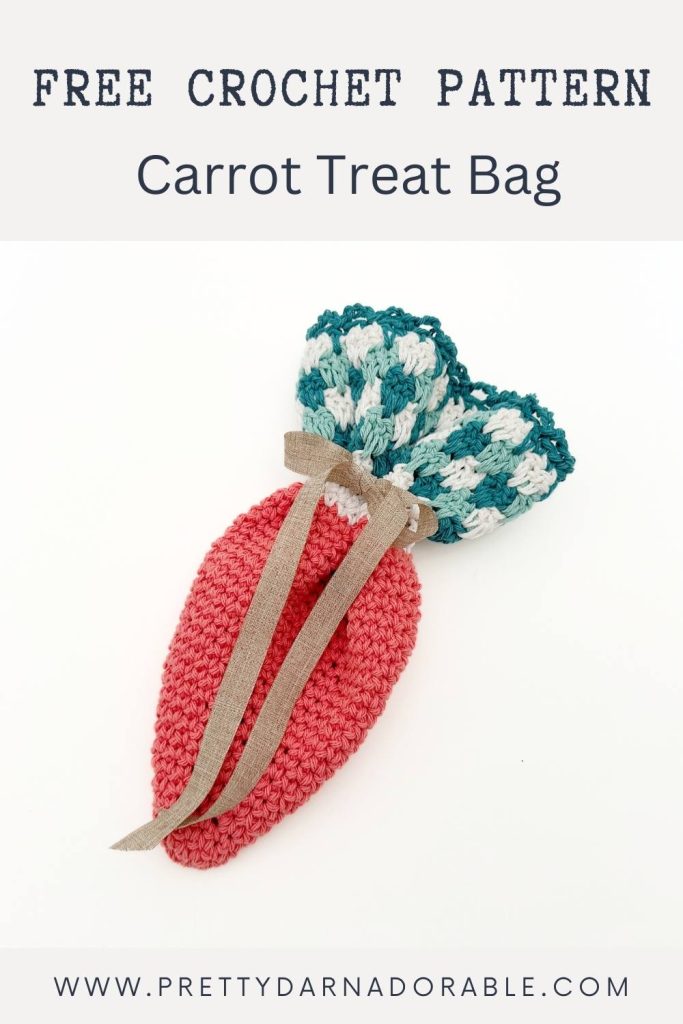
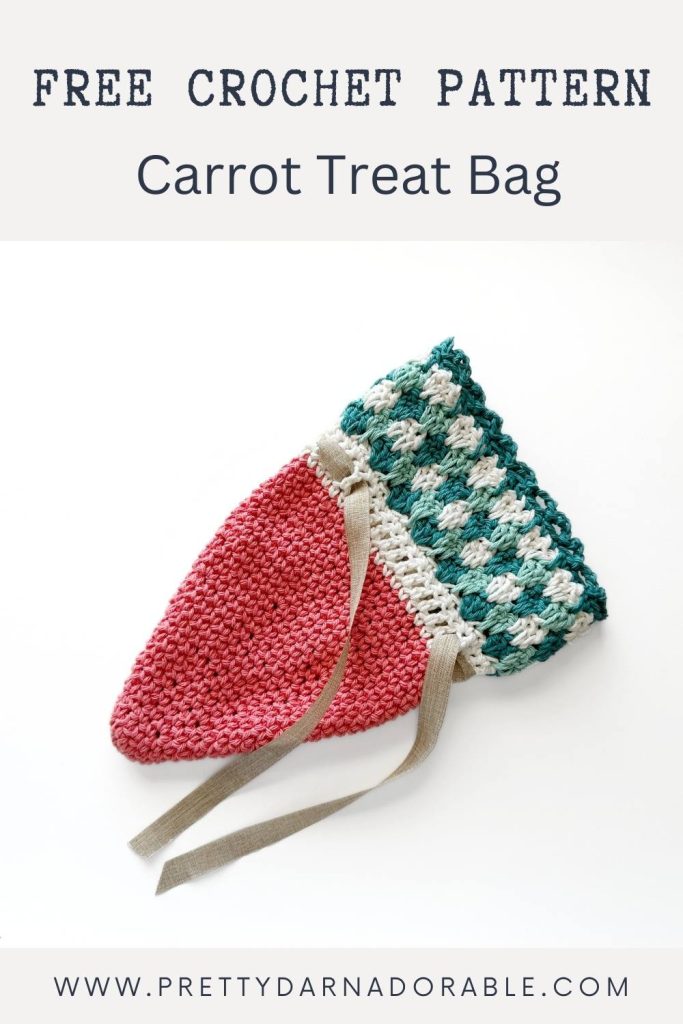
This free crochet carrot treat bag pattern is a fun, easy project using any worsted weight yarn of your choice. With a tapered carrot body and a gingham-inspired top in three colors, it’s cinched with a drawstring for that perfect Easter treat bag. Now, let me tell you what sparked it.
I was in Michaels, and I saw some fabric carrot bags, orange bottom, gingham top. My first thought? That’s a Country Charm project waiting to happen. I came home, grabbed my cotton yarn, and the rest fell into place… Really quickly! I wasn’t even planning a carrot pattern until I saw these in Micheals.
I used Bernat Handicrafter Cotton in orange for the carrot and three colors for the top. Any worsted weight yarn works, but I love cotton for that crisp stitch definition. I used a 6.5 mm hook. I’d call this an easy pattern, if you’ve made a hat, you’ll be comfortable with this.
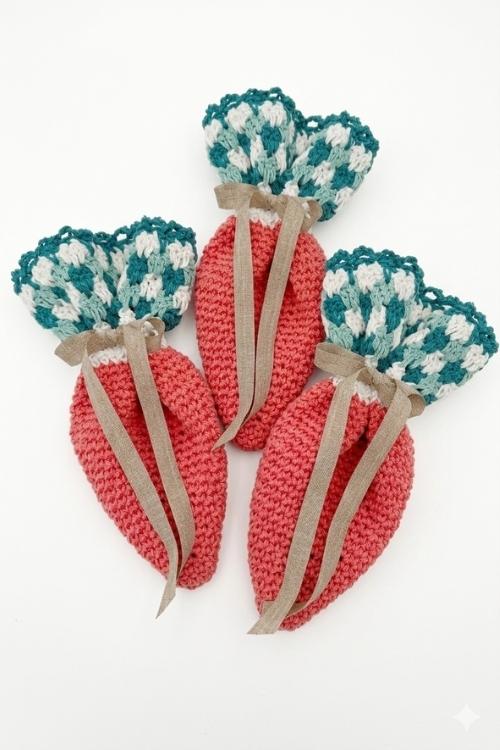
This Crochet Carrot Treat Bag Pattern is such a quick little make. You can easily finish one in just a few hours, which makes it perfect for last-minute Easter baskets, classroom treats, or spring party favours.
It’s also scrap friendly. You only need small amounts of yarn for the top of the carrot bag, so it’s a great way to use up leftover worsted weight from your stash without starting a big project.
What Can You Put Inside?
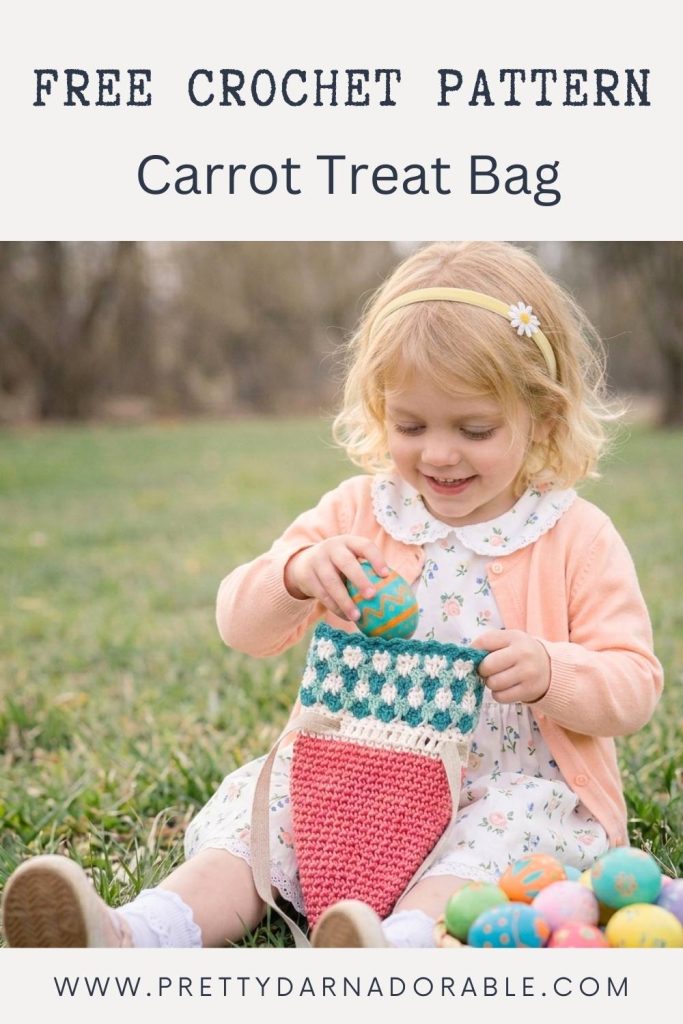
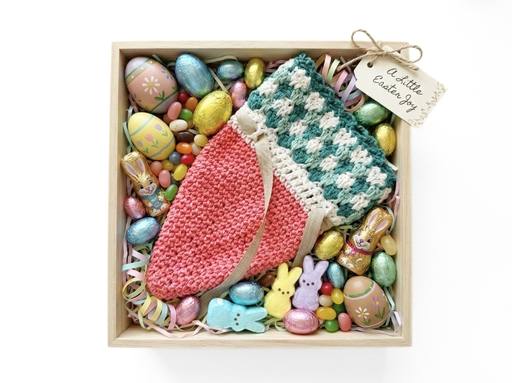
Mini chocolate eggs, jelly beans, and all those little Easter sweets fit perfectly inside this Crochet Carrot Treat Bag Pattern. But don’t let the “treat bag” name fool you.
This little carrot is just the right size for candy, yet it also works beautifully for small gifts like AirPods, lip balm, tiny toys, folded money for spring parties, or a tucked-in gift card. It’s so much more special than handing someone a plastic bag.
Ways to Use It
Once you’ve finished the carrot, here’s where you can get creative!
- Fill it with Easter candy.
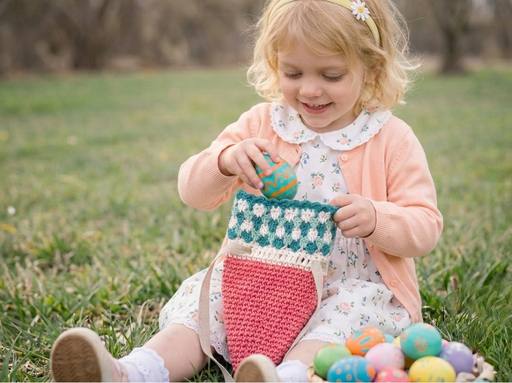
- Add a handle for egg hunts.
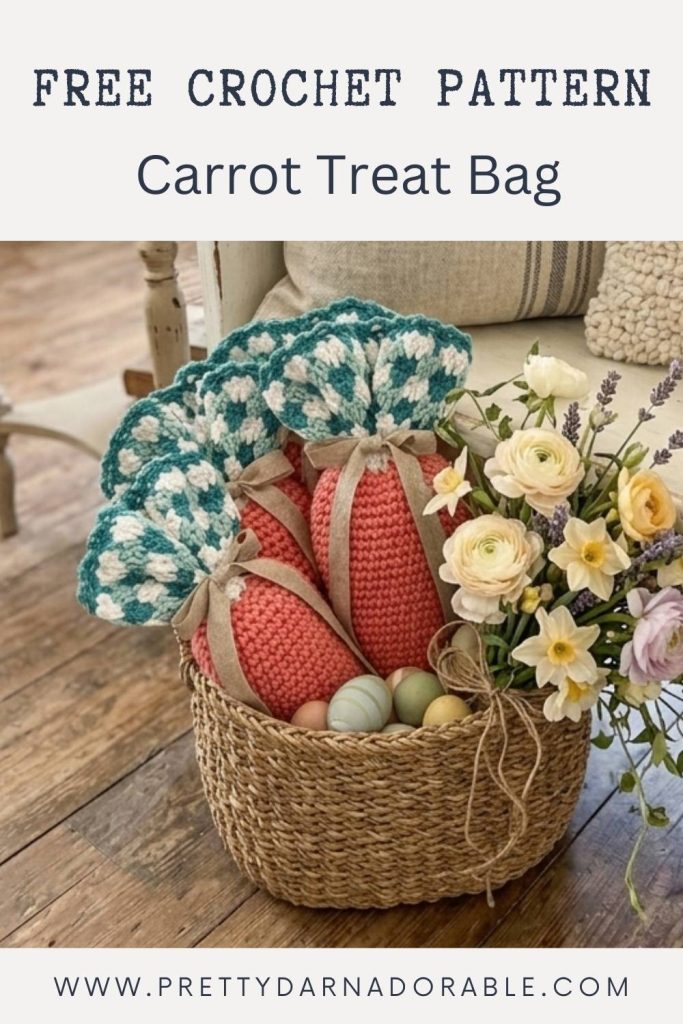
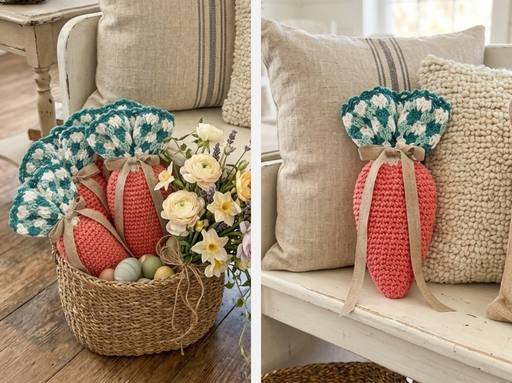
- Stuff it as spring decor.
Colour Combination Ideas
Your carrot body is one color, and the top is three. Try these:
- Classic Spring: Orange body; Aqua, Cream, Soft White top.
- Buffalo Plaid: Orange body; Black, Grey, White top.
- Farmhouse Neutral: Burnt Orange body; Taupe, Cream, Brown top.
(And any other combos you want!)
Purchase Ad Free Pattern – Instant Download!
Purchase the ad-free PDF for a smooth, distraction-free crocheting experience anytime, anywhere.
Already a subscriber? Check your latest email for your special discount code. Not subscribed yet? Sign up here to get yours!
Thanks so much for supporting my blog!
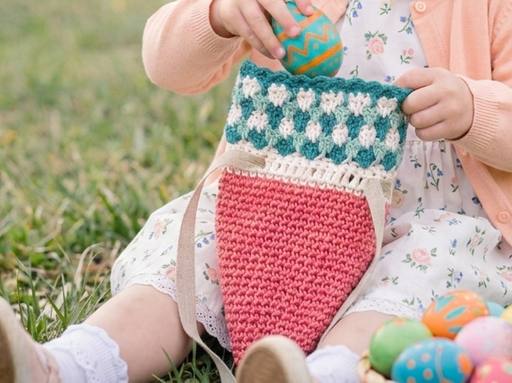
Country Charm Carrot Treat Bag
Skill Level
Easy
Abbreviations (US Terms)
- ch – chain
- dc – double crochet
- ldc – long double crochet (see special stitches)
- sc – single crochet
- sk – skip
- sp – space
- st – stitch
- sts – stitches
- sl st – slip stitch
Gauge
No swatching required for this project.
👉 Gauge isn’t important here, your carrot may just turn out a little bigger or smaller depending on your yarn and hook.
Finished Measurements
• Total Length: Approximately 12 inches
• Treat Portion (orange section only): Approximately 8 inches
• Width at Widest Point: Approximately 7 inches
Materials Needed
- Worsted weight yarn I used Bernat Handicrafter Cotton
- Orange – body of the carrot – 45 Grams
- Teal, Aqua and Cream 15 grams each for the top of the carrot
- 6.50 mm Crochet hook
- Yarn needle
- Scissors
Not sure if you have enough you can use my Yarn Leftover Calculator to figure it out!
Please note that the actual amount of yarn needed may change depending on the yarn chosen always purchase a little more than you think you may need.
Note: These carrots can be made with any yarn weight and hook size you like. Just keep in mind that the texture, size, and overall look will change depending on what you choose.
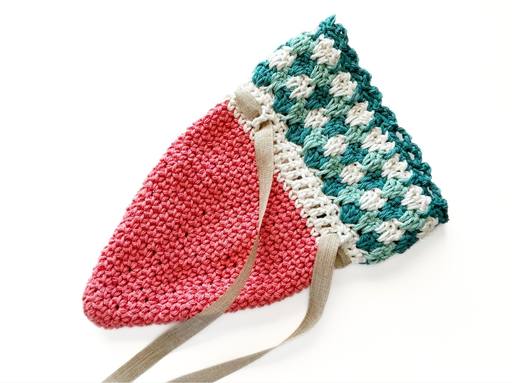
Notes
- The body of this carrot is worked bottom up in continuous rounds without joining or turning.
- The top of the carrot is worked in joined rounds, and you’ll turn at the end of each round to keep the texture even.
- Change colours on the final stitch of the round unless otherwise noted.
- Stitch counts are included at the end of each round in ( ).
- Written in US crochet terms.
- Long double crochet (ldc) in Round 3 and beyond is worked into the sc of Round 1 (or into the middle st of the cluster below in later rounds).
- Turning chain for the top of the carrot does not count as a stitch.
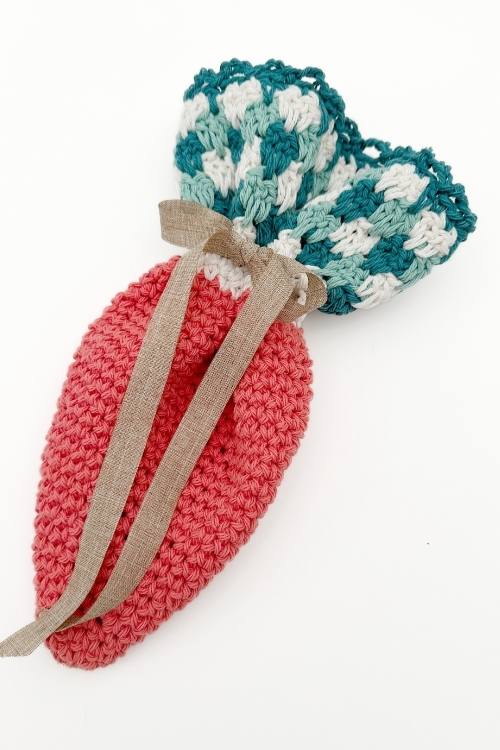
Special Stitches
Long Double Crochet (ldc): Work double crochet around and in front of the previous Rnd and into the stitch indicated one Rnd below.
Cluster: In the space between groups of 3 dc, work (dc, ldc in middle st of cluster below, dc). When working ldc be sure to bring the height of the stitch up to match the height of the dc previously made in the space between the clusters.
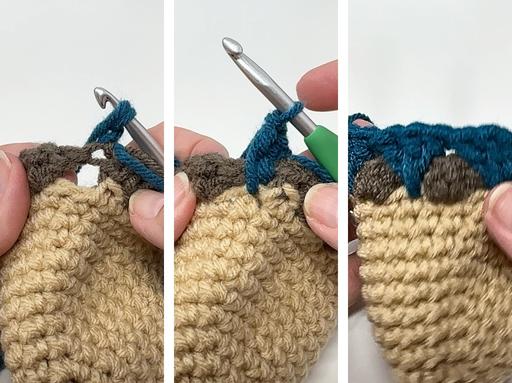
Construction of the Carrot
Work the carrot body bottom-up in single crochet rounds. When you reach the top, switch to a coordinating colours to create the gingham affect.
Using Colours in Your Carrot
Three colours are used for the top of the carrot. You will change colours at the end of each round.
Work each round completely in one colour. When the round is finished, switch to the next colour before starting the following round.
💡 Tip:
Not sure which colours to use? Try out my Random Stripe Generator ! It’s a fun tool that not only mixes and matches random stripes for you, but you can also upload your own photos and pull colour palettes directly from them. A super easy way to figure out the perfect stripe order for your carrot.
Colour Changes for the Top of the Carrot
Three colours are used in the top of the carrot – change colours at each round.
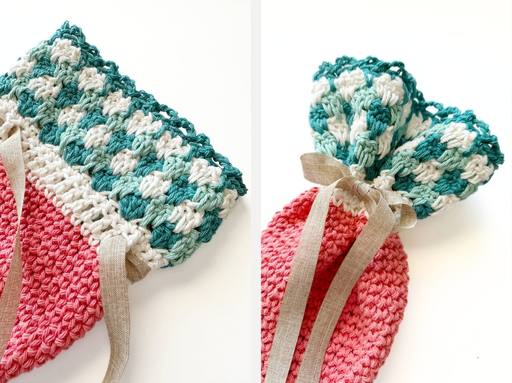
How to Make Colour Changes
Steps
- Work the round as written in the current colour.
- When you get to the very last slip stitch (sl st) of the round, stop before completing it.
- Drop the old colour and place the new colour on your hook.
- Pull the new colour through to finish the slip stitch – this completes the join for that round.
- Chain 1 and turn (as pattern instructs), now working the next round in the new colour.
- No need to weave in – simply tie a knot and tuck them to the inside of the carrot.
Note: Make sure all yarn tails from your colour changes are pulled to the same side of the carrot. Round 1 is the outside of the carrot, so pull all tails to the inside. If you forget, no worries – just use your crochet hook to grab them through and pull them to the inside later.
Instructions
The carrot is worked from the bottom up in continuous rounds without joining. Place a stitch marker in the first stitch of each round to help keep track of your count.
With a 6.50 mm hook, ch 2.
Rnd 1: Work 6 sc into the 2nd ch from the hook. (6 sts)
Alternative start: You can also begin with a magic circle and work 6 sc into the ring.
Rnd 2: 2 sc in 1st st and each st around (12)
Rnds 3 – 4: Sc in 1st and each st around (12)
Rnd 5: 1 sc in 1st st *2 sc in next st, 1 sc in next st* rpt from * to * till end of rnd (18)
Rnds 6 – 7: Sc in 1st and each st around (18)
Rnd 8: 1 sc in 1st 2 sts *2 sc in next st, 1 sc in next 2 sts* rpt from * to * till end of rnd (24)
Rnds 9 – 10: Sc in 1st and each st around (24)
Rnd 11: 1 sc in 1st 3 sts *2 sc in next st, 1 sc in next 3 sts* rpt from * to * till end of rnd (30)
Rnds 12 – 13: Sc in 1st and each st around (30)
Rnd 14: 1 sc in 1st 4 sts *2 sc in next st, 1 sc in next 4 sts* rpt from * to * till end of rnd (36)
Rnds 15 – 16: Sc in 1st and each st around (36)
Rnd 17: 1 sc in 1st 5 sts *2 sc in next st, 1 sc in next 5 sts* rpt from * to * till end of rnd (42)
Rnds 18 – 25: Sc in 1st st and each st around (42). After last round change to cream yarn.
Rnd 26: Sc in 1st st and each st around (42)
Rnd 27: Dc in 1st st and each st around (42)
Rnd 28: Sc in 1st st and each st around (42)
Top of Carrot
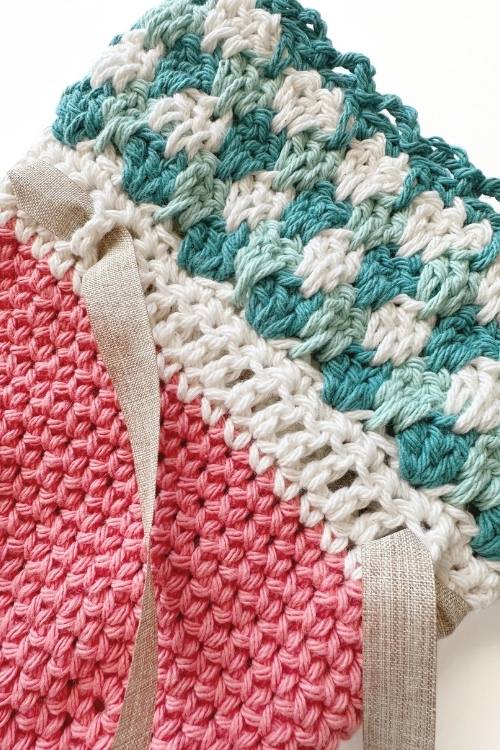
Rnd 1: 3 dc in 1st sc, sk next 2 sts, 3 dc in next st, sk next 2 sts; repeat around. Skip last 2 sts. Join with sl st, ch 1, turn. (42)
Rnd 2: In space before 1st cluster: (dc, ldc in sc below, dc). Sk next cluster, in space before next cluster (dc, ldc in sc below, dc). Repeat around. Skip last 2 sts. Join with sl st, ch 1, turn. (42)
Rnds 3 – 6: Working in space before 1st cluster, (dc, ldc in 2nd st of cluster below, dc). *Sk next cluster, in space before next cluster (dc, ldc in 2nd st of cluster below, dc).* Repeat from *to* to last 3 sts. Skip last 2 sts. Join with sl st, ch 1, turn. (42)
Note for final round: You will no longer be working into the spaces. Work directly into stitches as instructed below.
Rnd 7: Dc in middle st of cluster below, sk next st, sc in next 2 sts. *dc in middle st of cluster below, sk next, sc in next 2 sts.* Repeat from *to* to last 3 sts. Skip next st, sc in the last 2 sts. (42 sts).
Rnd 8: Ch 3, skip next st, slst in next. *Ch 3, sk next st, slst in next* rpt from *to* around the top of the carrot.
Adding the Ribbon Drawstring
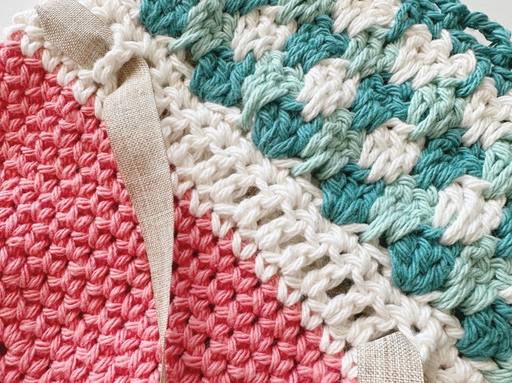
Cut a piece of ribbon approximately 20–24 inches long.
Starting at the front of the carrot, use your fingers or crochet hook to weave the ribbon under every 5th double crochet stitch from Round 27.
Go under one stitch, skip the next four stitches, then go under the next stitch. Repeat this pattern evenly around the carrot.
Pull both ends of the ribbon to gather the top closed and tie into a bow.
Because it’s scrap friendly, it’s also a great stash-buster project when you just want something quick and satisfying on your hook.
The simple drawstring closure keeps everything tucked safely inside, while still being easy for little hands to open and close.
Did you make any of these?
I would love to see what you have made be sure to mention @prettydarnadorable or tag me using #prettydarnadorable on Instagram so I can see your creations!
More Free Crochet Patterns You;ll Love!
Frequently Asked Questions
Yes! Adjust your hook size to match, but the shaping works with any worsted or similar weight.
Change colors at the final pull-through of the last stitch of a round. Keep tension consistent.
Absolutely. Just keep increasing or stop sooner, the pattern scales easily.