


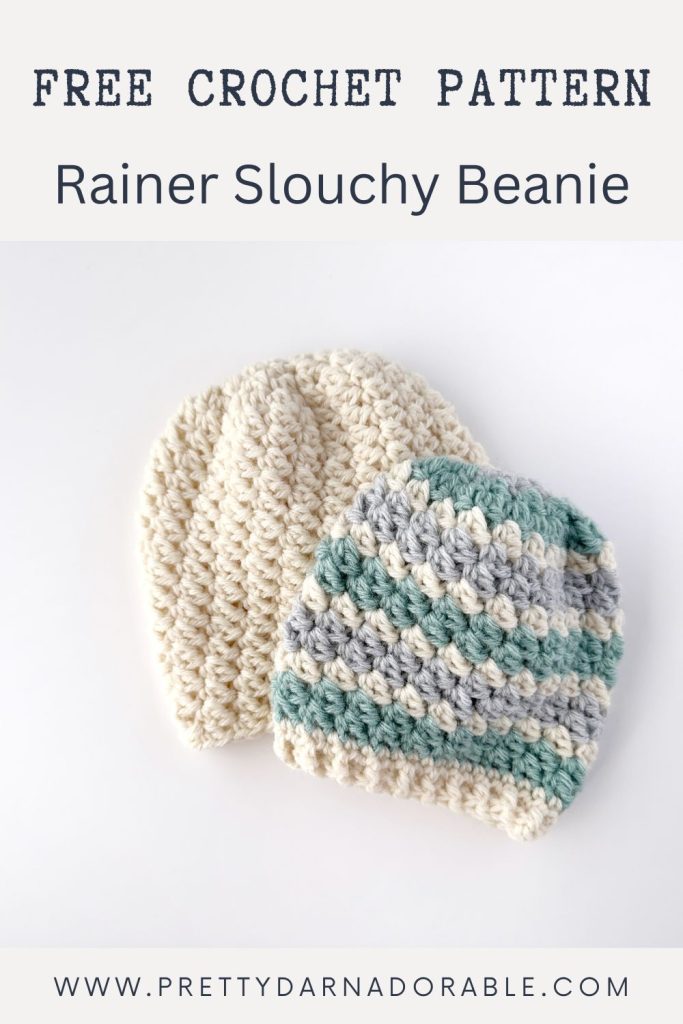
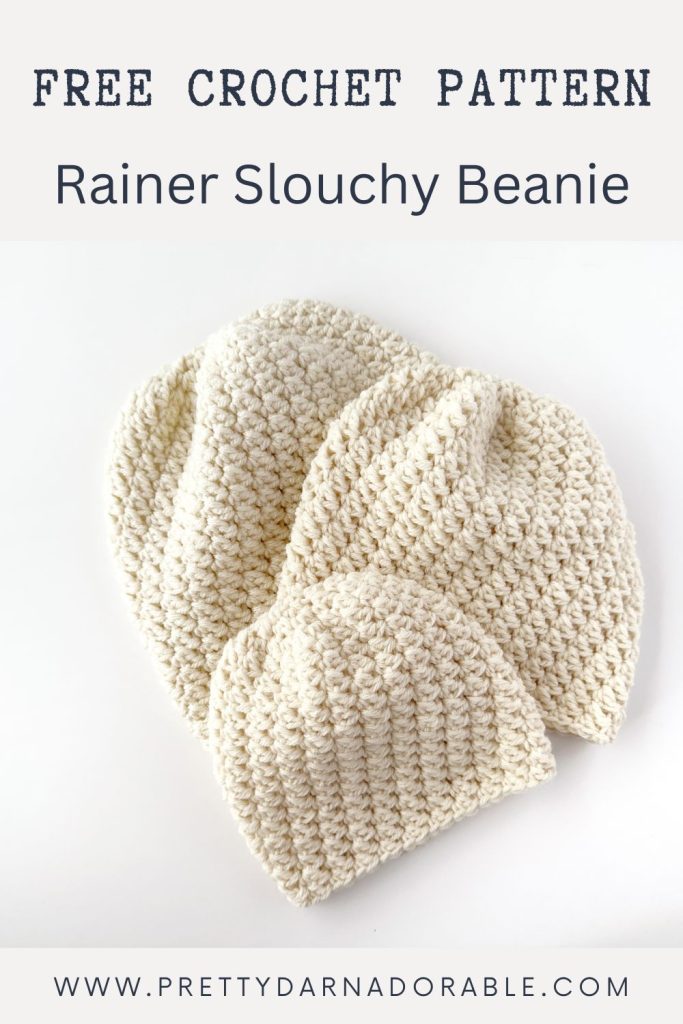


The Rainer Slouch Hat has always held a special place in my heart. It was one of the very first designs I ever shared, and over the years it’s become a favourite among crocheters. It makes me so happy to finally bring this easy crochet slouch hat pattern here to the blog so everyone can enjoy it for free.
This free crochet slouch hat pattern is one of those simple, relaxing projects that you can make while catching up on your favourite show or chatting with a friend. It uses basic stitches, works up quickly with worsted weight yarn, and the result is a soft, slightly slouchy hat that looks great on everyone.

What Makes This Easy Crochet Slouch Hat Pattern So Great
This beginner crochet hat pattern is simple, relaxing, and great for anyone who wants to crochet something stylish without stress.
Here’s why it’s a favourite:
- Uses simple crochet stitches: single crochet, double crochet, and front/back post double crochet
- Worked in continuous rounds, so there are no seams to sew
- Includes six sizes from newborn 0–3 months to adult
- Looks beautiful in solid colours or stripes
- The crochet hat with ribbed brim gives it a professional, stretchy finish
- Perfect stash-buster for leftover worsted weight yarn
Both striped and solid versions work equally well making it a flexible easy crochet hat pattern for any occasion.
If you’ve ever wanted a go-to easy crochet hat pattern that always turns out, this is the one to save and make on repeat.

Yarn Colour Ideas
The Rainer Slouch Hat looks beautiful whether you stick with neutrals or experiment with colour.
Ideas to try:
- Neutrals like cream, grey, or beige for a timeless look
- Warm earth tones like tan, mocha, or chestnut
- Bright shades like coral, mustard, or teal for fun, modern style
- Use up leftover yarn for striped crochet slouch hats in multiple colours
- And of course seasonal colours! So fun for Christmas!
This crochet slouch beanie has a relaxed, slightly oversized fit. For extra slouch, simply add a few more rounds before starting the ribbed band.
Tips for Beginners
- This beginner crochet hat pattern is great practice for improving your stitch consistency and tension control.
- Always use a stitch marker to track the first stitch of each round since the pattern is worked in spirals.
- If your hat looks wavy early on, don’t worry, it smooths out perfectly
- Keep your tension relaxed for a soft, stretchy texture.
- Mix and match colours for unique striped versions.
Most Popular
Hat Patterns

Purchase Ad Free Pattern – Instant Download!
Purchase the ad-free PDF for a smooth, distraction-free crocheting experience anytime, anywhere.
Already a subscriber? Check your latest email for your special discount code. Not subscribed yet? Sign up here to get yours!
Thanks so much for supporting my blog!
Notes
- The hat is worked in continuous rounds, no joining unless instructed.
- Use a stitch marker to keep track of the first stitch of each round.
- The top of the hat may look slightly rippled at first; this will even out as you continue.
- To make your hat tighter, drop down one hook size.
- For more slouch, add a few rounds before the ribbed section.
- When making striped version divide the total amount of yarn needed by number of colours used.
Skill Level
Beginner
Abbreviations
- ch – chain
- sc – single crochet
- dc – double crochet
- fpdc – front post double crochet
- bpdc – back post double crochet
- sl st – slip stitch
- st(s) – stitch(es)
Each stitch in this beginner crochet hat pattern builds texture and softness, making this hat both stylish and comfortable.
Gauge
12 sc and 13 rows = 4” square using 6.50 mm hook.
Checking gauge ensures your crochet slouch beanie will fit correctly across all sizes.

Materials Needed
For my sample, I used Bernat Premium and Lion’s Brand Wool EAse.
Yarn:
- Bernat Premium (or any medium 4 / worsted weight yarn) shown above.
- Colour A – Dark Grey
- Colour B – Light Grey
- Colour C – Cream
- Solid colour hat yarn requirements below. If you are making the striped version simply divide the total amount by the number by 2 or 3 depending on the number of colours you want to use.
- 6.50 mm crochet hook for the body
- 6.00 mm crochet hook for the ribbed band
- Stitch markers
- Tapestry needle
Finished Measurements & Yarn Requirements
0 to 3 months:
- Width: 15”
- Height: 7”
- Yarn: 50g, 78m, 1.76 oz, 85 yds
3 to 6 months:
- Width: 16”
- Height: 7.5”
- Yarn: 55g, 86m, 1.94 oz, 94 yds
6 to 12 months:
- Width: 17”
- Height: 8.5”
- Yarn: 60g, 94m, 2.12 oz, 102 yds
12 months to 3 years:
- Width: 18”
- Height: 9”
- Yarn: 80g, 125m, 2.82 oz, 137 yds
3 to 10 years:
- Width: 19”
- Height: 9.5”
- Yarn: 90g, 140m, 3.17 oz, 154 yds
Adult:
- Width: 21”
- Height: 10.5”
- Yarn: 100g, 156m, 3.53 oz, 171 yds
Please note that the actual amount of yarn needed may change depending on the yarn chosen always purchase a little more than you think you may need..
Striping
If you’re making a striped version, keep in mind that the beginning rounds use less yarn than the body of the hat because there are fewer stitches at the top. To estimate yardage for each colour, you can start by dividing the total yarn by the number of colours to get a rough idea, but expect to use a little more yarn for the colours worked in the middle and lower rounds. It’s always safest to have extra yarn in each colour—especially if you’re following the striping pattern exactly as shown.
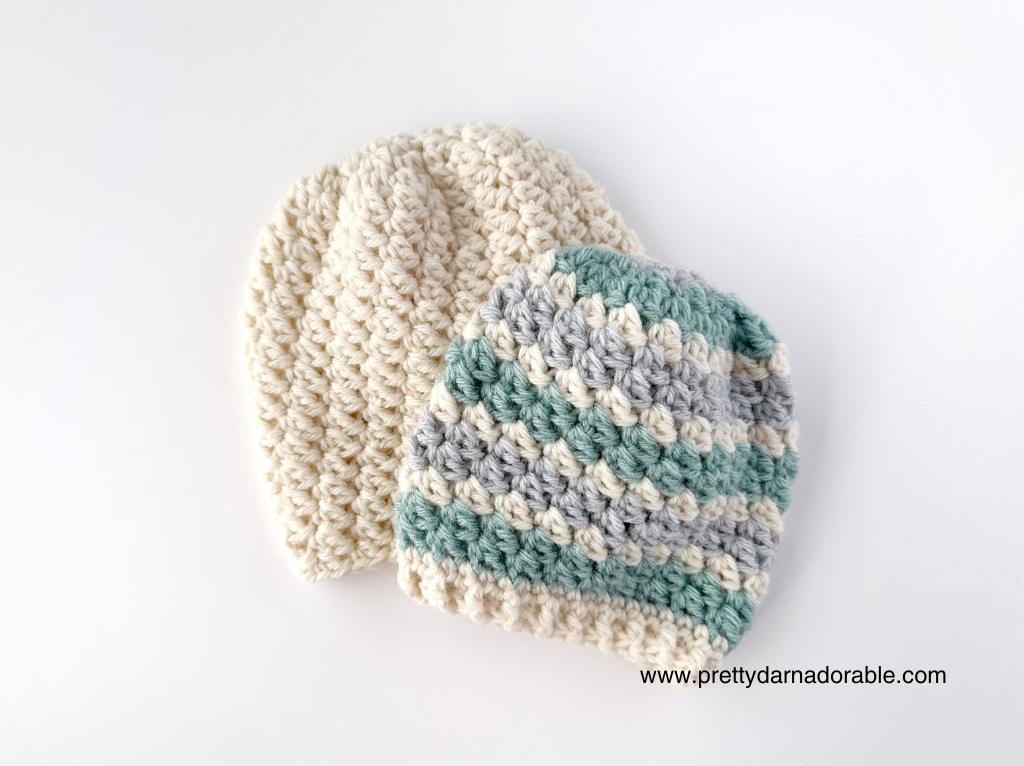
Note striping may vary from picture shown above depending on size being made.
- 1 Round – Colour A
- 2 Rounds – Colour B
- 1 Round – Colour A
- 2 Rounds – Colour C
Repeat until Ribbed Band Instructions.

Newborn 0 – 3 Months
Entire hat is worked in continuous rounds.
For best results, use a marker in the first stitch of each round to indicate the beginning of the round.
Using 6.50 mm hook ch 3
Rnd 1: Work 10 dc in 3rd ch from hook. (10)
Rnd 2: (Sc, dc) in 1st st and each st around (20)
Rnd 3: (Sc, dc) in 1st st and each st around (40)
Your hat will look quite ‘rippled’ at this point it is supposed to look like that 🙂
Rnds 4-16: (Sc, dc) in 1st sc *sk next st (sc, dc) in next sc* rpt from *to* end of rnd (40)
Change to 6.00 mm hook
Without Ribbed Band
Rnds 17-18: (Sc, dc) in 1st sc *sk next st, (sc, dc) in next sc* rpt from *to* end of rnd (40)
Ribbed Band
Rnd 17: Dc in 1st and each st around. Join with slst to 1st dc. Ch 2, turn. (40)
Rnd 18: Fpdc in 1st st, bpdc in next. *fpdc in next st, bpdc in next* rpt from *to* until end of rnd. Join with slst to 1st fpdc. Fasten off and weave in ends. (40)
Baby 3 – 6 Months
Entire hat is worked in continuous rounds.
For best results, use a marker in the first stitch of each round to indicate the beginning of the round.
Using 6.50 mm hook ch 2
Rnd 1: Work 6 sc in 2nd ch from hook (6)
Rnd 2: Hdc in 1st st, (sc, dc) in each st around (11)
Rnd 3: (Sc, dc) in 1st st and each st around (22)
Rnd 4: (Sc, dc) in 1st st and each st around (44)
Your hat will look quite ‘rippled’ at this point it is supposed to look like that 🙂
Rnds 5-17: (Sc, dc) in next sc *sk next st (sc, dc) in next sc* rpt from *to* end of rnd (44)
Change to 6.00 mm hook
Without Ribbed Band
Rnds 18-19: (Sc, dc) in 1st sc *sk next st, (sc, dc) in next sc* rpt from *to* end of rnd (44)
Ribbed Band
Rnd 18: Dc in 1st and each st around. Join with slst to 1st dc. Ch 2, turn. (44)
Rnd 19: Fpdc in 1st st, bpdc in next. *fpdc in next st, bpdc in next* rpt from *to* until end of rnd. Join with slst to 1st fpdc. Fasten off and weave in ends. (44)
Baby 6 – 12 Months
Entire hat is worked in continuous rounds.
For best results, use a marker in the first stitch of each round to indicate the beginning of the round.
Using 6.50 mm hook ch 2
Rnd 1: Work 6 sc in ch 2nd st from hook (6)
Rnd 2: (Sc, dc) in 1st and each st around (12)
Rnd 3: (Sc, dc) in 1st and each st around (24)
Rnd 4: (Sc, dc) in 1st and each st around (48)
Your hat will look quite ‘rippled’ at this point it is supposed to look like that 🙂
Rnds 5-20: (Sc, dc) in next sc *sk next st (sc, dc) in next sc* rpt from *to* end of rnd (48)
Change to 6.00 mm hook
Without Ribbed Band
Rnds 21-23: (Sc, dc) in 1st sc *sk next st, (sc, dc) in next sc* rpt from *to* end of rnd (48)
Ribbed Band
Rnd 21: Dc in 1st and each st around. Join with slst to 1st dc. Ch 2, turn. (48)
Rnds 22-23: Fpdc in 1st st, bpdc in next. *fpdc in next st, bpdc in next* rpt from *to* until end of rnd. Join with slst, to 1st fpdc. Ch 2, turn. (48)
After round 23 Join with slst to 1st fpdc, fasten off and weave in ends.
Toddler 1 to 3 Years
Entire hat is worked in continuous rounds.
For best results, use a marker in the first stitch of each round to indicate the beginning of the round.
Using 6.50 mm hook ch 2
Rnd 1: Work 7 sc in 2nd st from hook (7)
Rnd 2: 1 hdc in 1st st, (sc, dc) in each st around (13)
Rnd 3: (Sc, dc) in 1st st, and each st around (26)
Rnd 4: (Sc, dc) in 1st and each st around (52)
Your hat will look quite ‘rippled’ at this point it is supposed to look like that 🙂
Rnds 5-21: (Sc, dc) in 1st st *sk next st, (sc, dc) in next sc* rpt from *to* end of rnd (52)
Change to 6.00 mm hook
Without Ribbed Band
Rnds 22-24: (Sc, dc) in 1st sc *sk next st, (sc, dc) in next sc* rpt from *to* end of rnd (52)
Ribbed Band
Rnd 22: Dc in 1st and each st around. Join with slst to 1st dc. Ch 2, turn. (52)
Rnds 23-24: Fpdc in 1st st, bpdc in next. *fpdc in next st, bpdc in next* rpt from *to* until end of rnd. Join with slst to 1st fpdc. Ch 2, turn. (52)
After round 24 fasten off and weave in ends.
Child 3 to 10 Years
Entire hat is worked in continuous rounds. For best results, use a marker in the first stitch of each round to indicate the beginning of the round.
Using 6.50 mm hook Ch 2
Rnd 1: Work 7 sc in 2nd st from hook (7)
Rnd 2: (Sc, dc) in 1st st and each st around (14)
Rnd 3: (Sc, dc) in 1st and each st around (28)
Rnd 4: (Sc, dc) in 1st and each st around (56)
Your hat will look quite ‘rippled’ at this point it is supposed to look like that 🙂
Rnds: 5-22: (Sc, dc) in 1st sc *sk next st, (sc, dc) in next sc* rpt from *to* end of rnd (56)
Change to 6.00 mm hook
Without Ribbed Band
Rnds 23-26: (Sc, dc) in 1st sc *sk next st, (sc, dc) in next sc* rpt from *to* end of rnd (56)
Ribbed Band
Rnd 23: Dc in 1st and each st around. Join with slst to 1st dc. Ch 2, turn. (56)
Rnds 24-26: Fpdc in 1st st, bpdc in next. *fpdc in next st, bpdc in next* rpt from *to* until end of rnd. Join with slst to 1st fpdc. Ch 2, turn. (56)
After round 26 Join with slst to 1st fpdc, fasten off and weave in ends.
Adult
Entire hat is worked in continuous rounds.
For best results, use a marker in the first stitch of each round to indicate the beginning of the round.
Using 6.50 mm hook Ch 2
Rnd 1: Work 8 sc in 2nd st from hook (8)
Rnd 2: Hdc in 1st st. (Sc, dc) in each st around (15)
Rnd 3: (Sc, dc) in 1st and each st around (30)
Rnd 4: (Sc, dc) in 1st and each st around (60)
Your hat will look quite ‘rippled’ at this point it is supposed to look like that 🙂
Rnds 5-23: (Sc, dc) in 1st sc *sk next st, (sc, dc) in next sc* rpt from *to* end of rnd (60)
Change to 6.00 mm hook
Without Ribbed Band
Rnds 24-28: (Sc, dc) in 1st sc *sk next st, (sc, dc) in next sc* rpt from *to* end of rnd (60)
Ribbed Band
Rnd 24: Dc in 1st and each st around. Join with slst to 1st dc. Ch 2, turn. (60)
Rnds 25-28: Fpdc in 1st st, bpdc in next. *fpdc in next st, bpdc in next* rpt from *to* until end of rnd. Join with slst, to 1st fpdc. Ch 2, turn. (60)
After round 28 Join with slst to 1st fpdc, fasten off and weave in ends.
Frequently Asked Questions
1. How much yarn do I need to crochet a slouch hat?
It depends on the size you’re making and the yarn weight. For this easy crochet slouch hat pattern, you’ll need between 40 and 127 grams of worsted weight yarn (about 188–216 yards for adult sizes). It’s always smart to buy a little extra in case your tension is different or you want to add a pom pom.
2. What is the best yarn for a crochet slouch hat?
A soft worsted weight yarn (medium 4) works best. I used Bernat Premium for my samples — it’s durable, affordable, and comes in beautiful colours. You can also try acrylic, wool blends, or cotton depending on the season and the look you want.
3. How do I make my crochet slouch hat more slouchy?
To get extra slouch, simply add a few more rounds before starting the ribbed band. You can also use a slightly larger hook for a looser fit. Just remember to keep your stitch pattern consistent so the texture stays even.
4. Is this a good crochet pattern for beginners?
Yes! This beginner crochet hat pattern uses only basic stitches — single crochet, double crochet, and front/back post double crochet. It’s a great project for anyone wanting to learn how to make a crochet slouch beanie without getting overwhelmed.
The Rainer Slouch Hat is an easy crochet slouch hat pattern that’s simple, modern, and perfect for beginners.
It’s the kind of project you’ll reach for whenever you need a quick, cozy make that still looks beautifully finished.
Grab your favourite worsted weight yarn, pick your colours, and enjoy this relaxing crochet slouch beanie project from start to finish.
I’d love to see your finished hats — tag me on Instagram @prettydarnadorable so I can see the colours and styles you’ve chosen.
Hugs,
Cyp
Where to Get the Printable PDF
Want the ad-free, printable free pattern to keep? Grab it in my Etsy shop.
It’s available for personal use only, and I may earn a small commission if you purchase through affiliate links.
Don’t Miss Out!
✨ Visit my VIP Library for more free crochet patterns, tags, printables & planners
📌 Follow along on Pinterest for more crochet ideas
🎥 Watch more tutorials and walkthroughs on YouTube
Get the Pattern
You can find the free crochet slouch hat pattern right here in this post.
If you prefer a printable, ad-free version, it’s available in my Etsy Shop and Ravelry Store.
More Free Crochet Hat Patterns You’ll Love
If you enjoyed making this easy crochet hat pattern, try one of these next:
The Voyager – Free Crochet Slouch Hat Pattern
cumberland free crochet slouchy beanie pattern
Free Crochet Granny Stitch Beanie Pattern: Chloe Beanie Tutorial
All three are beginner-friendly crochet patterns using worsted weight yarn and include step-by-step instructions.