


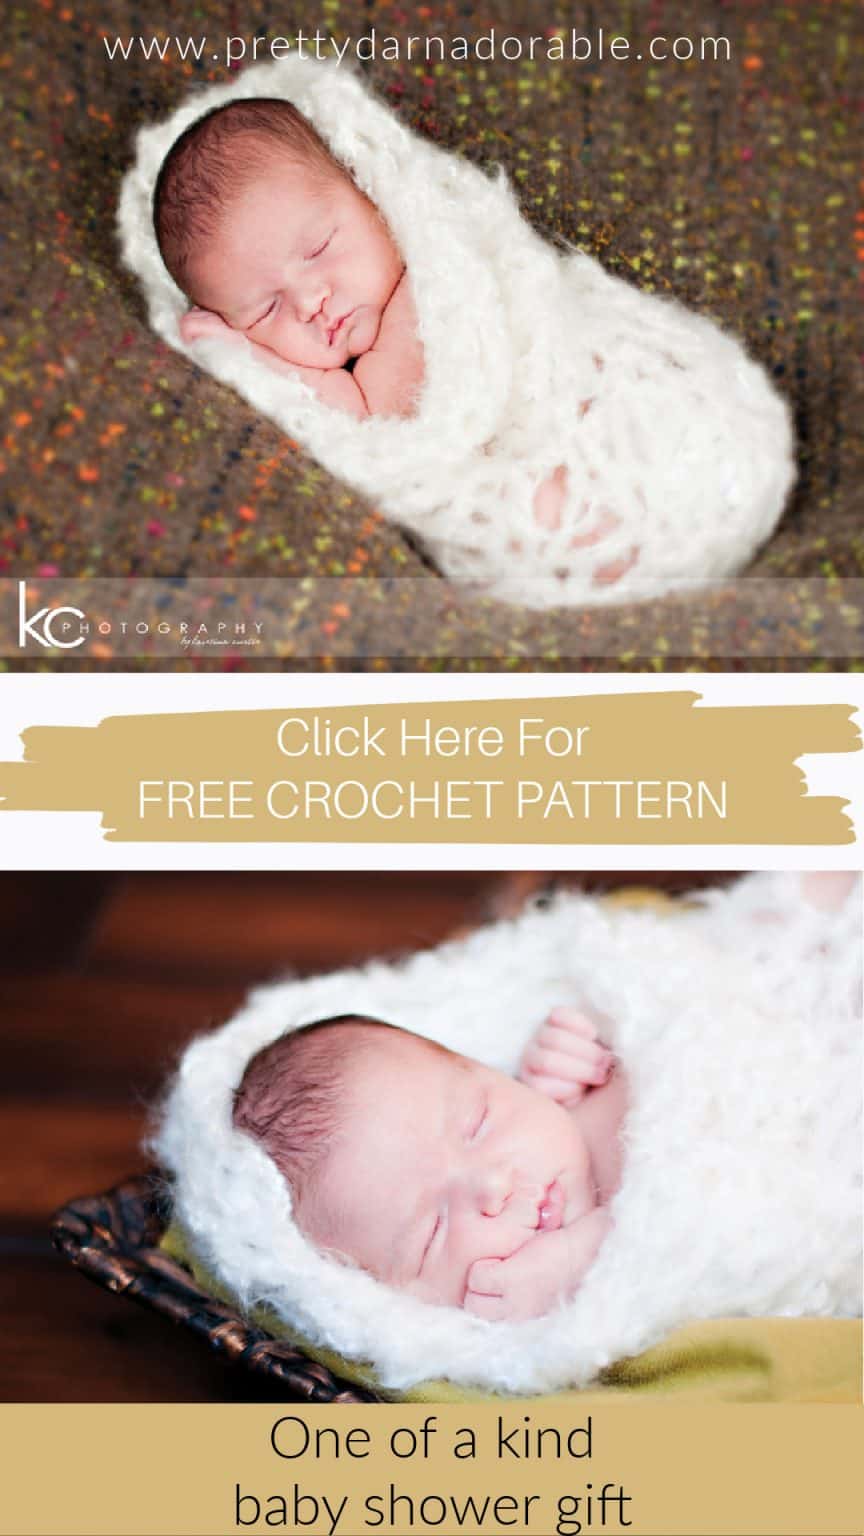
This sweet little snuggly crochet baby cocoon and headband is made from soft yarn and basic crochet stitches great for beginner.
Now you can make your own cute crochet baby cocoon and headband set with this easy to follow pattern. This is a great project for beginners, as it uses only basic crochet stitches.
The finished product is both cute and cozy, perfect for snuggling up in on a cold winter day.
- Add Pattern to your Ravelry Library
- Download On Etsy
- Pin Now Make Later
Who can make this?
So Easy Even a Beginner Crocheter Can Make It
If you’re looking for a beautiful and easy crochet baby cocoon, look no further than the Crochet Lacey Cocoon and Headband pattern.
This cocoon and headband set is made using only basic stitches, so it’s perfect for beginners. The stunning texture is achieved by using a simple stitch pattern that anyone can master.
Best of all, this project can be completed in just a few hours.
How to print this pattern
If you’re looking for a crochet pattern that you can take with you anywhere, and that is easy to read and follow, then look no further!
I’ve created an ad-free version of my popular crochet pattern that you can easily download from Etsy. This way, you can mark up the pattern as needed without any distractions, and enjoy crocheting it wherever you go.
Thanks so much for supporting my blog!
- Add Pattern to your Ravelry Library
- Download On Etsy
- Pin Now Make Later

Create lasting memories with adorable newborn photos in a crochet baby cocoon!
This cocoon and headband combo is perfect for any newborn shoot, whether you’re going for a naturalistic look or something more whimsical.
The cocoon provides a lovely frame for your subject, while the headband adds a touch of elegance. And because each set is handmade with love, you can be sure that your photos will be one-of-a-kind.
Here are some tips on how to get the perfect newborn photos in a crochet cocoon.
Tips for using a crochet cocoon
If you’re thinking about using a crochet cocoon for your next newborn photoshoot, here are some tips!
1. Choose a simple pattern. You don’t want anything too complicated or fussy – remember, the focus is on the baby!
2. Make sure the cocoon is big enough. You want your baby to be comfortable, and you don’t want them to get lost in all that fabric!
3. Use soft, natural fibers. Again, comfort is key – you don’t want your baby to be itchy or uncomfortable during the shoot.
4. Finally, have fun with it! This is a once-in-a-lifetime opportunity to capture those precious first few weeks of life. Embrace the messiness and enjoy every minute!
Standard Measurements
| Size | Length | Age |
| Infant | 18-23 inches | 0-3 months |
| Baby | 24-25.5 inches | 3-6 months |
Newest Posts to the Blog
- Cedar Ridge Pumpkins: A Free Crochet Pumpkin Pattern
- Free Crochet Lapghan Pattern: Country Charm Lapghan
- Gardenlace Free Crochet Dishcloth Pattern PDF Download
- Free Montero Crochet Basket Pattern
PLEASE NOTE THAT THIS POST CONTAINS AFFILIATE LINKS – Read more
Designers Notes
💕 Skill Level is Easy
💕 Skills Needed half double crochet, double crochet, single crochet, slip stitch
💕 Sizes Newborn
💕 Made with bulky weight yarn
💕 Written in Standard American terms
💕 Flower included in pattern
Substituting Yarn
If you cannot find the yarn I used below you will want to substitute a beautiful textured soft yarn. I love Lions Brand Homespun. It comes in so many beautiful colours and is ultra soft for baby.
Skill Level
Easy
Abbreviations
- ch – chain
- dc – double crochet
- hdc – half double crochet
- sc – single crochet
- st – stitch
- sts – stitches
- sl st – slip stitch
- rpt – repeat
Gauge
Not required
Materials Needed
- 11.5 mm hook
- Tapestry Needle
- Stitch Markers
- 125 g – 5 Bulky yarn
- I used Patons Divine – Chantilly Rose
Finished Length
18″ Long x 24″ Around
To make for a larger baby add rounds until you reach the required length.
- Add Pattern to your Ravelry Library
- Download On Etsy
- Pin Now Make Later
Crochet Cocoon Instructions
CAUTION
This crochet cocoon is a photo prop only. Babies should not be left unattended while in use. It is designed to allow little fingers and toes to poke through but it should be used with care to make sure that yarn does not get wrapped around any baby parts sticking through.
DIRECTIONS – Work in continuous rounds
Ch 2
Rnd 1: 10 hdc into 2nd ch from hook (10)
Rnd 2: Hdc in 1st st, *2 hdc in next , hdc in next* rpt till end of round (15)
Rnd 3: (Dc, sc) in 1st and each st around (30)
Rnds 4-28: (Dc, sc) in 1st *skip next st, (dc,sc) in next* rpt from *to* to end of rnd (30)
Rnd 29: Sc in 1st and each st around (30)
This is where the lacy texture starts.
Rnd 30: Skip 1st 2 sts, 5 dc in next, *skip next 2 sts, sc in next, skip next 2 sts, 5 dc in next* rpt from * to * till end of round. (30)
Fasten off and weave in ends.

Crochet Headband Instructions
Using 6.50mm hook
Ch 60, fasten off and weave in ends.
This will give you one long string of chains will be tied around the baby’s head.
Crochet Flower Instructions
Using 5mm hook ch 4, join with sl st
Rnd 1: Ch 1, 5sc in circle, join with sl st
Rnd 2: ch2, 2dc, ch2, sl st, *(sl st, ch2, 2dc, ch2, sl st) in next st* rpt from *to* 3 more times. Five petals made.
Optional – Sew button to centre of flower.
Use ends to tie flower to band.
Final Reminder
This crochet cocoon is a photo prop only. Babies should not be left unattended while in use. It is designed to allow little fingers and toes to poke through but it should be used with care to make sure that yarn does not get wrapped around any baby parts sticking through.
- Add Pattern to your Ravelry Library
- Download On Etsy
- Pin Now Make Later
Did you make any of these?
I would love to see what you have made be sure to mention @prettydarnadorable or tag me using #prettydarnadorable on Instagram so I can see your creations!
I also love to see what you make so please also be sure to tag me on social media @prettydarnadorable xo
Get Ideas on Instagram Learn on YouTube Get free stuff on my Blog
Get 20% Off Sign Up Shop on Etsy Share on Facebook
Save things on Pinterest