


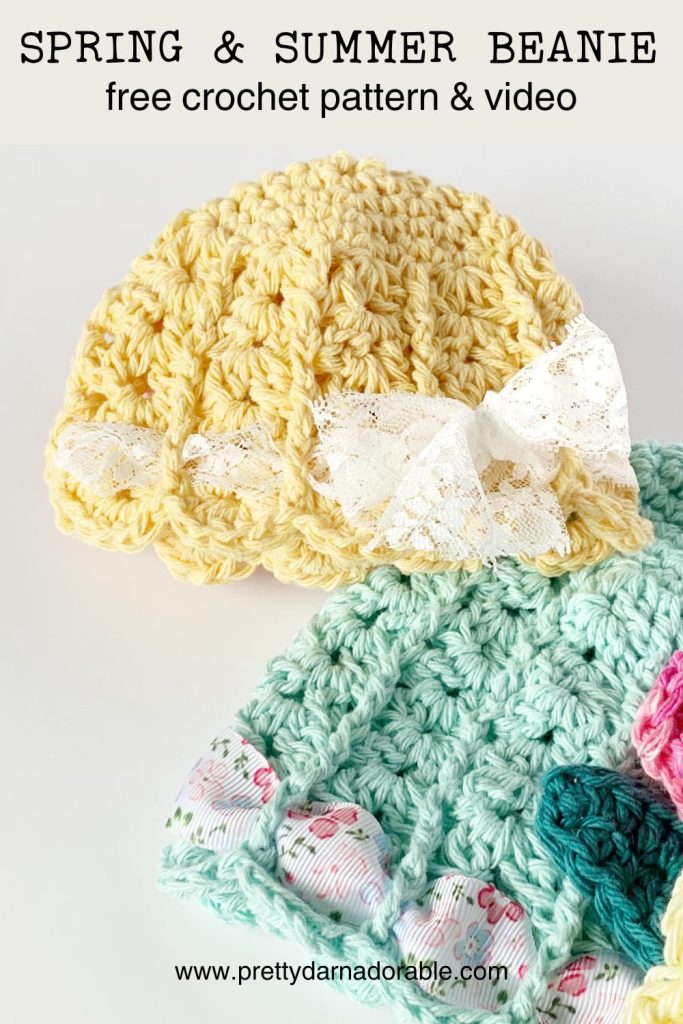
The Logan Crochet Spring Beanie Pattern is the perfect hat to make as spring approaches. The Logan Beanie is an easy crochet hat pattern and is a great project just in time for Easter! I’m so happy to be sharing this as a free crochet pattern here on my blog – be sure to save it with your favourite free patterns for spring and summer.
I have included all different sizes from baby hats, toddler, child and adult size so you can make for all your family and friends so be sure to scroll down for the crochet hat size chart to help you decide on what size you need to make.

The Logan – Free Crochet Spring and Summer Beanie Pattern
Be sure to PIN it to your FREE CROCHET HAT PATTERNS Pinterest Board
This easy pattern has a playful and airy texture that comes together using basic crochet stitches that looks like a small puff stitch pattern! Unlike crochet hats with closed textures this will let a little spring air through so that it isn’t too warm. Making it perfect for transitional months.
For my hat I have chosen cotton yarn but it works up great in acrylic too – I have a newsboy pattern where I have made up in the acrylic. I like cotton for the warm spring and summer months and acrylic for the cooler months. Then just a little bit of yarn for the crochet roses and leaves should you choose to add those.
I have not tried this in different yarn weights. If I were to hazard a guess, I would think that chunky yarn would be the thickest you could go without having to change the pattern too much. If you do make it in a different weight yarn, I would love the hear how it comes out.
Give it a try – I’m sure it will become one of your favourite beanie patterns.

Construction of the Logan Spring Beanie
This construction of this beanie is fairly simple. Starting at the top of the hat it is worked in continuous rounds of single crochet which makes the start of this hat fairly fast to make.
If you prefer the magic circle method, for sure, you can substitute that instead of using my preferred chain 2 method.
I have to admit that this texture can be a little challenging if you are new to crochet so I recommend watching the Video Tutorial a few times before trying to make it. Once you have practiced the clusters a few times, they become easy to make and then this beanie pattern moves along quite quickly.
A few different crochet hook sizes are used, so be sure to watch out for when those changes are made.
One other thought and I haven’t done this myself but I do think that this hat would look super cute if you used different colours – perhaps each round of the clusters done in a different colour to use up scrap yarn. If you do this, I would love to see it!
Okay, I think that is everything for now – I hope you have a great time making this!
Scroll Down for Free Crochet Spring Beanie Pattern.

Happy Crocheting!
Watch Video Tutorial Here
Tips for beginner crocheters! Watch the video all the way through a few times so that you know what to expect.
How to print this pattern
If you’re looking for a crochet pattern that you can take with you anywhere, and that is easy to read and follow, then look no further!
I’ve created an INEXPENSIVE ad-free version of my popular crochet pattern that you can easily download from Etsy. This way, you can mark up the pattern as needed without any distractions, and enjoy crocheting it wherever you go.
Thanks so much for supporting my blog!
- Add Pattern to your Ravelry Library
- Download on Etsy
- Pin Now Make Later
Newest Posts to the Blog
- Free Beginner Crochet Acorn Pattern in 4 Sizes – Cedar Ridge
- Cedar Ridge Pumpkins: A Free Crochet Pumpkin Pattern
- Free Crochet Lapghan Pattern: Country Charm Lapghan
- Gardenlace Free Crochet Dishcloth Pattern PDF Download
- Free Montero Crochet Basket Pattern
Designers Notes
💕 Skill Level is Easy
💕 Skills Needed double crochet, half double crochet, front post double crochet, back post double crochet, single crochet
💕 Sizes Newborn to Adult
💕 Made with worsted weight yarn
💕 All sizes written individually
💕 Written in Standard American terms

Best yarn for this pattern
This open-weave beauty allows for plenty of airflow, keeping you cool and comfy all summer long. Plus, cotton yarn comes in a rainbow of colors, adding some serious fun to your wardrobe. Bonus points for its lightweight and hypoallergenic properties.
Acrylic Yarn
Now, when it comes to winter wear, you’ll want to switch gears to acrylic yarn for your Logan Beanie. This closed-top design with insulating properties will keep you warm and toasty when the snow starts to fall. And let’s be real, who doesn’t love easy-care yarn that won’t shrink in the wash? But hold on tight – save the acrylic yarn for winter! Its insulating properties make it less-than-ideal for summer wear, as it can lead to some serious overheating.
Remember, the type of yarn you choose can make or break your crochet project. Whether you’re going for the ultimate winter hat with acrylic yarn or a cool and comfortable summer beanie with cotton, consider the season and how you’ll wear it.
The Logan Beanie and your favourite yarn, you’re sure to turn heads no matter what season it is. So grab your hook, some yarn, and get ready to crochet the perfect accessory for any weather!
Substituting yarn
When substituting yarns for a crochet pattern, it’s crucial to keep the gauge as close as possible to the original yarn. Gauge refers to the number of stitches and rows in a given area of the crochet fabric, and it affects the size and shape of the finished project.
If the gauge of the substitute yarn is significantly different from the original yarn, the project’s feel and look may be affected. To ensure that the finished project looks and feels as close to the original design as possible, make a swatch with the substitute yarn and compare it to the original yarn swatch to match the gauge.
Be sure to visit www.yarnsub.com to help you choose the right substitute.
PLEASE NOTE THAT THIS POST CONTAINS AFFILIATE LINKS – Read more
Purchase Ad Free Pattern – Instant Download!
Purchase the ad-free PDF for a smooth, distraction-free crocheting experience anytime, anywhere.
Already a subscriber? Check your latest email for your special discount code. Not subscribed yet? Sign up here to get yours!
Thanks so much for supporting my blog!
Skill Level
Beginner
Abbreviations
ch – chain
CL – cluster
dc – double crochet
hdc – half double crochet
FPdc – Front Post Double Crochet
BPdc – Back Post Double Crochet
sc – single crochet
sk – skip
st – stitch
sts – stitches
slst – slip stitch
rpt – repeat
YO – yarn over
Gauge
Using 6.00 mm hook and #4 worsted weight yarn
12 rows + 12 sts across of sc = 4″ x 4″
A gauge swatch is vital for a well-fitting crochet hat. It determines stitch tension and measures the number of stitches and rows. Comparing it to the pattern’s gauge ensures the final hat fits as desired. Adjust hook or tension if needed for a perfectly fitting hat.
To do a crochet gauge swatch using a single crochet stitch, start by using the same type of yarn and crochet hook that you plan to use for your hat. Begin crocheting a square swatch using the single crochet stitch, making sure to maintain an even tension throughout. Once your swatch is complete, measure it using a ruler or measuring tape to determine the number of stitches and rows per inch.
Even though the hat is made using a different stitch, this gauge swatch will give you an idea of how your tension will affect the overall size of your finished product.

Finished Measurements & Yarn Requirements
Please note that the actual amount of yarn needed may change depending on the yarn chosen always purchase a little more than you think you may need.
Yarn Required
| Size | Width | Height | Grams | M | O | Y |
| 0 to 3 months | 15” | 6” | 30 | 48 | 1.06 | 53 |
| 3 to 6 months | 16” | 6 1/2” | 40 | 64 | 1.41 | 70 |
| 6 to 12 months | 16 1/2” | 7” | 50 | 80 | 1.76 | 88 |
| 12 months to 3 yrs | 18” | 8” | 65 | 104 | 2.29 | 114 |
| 3 to 10 yrs | 19 1/2” | 9” | 80 | 128 | 2.82 | 140 |
| Adult | 21” | 10” | 95 | 152 | 3.35 | 166 |
Some items below click through to an affiliate link at no extra cost to you.
You can check out all my favourites HERE
Yarn used in pattern (see sizing chart for exact amount required):
Loops and Threads Capri Eco Cotton
Approx 20-30 grams of worsted weight yarn for each rose
Yarn Gauge
Gauge must be matched for the correct fit of this hat, matching the recommended yarn gauge can assist in successful substitution and result in a more accurate finished product.
Recommend Cotton Worsted Weight Yarns
Recommended Acrylic Worsted Weight Yarns
Lions Brand – Wool Ease
Crochet Hooks
5.50 mm crochet hook
6.50 mm crochet hook for rose – can use any size hook you like size of finished rose will change accordingly.
Notes
This pattern also comes with a video tutorial. This means that you can follow along step-by-step and have all your questions answered in real-time.
Whether you’re struggling to understand a particular stitch or just want to see how it should look, the video tutorial is a fantastic resource to have. You can pause, rewind, and re-watch as many times as you need to make sure you’re doing everything correctly.
Special Stitches
CLUSTER STITCH
*Yarn over (YO), insert hook, YO and draw up loop, YO and draw through 2 loops on the hook (two loops remain on the hook) * rpt *to* once (you should now have three loops left on hook) YO and pull through all 3 loops. One cluster is complete.
FRONT-POST DOUBLE CROCHET (FPdc)
Insert hook from front to back to front around post of specified st, YO and draw up a loop, YO and draw through 2 loops, YO and draw through 2 loops. One FPdc made.
BACK-POST DOUBLE CROCHET (BPdc)
YO Insert hook from back to front to back around post of specified st, YO and draw up a loop, YO and draw through 2 loops, YO and draw through 2 loops. One BPdc made.
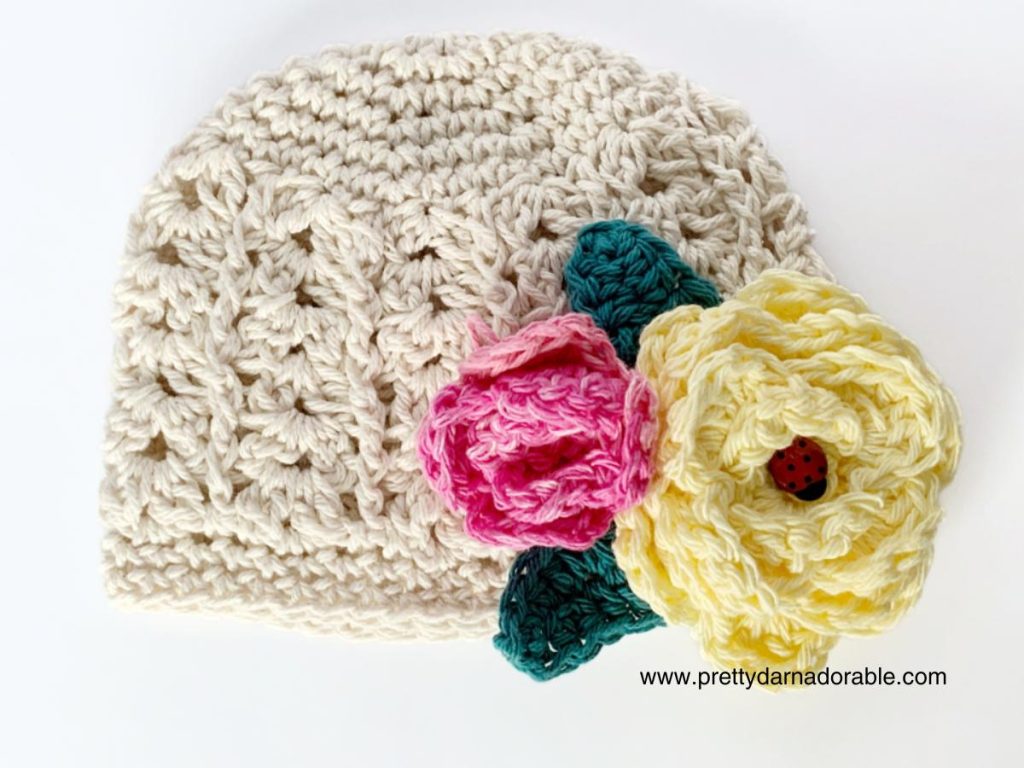
Roses
(video included for medium rose and leaves)
Use 6.50 mm hook
Small Rose Ch 20
Medium Rose Ch 35 (click for video)
Large Rose Ch 55
Row 1: 1 dc in 5th chain from hook, *Ch 1, sk 1 ch, (dc, ch1, dc) in next st* rpt from *to* till end of row, ch 2 turn
Row 2: *(hdc, 4 dc, hdc) 1st ch1 sp, sl st in next ch1 sp* rpt from *to* till end of row
Roll rose into shape very loosely so that rose stays large and flat.
LEAF
6.5 mm hook
CH 9
Row1: Sc 2nd ch from hook, hdc next 3, dc next 3, 3 hdc in last ch (this will bring to the bottom loops, which will be called row 2)
Row 2: Dc in next 3 sts, hdc next 3 sts, sc in last st and fasten off.
- Add Pattern to your Ravelry Library
- Download on Etsy
- Pin Now Make Later
0 to 3 Months – 15” x 6”
Note: Increase rounds are worked continuously without joining or turning. Use a stitch marker to mark the first stitch of each round for easier counting.
Using 6.00 mm hook Ch 2
Rnd 1: Work 8 hdc in 2nd st from hook (8)
Rnd 2: 2 sc in 1st st and each st around (16)
Rnd 3: 1 sc in 1st st *2 sc in next st, 1 sc in next st* rpt from * to * till end of rnd (24)
Rnd 4: 1 sc in 1st 2 sts *2 sc in next st, 1 sc in next 2 sts* rpt from * to * till end of rnd (32)
Rnd 5: 1 sc in 1st 3 sts *2 sc in next st, 1 sc in next 3 sts* rpt from * to * till end of rnd,(40)
Rnd 6: Dc in 1st st, *(CL, ch1, CL) in next, sk next sc, dc in next, sk next* rpt from * to * till end of rnd, join with slst, ch 3 turn (40)
Note: Ch 3 at end of previous round is to be counted as beginning dc of next round
Rnd 7: BPdc in dc below, (CL, ch 1, CL) in 1st ch 1 space, *BPdc around next dc, (CL, ch 1, CL) in next ch 1 space* rpt from *to* till end of round, join with slst, ch 3 turn (40)
Rnd 8: FPdc in dc below ch 1 st (CL, ch 1, CL) in 1st ch 1 space, *FPdc around next dc, (CL, ch 1, CL) in next ch 1 space* rpt from *to* till end of round, join with slst, ch 3 turn (40)
Rnd 9: BPdc in dc below ch 1 st (CL, ch 1, CL) in 1st ch 1 space, *BPdc around next dc, (CL, ch 1, CL) in next ch 1 space* rpt from *to* till end of round, join with slst, ch 3 turn (40)
Rnd 10: FPdc in dc below ch 1 st (CL, ch 1, CL) in 1st ch 1 space, *FPdc around next dc, (CL, ch 1, CL) in next ch 1 space* rpt from *to* till end of round, join with slst, ch 3 turn (40)
Rnd 11: BPdc in dc below ch 1 st (CL, ch 1, CL) in 1st ch 1 space, *BPdc around next dc, (CL, ch 1, CL) in next ch 1 space* rpt from *to* till end of round, join with slst, ch 1 turn (40)
Change to 5.50 mm hook
Plain Band: Work a single crochet in each stitch around for 3 rounds.
OR
Scalloped Edge: Skip 1st st, 5 dc in ch 1 space, sk next st, slst in next st, *skip next st, 5 dc in ch 1 sp, sk next st, slst in next* rpt from *to* till end of rnd. Join with slip stitch, fasten off and weave in ends.
3 to 6 Months – 16” x 6 ½”
Note: Increase rounds are worked continuously without joining or turning. Use a stitch marker to mark the first stitch of each round for easier counting.
Using 6.00 mm hook Ch 2
Rnd 1: Work 8 hdc in 2nd st from hook (8)
Rnd 2: 2 sc in 1st st and each st around (16)
Rnd 3: 1 sc in 1st st *2 sc in next st, 1 sc in next st* rpt from * to * till end of rnd (24)
Rnd 4: 1 sc in 1st 2 sts *2 sc in next st, 1 sc in next 2 sts* rpt from * to * till end of rnd (32)
Rnd 5: 1 sc in 1st 3 sts *2 sc in next st, 1 sc in next 3 sts* rpt from * to * till end of rnd (40)
Rnd 6: 1 sc in 1st 9 sts *2 sc in next st, 1 sc in next 9 sts* rpt from * to * finish round by working sc in any remaining sts.(44)
Rnd 7: Dc in 1st st, *(CL, ch1, CL) in next, sk next sc, dc in next, sk next* rpt from * to * till end of rnd, join with slst, ch 3 turn (44)
Note: Ch 3 at end of previous round is to be counted as beginning dc of next round
Rnd 8: BPdc in dc below (CL, ch 1, CL) in 1st ch 1 space, *BPdc around next dc, (CL, ch 1, CL) in next ch 1 space* rpt from *to* till end of round, join with slst, ch 3 turn (44)
Rnd 9: FPdc in dc below ch 1 st (CL, ch 1, CL) in 1st ch 1 space, *FPdc around next dc, (CL, ch 1, CL) in next ch 1 space* rpt from *to* till end of round, join with slst, ch 3 turn (44)
Rnd 10: BPdc in dc below ch 1 st (CL, ch 1, CL) in 1st ch 1 space, *BPdc around next dc, (CL, ch 1, CL) in next ch 1 space* rpt from *to* till end of round, join with slst, ch 3 turn (44)
Rnd 11: FPdc in dc below ch 1 st (CL, ch 1, CL) in 1st ch 1 space, *FPdc around next dc, (CL, ch 1, CL) in next ch 1 space* rpt from *to* till end of round, join with slst, ch 3 turn (44)
Rnd 12: BPdc in dc below ch 1 st (CL, ch 1, CL) in 1st ch 1 space, *BPdc around next dc, (CL, ch 1, CL) in next ch 1 space* rpt from *to* till end of round, join with slst, ch 3 turn (44)
Rnd 13: FPdc in dc below ch 1 st (CL, ch 1, CL) in 1st ch 1 space, *FPdc around next dc, (CL, ch 1, CL) in next ch 1 space* rpt from *to* till end of round, join with slst (44)
Change to 5.50 mm hook
Plain Band: Work a single crochet in each stitch around for 3 rounds.
OR
Scalloped Edge: Skip 1st st, 5 dc in ch 1 space, slst in next st, *skip next st, 5 dc in ch 1 sp, slst in next* rpt from *to* till end of rnd. Join with slip stitch, fasten off and weave in ends.

6 to 12 Months 16 ½” x 7”
Note: Increase rounds are worked continuously without joining or turning. Use a stitch marker to mark the first stitch of each round for easier counting.
Using 6.00 mm hook Ch 2
Rnd 1: Work 8 hdc in 2nd st from hook (8)
Rnd 2: 2 sc in 1st st and each st around (16)
Rnd 3: 1 sc in 1st st *2 sc in next st, 1 sc in next st* rpt from * to * till end of rnd (24)
Rnd 4: 1 sc in 1st 2 sts *2 sc in next st, 1 sc in next 2 sts* rpt from * to * till end of rnd (32)
Rnd 5: 1 sc in 1st 3 sts *2 sc in next st, 1 sc in next 3 sts* rpt from * to * till end of rnd (40)
Rnd 6: 1 sc in 1st 4 sts *2 sc in next st, 1 sc in next 4 sts* rpt from * to * till end of rnd (48)
Rnd 7: Dc in 1st st, *(CL, ch1, CL) in next, sk next sc, dc in next, sk next* rpt from * to * till end of rnd, join with slst, ch 3 turn (48)
Note: Ch 3 at end of previous round is to be counted as beginning dc of next round
Rnd 8: BPdc in dc below (CL, ch 1, CL) in 1st ch 1 space, *BPdc around next dc, (CL, ch 1, CL) in next ch 1 space* rpt from *to* till end of round, join with slst, ch 3 turn (48)
Rnd 9: FPdc in dc below (CL, ch 1, CL) in 1st ch 1 space, *FPdc around next dc, (CL, ch 1, CL) in next ch 1 space* rpt from *to* till end of round, join with slst, ch 3 turn (48)
Rnd 10: BPdc in dc below (CL, ch 1, CL) in 1st ch 1 space, *BPdc around next dc, (CL, ch 1, CL) in next ch 1 space* rpt from *to* till end of round, join with slst, ch 3 turn (48)
Rnd 11: FPdc in dc below (CL, ch 1, CL) in 1st ch 1 space, *FPdc around next dc, (CL, ch 1, CL) in next ch 1 space* rpt from *to* till end of round, join with slst, ch 3 turn (48)
Rnd 12: BPdc in dc below (CL, ch 1, CL) in 1st ch 1 space, *BPdc around next dc, (CL, ch 1, CL) in next ch 1 space* rpt from *to* till end of round, join with slst, ch 3 turn (48)
Rnd 13: FPdc in dc below (CL, ch 1, CL) in 1st ch 1 space, *FPdc around next dc, (CL, ch 1, CL) in next ch 1 space* rpt from *to* till end of round, join with slst, ch 3 turn (48)
Rnd 14: BPdc in dc below (CL, ch 1, CL) in 1st ch 1 space, *BPdc around next dc, (CL, ch 1, CL) in next ch 1 space* rpt from *to* till end of round, join with slst, ch 1 turn (48)
Change to 5.50 mm hook
Plain Band: Work a single crochet in each stitch around for 3 rounds.
OR
Scalloped Edge: Skip 1st st, 5 dc in ch 1 space, slst in next st, *skip next st, 5 dc in ch 1 sp, slst in next* rpt from *to* till end of rnd. Join with slip stitch, fasten off and weave in ends.
12 Months – 3 Years 18” x 8”
Note: Increase rounds are worked continuously without joining or turning. Use a stitch marker to mark the first stitch of each round for easier counting.
Using 6.00 mm hook Ch 2
Rnd 1: Work 8 sc in 2nd st from hook (8)
Rnd 2: 2 sc in 1st st and each st around (16)
Rnd 3: 1 sc in 1st st *2 sc in next st, 1 sc in next st* rpt from * to * till end of rnd (24)
Rnd 4: 1 sc in 1st 2 sts *2 sc in next st, 1 sc in next 2 sts* rpt from * to * till end of rnd (32)
Rnd 5: 1 sc in 1st 3 sts *2 sc in next st, 1 sc in next 3 sts* rpt from * to * till end of rnd (40)
Rnd 6: 1 sc in 1st 4 sts *2 sc in next st, 1 sc in next 4 sts* rpt from * to * till end of rnd (48)
Rnd 7: 1 sc in 1st 8 sts *2 sc in next st, 1 sc in next 8 sts* rpt from * to * finish round by working sc in any remaining sts. (52)
Rnd 8: Dc in first sc, *(CL, ch1, CL) in next, sk next sc, dc in next, sk next* rpt from * to * till end of rnd, join with slst, ch 3 turn (52)
Note: Ch 3 at end of previous round is to be counted as beginning dc of next round
Rnd 9: BPdc in dc below (CL, ch 1, CL) in 1st ch 1 space, *BPdc around next dc, (CL, ch 1, CL) in next ch 1 space* rpt from *to* till end of round, join with slst, ch 3 turn, (52)
Rnd 10: FPdc in dc below (CL, ch 1, CL) in 1st ch 1 space, *FPdc around next dc, (CL, ch 1, CL) in next ch 1 space*, rpt from *to* till end of round, join with slst, ch 3 turn (52)
Rnd 11: BPdc in dc below (CL, ch 1, CL) in 1st ch 1 space, *BPdc around next dc, (CL, ch 1, CL) in next ch 1 space* rpt from *to* till end of round, join with slst, ch 3 turn (52)
Rnd 12: FPdc in dc below (CL, ch 1, CL) in 1st ch 1 space, *FPdc around next dc, (CL, ch 1, CL) in next ch 1 space* rpt from *to* till end of round, join with slst, ch 3 turn (52)
Rnd 13: BPdc in dc below (CL, ch 1, CL) in 1st ch 1 space, *BPdc around next dc, (CL, ch 1, CL) in next ch 1 space* rpt from *to* till end of round, join with slst, ch 3 turn (52)
Rnd 14: FPdc in dc below (CL, ch 1, CL) in 1st ch 1 space, *FPdc around next dc, (CL, ch 1, CL) in next ch 1 space* rpt from *to* till end of round, join with slst, ch 3 turn (52)
Rnd 15: BPdc in dc below (CL, ch 1, CL) in 1st ch 1 space, *BPdc around next dc, (CL, ch 1, CL) in next ch 1 space* rpt from *to* till end of round, join with slst, ch 3 turn (52)
Rnd 16: FPdc in dc below (CL, ch 1, CL) in 1st ch 1 space, *FPdc around next dc, (CL, ch 1, CL) in next ch 1 space* rpt from *to* till end of round, join with slst (52)
Change to 5.50 mm hook
Plain Band: Work a single crochet in each stitch around for 3 rounds.
OR
Scalloped Edge: Skip 1st st, 5 dc in ch 1 space, slst in next st, *skip next st, 5 dc in ch 1 sp, slst in next* rpt from *to* till end of rnd. Join with slip stitch, fasten off and weave in ends.
- Add Pattern to your Ravelry Library
- Download on Etsy
- Pin Now Make Later

3 – 10 Years – 19 ½ x 9”
Note: Increase rounds are worked continuously without joining or turning. Use a stitch marker to mark the first stitch of each round for easier counting.
Using 6.00 mm hook Ch 2
Rnd 1: Work 8 sc in 2nd st from hook. (8)
Rnd 2: 2 sc in 1st st and each st around (16)
Rnd 3: 1 sc in 1st st *2 sc in next st, 1 sc in next st* rpt from * to * till end of rnd (24)
Rnd 4: 1 sc in 1st 2 sts *2 sc in next st, 1 sc in next 2 sts* rpt from * to * till end of rnd (32)
Rnd 5: 1 sc in 1st 3 sts *2 sc in next st, 1 sc in next 3 sts* rpt from * to * till end of rnd (40)
Rnd 6: 1 sc in 1st 4 sts *2 sc in next st, 1 sc in next 4 sts* rpt from * to * till end of rnd (48)
Rnd 7: 1 sc in 1st 5 sts *2 sc in next st, 1 sc in next 5 sts* rpt from * to * till end of rnd (56)
Rnd 8: Dc in first sc, *(CL, ch1, CL) in next, sk next sc, dc in next, sk next* rpt from * to * till end of rnd, join with slst, ch 3 turn (56)
Note: Ch 3 at end of previous round is to be counted as beginning dc of next round
Rnd 9: BPdc in dc below (CL, ch 1, CL) in 1st ch 1 space, *BPdc around next dc, (CL, ch 1, CL) in next ch 1 space* rpt from *to* till end of round, join with slst, ch 3 turn (56)
Rnd 10: FPdc in dc below (CL, ch 1, CL) in 1st ch 1 space, *FPdc around next dc, (CL, ch 1, CL) in next ch 1 space*, rpt from *to* till end of round, join with slst, ch 3 turn (56)
Rnd 11: BPdc in dc below (CL, ch 1, CL) in 1st ch 1 space, *BPdc around next dc, (CL, ch 1, CL) in next ch 1 space* rpt from *to* till end of round, join with slst, ch 3 turn (56)
Rnd 12: FPdc in dc below (CL, ch 1, CL) in 1st ch 1 space, *FPdc around next dc, (CL, ch 1, CL) in next ch 1 space* rpt from *to* till end of round, join with slst, ch 3 turn (56)
Rnd 13: BPdc in dc below (CL, ch 1, CL) in 1st ch 1 space, *BPdc around next dc, (CL, ch 1, CL) in next ch 1 space* rpt from *to* till end of round, join with slst, ch 3 turn (56)
Rnd 14: FPdc in dc below (CL, ch 1, CL) in 1st ch 1 space, *FPdc around next dc, (CL, ch 1, CL) in next ch 1 space* rpt from *to* till end of round, join with slst, ch 3 turn (56)
Rnd 15: BPdc in dc below (CL, ch 1, CL) in 1st ch 1 space, *BPdc around next dc, (CL, ch 1, CL) in next ch 1 space* rpt from *to* till end of round, join with slst, ch 3 turn (56)
Rnd 16: FPdc in dc below (CL, ch 1, CL) in 1st ch 1 space, *FPdc around next dc, (CL, ch 1, CL) in next ch 1 space* rpt from *to* till end of round, join with slst, ch 3 turn (56)
Rnd 17: BPdc in dc below (CL, ch 1, CL) in 1st ch 1 space, *BPdc around next dc, (CL, ch 1, CL) in next ch 1 space* rpt from *to* till end of round, join with slst, ch 1 turn (56)
Change to 5.50 mm hook
Plain Band: Work a single crochet in each stitch around for 3 rounds.
OR
Scalloped Edge: Skip 1st st, 5 dc in ch 1 space, slst in next st, *skip next st, 5 dc in ch 1 sp, slst in next* rpt from *to* till end of rnd. Join with slip stitch, fasten off and weave in ends.
Adult 21” x 10”
Note: Increase rounds are worked continuously without joining or turning. Use a stitch marker to mark the first stitch of each round for easier counting.
Using 6.00 mm hook Ch 2
Rnd 1: Work 8 sc in 2nd st from hook. (8)
Rnd 2: 2 sc in 1st st and each st around (16)
Rnd 3: 1 sc in 1st st *2 sc in next st, 1 sc in next st* rpt from * to * till end of rnd (24)
Rnd 4: 1 sc in 1st 2 sts *2 sc in next st, 1 sc in next 2 sts* rpt from * to * till end of rnd (32)
Rnd 5: 1 sc in 1st 3 sts *2 sc in next st, 1 sc in next 3 sts* rpt from * to * till end of rnd (40)
Rnd 6: 1 sc in 1st 4 sts *2 sc in next st, 1 sc in next 4 sts* rpt from * to * till end of rnd (48)
Rnd 7: 1 sc in 1st 5 sts *2 sc in next st, 1 sc in next 5 sts* rpt from * to * till end of rnd (56)
Rnd 8: 1 sc in 1st 10 sts *2 sc in next st, 1 sc in next 10 sts* rpt from * to * finish round by working sc in any remaining sts.(60)
Rnd 9: Dc in first sc, *(CL, ch1, CL) in next, sk next sc, dc in next, sk next* rpt from * to * till end of rnd, join with slst, ch 3 turn (60)
Note: Ch 3 at end of previous round is to be counted as beginning dc of next round
Rnd 10: (CL, ch 1, CL) in 1st ch 1 space, *BPdc around next dc, (CL, ch 1, CL) in next ch 1 space* rpt from *to* till end of round, join with slst, ch 3 turn (60)
Rnd 11: FPdc in dc below (CL, ch 1, CL) in 1st ch 1 space, *FPdc around next dc, (CL, ch 1, CL) in next ch 1 space*, rpt from *to* till end of round, join with slst, ch 3 turn (60)
Rnd 12: BPdc in dc below (CL, ch 1, CL) in 1st ch 1 space, *BPdc around next dc, (CL, ch 1, CL) in next ch 1 space* rpt from *to* till end of round, join with slst, ch 3 turn (60)
Rnd 13: FPdc in dc below (CL, ch 1, CL) in 1st ch 1 space, *FPdc around next dc, (CL, ch 1, CL) in next ch 1 space* rpt from *to* till end of round, join with slst, ch 3 turn (60)
Rnd 14: BPdc in dc below (CL, ch 1, CL) in 1st ch 1 space, *BPdc around next dc, (CL, ch 1, CL) in next ch 1 space* rpt from *to* till end of round, join with slst, ch 3 turn (60)
Rnd 15: FPdc in dc below (CL, ch 1, CL) in 1st ch 1 space, *FPdc around next dc, (CL, ch 1, CL) in next ch 1 space* rpt from *to* till end of round, join with slst, ch 3 turn (60)
Rnd 16: BPdc in dc below (CL, ch 1, CL) in 1st ch 1 space, *BPdc around next dc, (CL, ch 1, CL) in next ch 1 space* rpt from *to* till end of round, join with slst, ch 3 turn (60)
Rnd 17: FPdc in dc below (CL, ch 1, CL) in 1st ch 1 space, *FPdc around next dc, (CL, ch 1, CL) in next ch 1 space* rpt from *to* till end of round, join with slst, ch 3 turn (60)
Rnd 18: BPdc in dc below (CL, ch 1, CL) in 1st ch 1 space, *BPdc around next dc, (CL, ch 1, CL) in next ch 1 space* rpt from *to* till end of round, join with slst, ch 3 turn (60)
Rnd 19: FPdc in dc below (CL, ch 1, CL) in 1st ch 1 space, *FPdc around next dc, (CL, ch 1, CL) in next ch 1 space* rpt from *to* till end of round, join with slst (60)
Change to 5.50 mm hook
Plain Band: Work a single crochet in each stitch around for 3 rounds.
OR
Scalloped Edge: Skip 1st st, 5 dc in ch 1 space, slst in next st, *skip next st, 5 dc in ch 1 sp, slst in next* rpt from *to* till end of rnd. Join with slip stitch, fasten off and weave in ends.
