


Ready to ditch the baseball cap and try this this stylish textured crochet newsboy hat instead? I am offering this free printable crochet newsboy pattern on my blog for teens and adults.
Before we go any further I want to give a big thank you to Liz Pixchet: Crochet & Photography for sharing her stunning photos with me for this blog post.
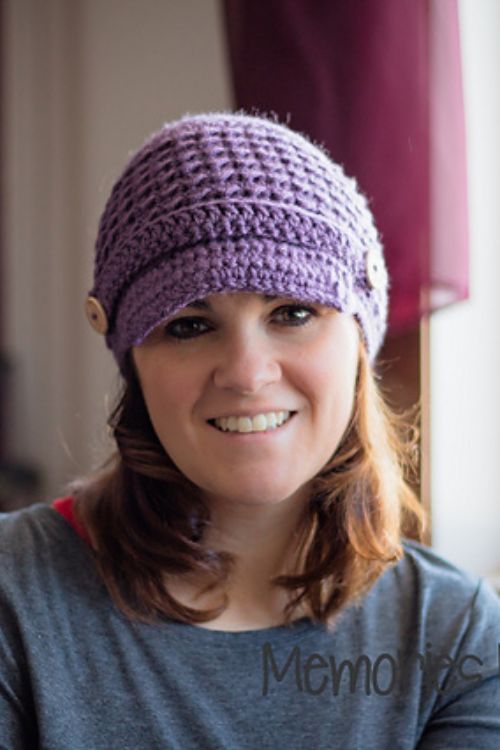
For this brimmed crochet hat the increase rounds are made using single crochet and the body of the hat is completed using the ever so popular crunch stitch. I just love this hat! This fun and funky stitch is so easy to make using half double crochet and slip stitch. So if you are a beginner and can count stitches and are comfortable making a basic stitches this hat could be a perfect next project for you.
Just as I was doing this post I wondered if Newsboy caps were still in style? The answer seems to be ‘they are timeless’ woo hoo for me! I love crochet newsboy caps. I never really had an appreciation for how functional they really were till I started wearing them in the winter when I walked the boys to school.
Most Popular
Hat Patterns
They kept the snow completely out of my eyes and believe me here in Canada we get a tonne of snow! I still wear my crochet newsboy hat if it is snowing out and I am walking the dog.
I have made a few from cotton yarn as well which I love for warmer days. The acrylic and wool are way too hot for summer days. But I do love sporting a newsie when I want to keep the sun out of my eyes in style.
Ready? Let’s make this crochet newsboy in four easy steps!
1. Crochet the base of the hat.
The base of the hat is made just like a regular crochet beanie. Newsboy caps are usually a little bit shorter than a regular crochet hat so that the brim doesn’t sit too low on the forehead.
2. Crochet the brim.
The brim will be worked in rows on this pattern. There will be a decrease with each row giving it a nice curve at both ends of the brim. Keep in mind that once you finish the brim it will need to be pulled into a nice shape with your hands.
See how I shape my brim in this video!
3. Crochet the band.
The crochet band is optional but I think adds a little more style. Dress it up with contrast or seasonal colours.
4. Add button
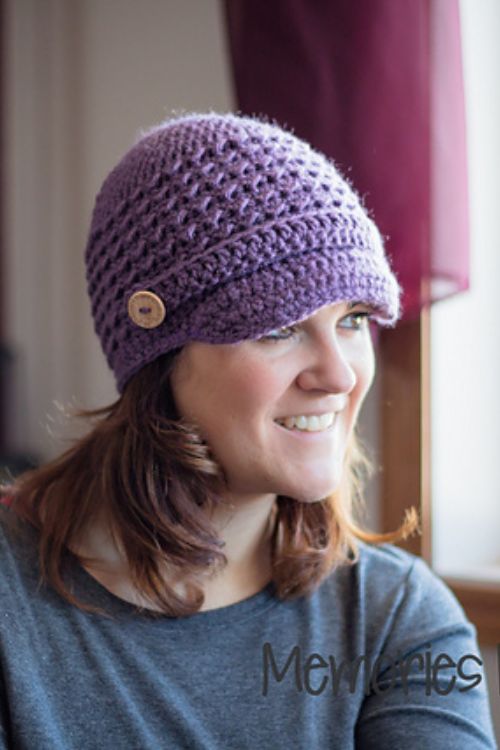
For a classic look wooden buttons are always great or if you love bling the way I do snazz it up with rhinestone buttons.
How To Measure For A Crochet Hat?
Use something flexible like a soft tape measure or piece of yarn and wrap around the head. Then measure against a ruler, tape measure or measuring stick.
Wrap around and measure the widest part of the head. The measuring tape or yarn should be snug but not tight when measuring.
The crochet newsboy will stretch so be sure to make a size that is the same or slightly smaller than the head measurement.
Do not make any smaller than this as a hat that is too small won’t allow the brim to sit away from the head. Instead it will be pulled tight and lay flat against your forehead.
YARN CHOICES
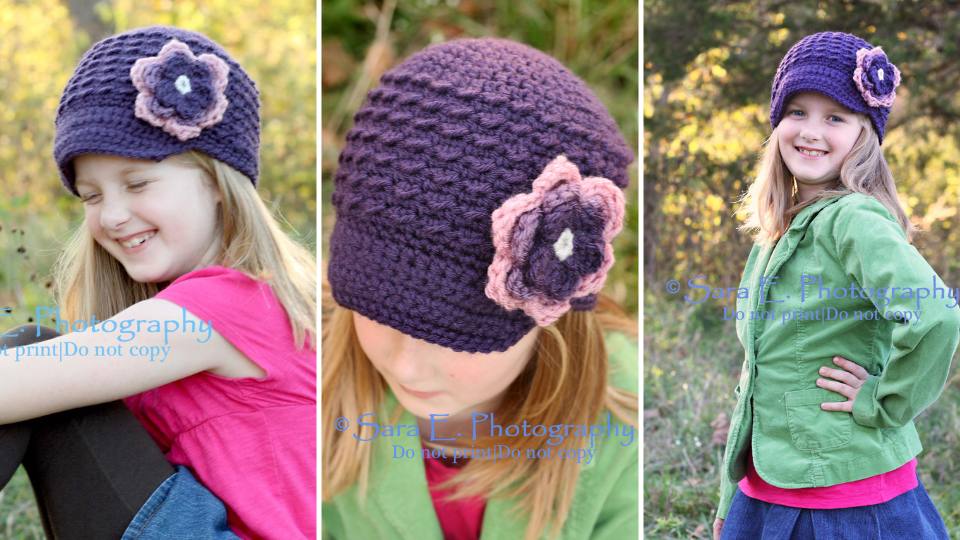
This crochet newsboy hat looks perfect in both cotton and acrylic yarn. Liz made hers using Vanna’s Choice and I have made them in Cotton and a Cotton/Acrylic Blend.
I have written the pattern for worsted weight but this pattern is also perfect for bulky weight. Go down a hook size to keep the gauge the same.
Designer Notes
- Skill Level is Beginner
- Skills Needed slip stitch, half double crochet, single crochet
- Sizes Teen to Adult available to download
- This hat is long enough to cover the ears if you prefer a shorter cap skip the last two rows in the pattern rounds.
- Made with worsted weight yarn
- All sizes written individually
- Written in Standard American terms
Did you make any of these?
I would love to see what you have made be sure to mention @prettydarnadorable or tag me using #prettydarnadorable on Instagram so I can see your creations!
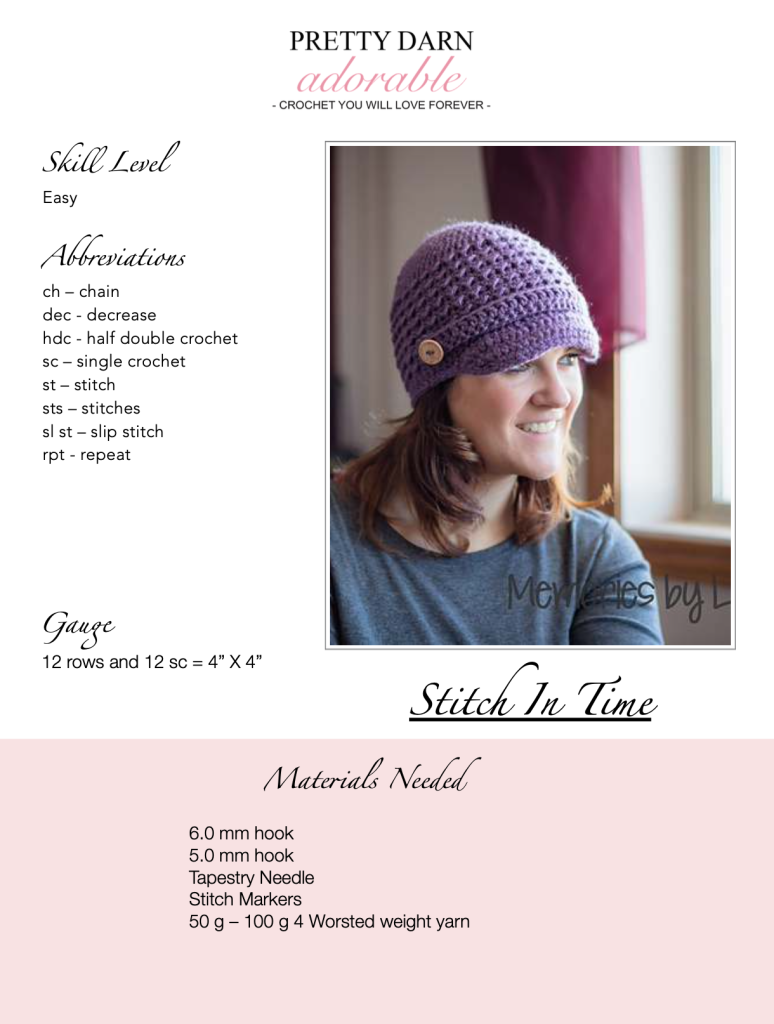
SKILL LEVEL
Easy
ABBREVIATION
- ch – chain
- dec – decrease
- hdc – half double crochet
- sc – single crochet
- st – stitch
- sts – stitches
- sl st – slip stitch
- rpt – repeat
MATERIALS
- 6.0 mm hook
- 5.0 mm hook
- Tapestry Needle
- Stitch Markers
- 50 g – 100 g 4 Worsted weight yarn
GAUGE
12 rows and 12 sc = 4” X 4”
MEASUREMENTS/SIZING
10 yrs to Small adult – 20 ½” x 8”
Medium to Large Adult – 22” x 8”
SPECIAL STITCH
WORK ALL STITCHES LOOSELY
1Hdc in first st, sl st in next *hdc in next st, sl st in next* rpt from * to end of row, join with sl st, ch 1 turn.
DECORATIVE BAND
Using 5mm hook, chain until you get to desired length, dc in 3rd ch from hook, dc in each ch, ch 2 at the top of last dc made. Sl st into bottom of last dc made. Sl st in bottom of each dc. Fasten off and weave in ends.
Use needle and thread to attach buttons. Slip buttons through dc on each end of band.
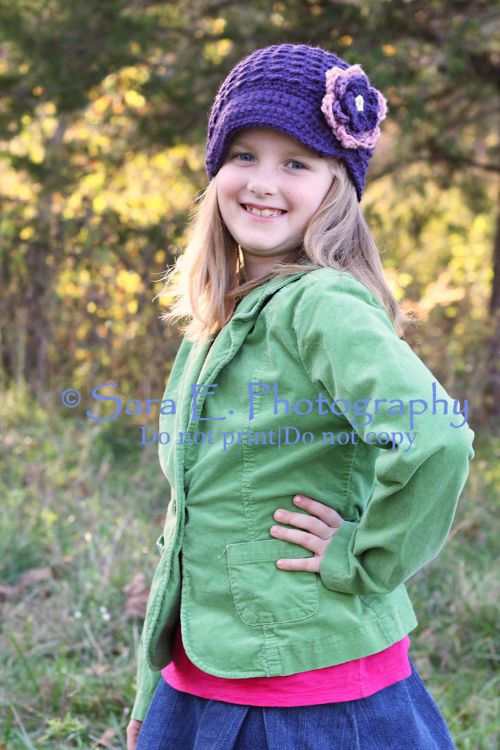
CROCHET FLOWER PATTERN
This flower is made in three separate pieces which will be joined together
Small Flower
Using 5mm hook ch 4, join with sl st
Rnd 1: Ch 1, 5sc in circle, join with sl st
Rnd 2: ch2, 2dc, ch2, sl st, *(sl st, ch2, 2dc, ch2, sl st) in next st* rpt from *to* 3 more times. Five petals made.
Medium Flower
Using 5mm hook ch 4, join with sl st
Rnd 1: Ch 1, 6sc in circle, join with sl st
Rnd 2: *ch3, sl st next st* (6 times) = 6, ch 3 spaces
Rnd 3: (sl st, hdc, 3dc, hdc, sl st) in each ch 3 sp, join last st with sl st (6 petals) fasten off weave in ends
Large Flower
Using 5mm hook ch 4, join with sl st
Rnd 1: Ch 2, 12 dc in circle, join with sl st
Rnd 2: *ch4, sk next st, sl st next st* (6 times) = 6, ch 4 spaces
Rnd 3: (sl st, hdc, dc, tc, dc, hdc, sl st) in each ch4 sp, join last st with sl st (6 petals) fasten off weave in ends
Stitch flowers together attach to hat add optional button to middle.
Crochet Newsboy Cap for Teens
Using 6.0 mm hook ch 2
Rnd 1: Work 8 hdc in 2nd st from hook. (8 hdc)
Rnd 2: 2 hdc in each st around (16 hdc)
Rnd 3: 1 hdc in first st *2 hdc in next st, 1 hdc in next st* rpt from * to * (24 hdc)
Rnd 4: 1 hdc in first 2 sts *2 hdc in next st, 1 hdc in next 2 sts* rpt from * to * (32 hdc)
Rnd 5: 1 hdc in first 3 sts *2 hdc in next st, 1 hdc in next 3 sts* rpt from * to * (40 hdc)
Rnd 6: 1 hdc in first 4 sts *2 hdc in next st, 1 hdc in next 4 sts* rpt from * to * (48 hdc)
Rnd 7: 1 hdc in first 5 sts *2 hdc in next st, 1 hdc in next 5 sts* rpt from * to *(56 hdc)
Rnd 8: 1 hdc in first 6 sts *2 hdc in next st, 1 hdc in next 6 sts* rpt from * to * (64 hdc)
From this point forward all rounds will be joined with a sl st.
Rnd 9: Sc in first st and each st around (64 sts) ch 1 turn
Rnd 10:*1Hdc in first st, sl st in next * rpt from * to end of rnd, (64 sts) ch 1 turn
Rnd 11: Sc in first st and each st around to end of rnd (64 sc) ch 1 turn
Rnd 12: *1Hdc in first st, sl st in next * rpt from * to end of rnd, (64 sts) ch 1 turn
Rnd 13: Sc in first st and each st around to end of rnd (64 sc) ch 1 turn
Rnd 14: *1Hdc in first st, sl st in next * rpt from * to end of rnd, (64 sts) ch 1 turn
Rnd 15: Sc in first st and each st around to end of rnd (64 sc) ch 1 turn
Rnd 16: *1Hdc in first st, sl st in next * rpt from * to end of rnd, (64 sts) ch 1 turn
Rnd 17: Sc in first st and each st around to end of rnd (64 sc) ch 1 turn
Rnd 18: *1Hdc in first st, sl st in next * rpt from * to end of rnd, (64 sts) ch 1 turn
Rnd 19: Sc in first st and each st around to end of rnd (64 sc) ch 1 turn
Rnd 20: *1Hdc in first st, sl st in next * rpt from * to end of rnd, (64 sts) ch 1 turn
Rnd 21: Sc in first st and each st around to end of rnd (64 sc) ch 1 turn
Rnd 22: *1Hdc in first st, sl st in next * rpt from * to end of rnd, (64 sts) ch 1 turn
Change to 5.0mm hook for rest of pattern
Rnd 23 – 25: Sc in each stitch around join last round with a sl st and fasten off.
BRIM
Working with two strands of yarn held together, join yarn with slip stitch in 17th st from fasten of point.
Row 1: Ch 1, sc in next 27 sts (28sc)
Row 2: Ch 1 turn, sc dec over next 2 sts, sc next 5, 2 sc in next st, sc next 10, 2 sc in next st, sc next 5 sts, sc dec over next 2 sts, sc last st (28 sc)
Row 3: Ch 1 turn, sc dec over next 2 sts, sc next 24 sts, sc dec over next 2 sts, sc in last st (26 sc)
Row 4: Ch 1 turn, sc dec over next 2 sts, sc next 4 sts, 2 sc in next st, sc next 10 sts, 2 sc next st, sc next 4 sts, sc dec over next 2 sts, sc last st (26 sc)
Row 5: Ch 1 turn, sc dec over next 2 sts, sc in next 22 sts, sc dec over next 2 sts, sc in last st (24 sc)
Fasten off and weave in all ends.
With single strand join yarn at middle back fasten off point and work sc crochet in each stitch around cap up brim sides along brim front and along other side. Fasten off and weave in ends and ENJOY!
Crochet Newsboy Cap for Ladies
Using 6.0 mm hook ch 2
Rnd 1: Work 8 hdc in 2nd st from hook. (8 hdc)
Rnd 2: 2 hdc in each st around (16 hdc)
Rnd 3: 1 hdc in first st *2 hdc in next st, 1 hdc in next st* rpt from * to * (24 hdc)
Rnd 4: 1 hdc in first 2 sts *2 hdc in next st, 1 hdc in next 2 sts* rpt from * to * (32 hdc)
Rnd 5: 1 hdc in first 3 sts *2 hdc in next st, 1 hdc in next 3 sts* rpt from * to * (40 hdc)
Rnd 6: 1 hdc in first 4 sts *2 hdc in next st, 1 hdc in next 4 sts* rpt from * to * (48 hdc)
Rnd 7: 1 hdc in first 5 sts *2 hdc in next st, 1 hdc in next 5 sts* rpt from * to * (56 hdc)
Rnd 8: 1 hdc in first 6 sts *2 hdc in next st, 1 hdc in next 5 sts* rpt from * to * (64 hdc)
Rnd 9: 1 hdc in first 15sts *2 hdc in next st, 1 hdc in next 15 sts* rpt from * to * (68 hdc)
From this point forward all rounds will be joined with a sl st.
Rnd 10: Sc in first st and each st around (68 sts) ch 1 turn
Rnd 11:*1Hdc in first st, sl st in next * rpt from * to end of rnd, (68 sts) ch 1 turn
Rnd 12: Sc in first st and each st around to end of rnd (68 sc) ch 1 turn
Rnd 13: *1Hdc in first st, sl st in next * rpt from * to end of rnd, (68 sts) ch 1 turn
Rnd 14: Sc in first st and each st around to end of rnd (68 sc) ch 1 turn
Rnd 15: *1Hdc in first st, sl st in next * rpt from * to end of rnd, (68 sts) ch 1 turn
Rnd 16: Sc in first st and each st around to end of rnd (68 sc) ch 1 turn
Rnd 17: *1Hdc in first st, sl st in next * rpt from * to end of rnd, (68 sts) ch 1 turn
Rnd 18: Sc in first st and each st around to end of rnd (68 sc) ch 1 turn
Rnd 19: *1Hdc in first st, sl st in next * rpt from * to end of rnd, (68 sts) ch 1 turn
Rnd 20: Sc in first st and each st around to end of rnd (68 sc) ch 1 turn
Rnd 21: *1Hdc in first st, sl st in next * rpt from * to end of rnd, (68 sts) ch 1 turn
Rnd 22: Sc in first st and each st around to end of rnd (68 sc) ch 1 turn
Rnd 23: *1Hdc in first st, sl st in next * rpt from * to end of rnd, (68 sts) ch 1 turn
Change to 5.0mm hook for rest of pattern
Rnd 24 – 26: Sc in each stitch around join last round with a sl st and fasten off.
BRIM
Working with two strands held together, join yarn with slip stitch in 17th st from fasten of point.
Row 1: Ch 1, sc in next 27 sts (28sc)
Row 2: Ch 1 turn, sc dec over next 2 sts, sc next 5, 2 sc in next st, sc next 10, 2 sc in next st, sc next 5 sts, sc dec over next 2 sts, sc last st (28 sc)
Row 3: Ch 1 turn, sc dec over next 2 sts, sc next 24 sts, sc dec over next 2 sts, sc in last st (26 sc)
Row 4: Ch 1 turn, sc dec over next 2 sts, sc next 4 sts, 2 sc in next st, sc next 10 sts, 2 sc next st, sc next 4 sts, sc dec over next 2 sts, sc last st (26 sc)
Row 5: Ch 1 turn, sc dec over next 2 sts, sc in next 22 sts, sc dec over next 2 sts, sc in last st (24 sc)
Fasten off and weave in all ends.
With single strand, join yarn at middle back fasten off point and work sc crochet in each stitch around cap up brim sides along brim front and along other side. Fasten off and weave in ends and ENJOY!

🎉 Free Pattern Download
This premium crochet pattern is free for a short time — grab it while you can! 💕
Sign up to unlock this pattern through Grow Exclusive Content and get instant access to all my free crochet downloads, plus any future limited-time freebies.
🧶 Help keep the freebies coming!
If you love getting access to these premium patterns, please share the link (not the pattern) with your friends and crochet groups — spreading the word helps me offer more free downloads in the future.
💬 Let me know you got it!
Leave a quick comment below once you’ve downloaded so I know how many people are enjoying it!
So that is pretty much all. I would love to hear how you made out with this pattern. Did you make it in cotton / acrylic / wool?
If you would like to share and brag about your crochet be sure to tag me on instagram @prettydarnadorable #pdamaker
Also be sure to FOLLOW ME ON PINTEREST so you get all the crochet designs I love along with any new ones I put out directly in your feed.
Till next time,
Stay cozy.
Below are a few more patterns I think you will really enjoy making!


