


Everyone should have that one special easy crochet beanie pattern they can make at the last minute and I am super happy to be offering you this FREE Ribbed Crochet Beanie free crochet pattern as a free instant pdf download here on my blog.
Using just basic stitches: chain, single crochet and half double crochet in the back loop only this easy crochet hat pattern will be one you turn to over and over again.
Whether you want to make this ribbed look beanie for a baby, toddler, child or adult I have all the different sizes you will need written up for you. Included below is also a detailed chart showing the exact amount of worsted weight yarn you will need before you start working up this free pattern.
Scroll down for free crochet pattern download

EASY BREEZY RIBBED BEANI
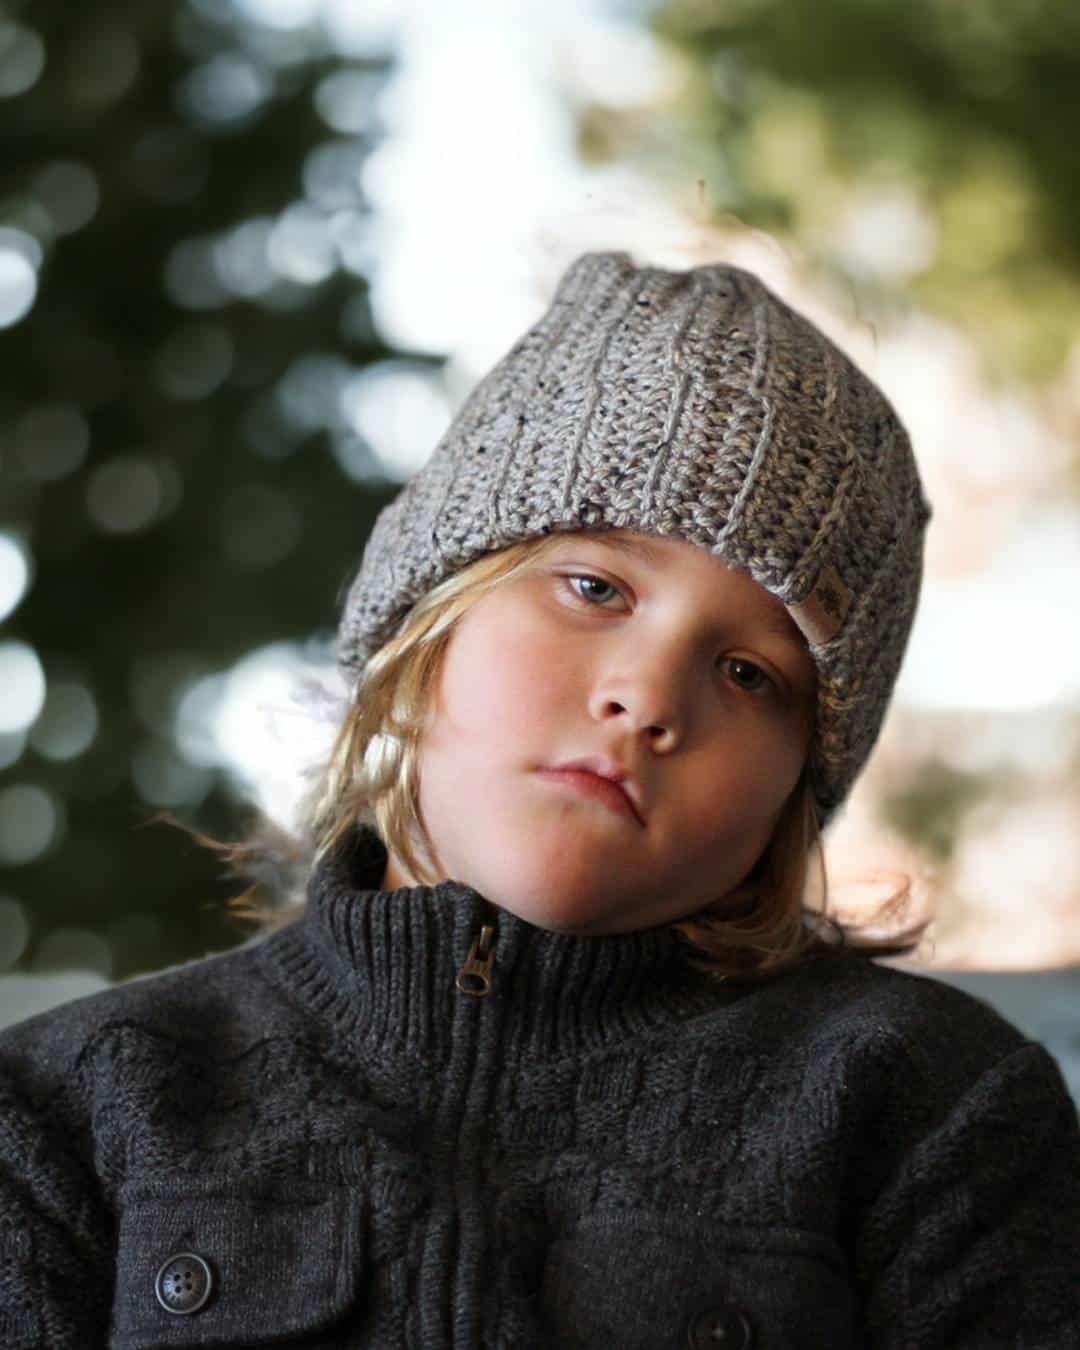
With its classic design and knit look stitch the Huntsman crochet ribbed beanie is great for any age and gender making it popular with everyone. So good thing I offered the pattern in EIGHT SIZES!
Christian was only 7 years old! I remember while he modelled it he said he was doing the ‘tough guy pose’. They grow way too fast! Hmmm seems to me he needs to model the adult one for me now!
Construction of the Hat
The Huntsman has been incredibly popular since 2015 and I believe because it is such a simple pattern to make in any size – no increasing or decreasing, no magic circle and no right side or wrong side. These are all things that can stump people just starting to crochet.
Because this hat is worked up as a rectangle the starting chain determines the height of the beanie. In other words to change your hat height simply change the number of stitches in starting chain.
Then the number of rows you make determine the overall width of the beanie (the part that goes around your head). For a larger hat you will work more rows and for a smaller you will work fewer rows.
If you are able I always recommend using a tape measure to get the exact head circumference of the person you are making it for for the best chance of a perfect fit. With this technique you can achieve the best hat size every time!
Once you check out the sizing chart below you will start by making a chain X stitches long. Then this beautiful stretchy ribbed stitch pattern begins. All you will be doing is working half double crochet until you get to the end of the row.
The only difference in the next row is that you will be working in half double crochet the back loop only (also written as hdc blo). This is what creates the ‘ribbed look’ in this simple ribbed beanie. This stitch pattern creates a lot of stretch
So first let’s talk about the back loop. The top of every crochet stitch has two loops a front and a back – this is what creates that ‘V’ shape you hear me talking about in my videos.
So lets turn that sideways shall we?

Most times when working regular stitches you work under both of the loops of a stitch, but in this case for this pattern you will be working in the back loop only. When you do this it creates a ridge across the row. This ridge is actually your front loop that you never worked in.
As you repeat rows working back and forth it creates this wonderful texture!

Once you have worked enough rows to create a rectangle and you have complete the final row, lay the piece flat with ribs vertical and fold in half. You don’t need to worry about right and wrong sides as they are both the same.
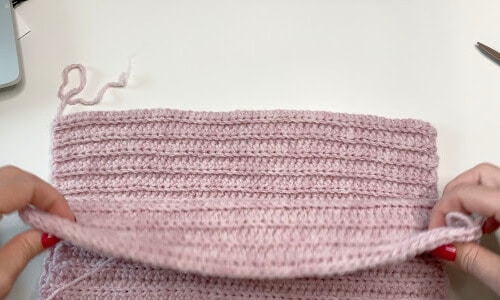
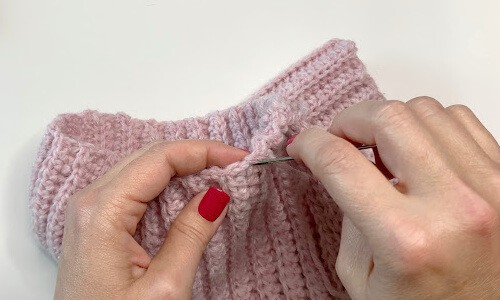
Using slip stitches sew together the first number of stitches in the size instructions below (this is the cuff).
Turn hat inside out and continue to sew together. This will create a tube. Do not fasten off.


Using a yarn needle and yarn weave in and out at the top of the hat and pull closed or working in the ends of the rows sc2tog over next 2 sts continually until the top of the hat is closed.
Crochet Ribbed Hat Measurements
Note that these measurements are the finished measurement of the rectangle. Your completed hat will be shorter once the cuff is folded up!
To make this hat longer or shorter easily adjust your beginning chain by adding or subtracting the number of chains you make.
This hat is also super stretchy so keep that in mind when making. If you have the head measurements make your completed rectangle 1-2 inches smaller to allow for stretch.

Use the chart below if you wanna jump right in. Keep in mind that you can easily adjust the height of the hat be adjusting the starting chain.
| Finished Measurements | Worsted Weight Yarn Requirements | |||||
| Width | Height | G | M | Oz | Yd | |
| 0 to 3 months | 14” | 6” | 40 | 85 | 1.41 | 93 |
| 3 to 6 months | 15” | 7” | 50 | 106 | 1.76 | 116 |
| 6 to 12 months | 16” | 8” | 60 | 127 | 2.12 | 139 |
| 12 months to 3 yrs | 17” | 9” | 70 | 148 | 2.47 | 162 |
| 3 to 10 yrs | 18” | 10” | 85 | 180 | 3.00 | 197 |
| Preteen | 19” | 11” | 90 | 191 | 3.17 | 209 |
| Adult | 20” | 11” | 100 | 212 | 3.53 | 232 |
| Adult xl | 21” | 12” | 110 | 233 | 3.88 | 255 |
Designers Notes
💕 Skill Level is Beginner
💕 Skills Needed half double crochet
💕 Sizes Newborn to Adult
💕 Made with worsted weight yarn
💕 All sizes written individually
💕 Unisex crochet hat pattern
💕 Written in Standard American terms
💕 Easily sub chunky yarn

Free Crochet Ribbed Beanie Pattern
This crochet hat pattern is the perfect project for those who are new to crochet. With a ribbed slouchy design, it creates a stylish accessory that is both comfortable and functional.
The hat is worked in rows using worsted weight yarn, making it suitable for all seasons. Whether you’re heading out for a brisk walk in the spring or fall, or bundling up for a winter snow day, this hat will be your go-to accessory.
Be sure to check out the video tutorial to answer any questions as you go!

Skill Level
Beginner
Abbreviations
- blo – back loop only
- ch – chain
- hdc – half double crochet
- rnd – round
- sc – single crochet
- st – stitch
- sts – stitches
- sl st – slip stitch
- rpt – repeat
Gauge
8 hdc x 5 rows = 2 inches x 2 inches
Gauge is less important when crocheting a hat as a rectangle such as this one. The width can be adjusted by adding more rows, regardless of your gauge. While gauge may affect the length slightly, it can be compensated for by adding or removing stitches from your starting chain as needed.

Finished Measurements & Yarn Requirements
Please note that the actual amount of yarn needed may change depending on the yarn chosen always purchase a little more than you think you may need.
Materials Needed
Some items below click through to an affiliate link at no extra cost to you.
You can check out all my favourites HERE
Yarn used in pattern (see sizing chart above for exact amount required):
Lions Brand – Wool Ease
Yarn Gauge:
Gauge must be matched for the correct fit of this hat, matching the recommended yarn gauge can assist in successful substitution and result in a more accurate finished product.
- Tapestry Needle
- Stitch Markers
- Scissors
- Measuring Tape
- Crochet Hooks
- 6.50 mm crochet hook
- Please note that the actual amount of yarn needed may change depending on the yarn chosen always purchase a little more than you think you may need.
- Recommended Worsted Weight Yarns
- Lions Brand – Wool Ease
- Lions Brand – Vanna’s Choice
Notes
This pattern is that it also comes with a video tutorial. This means that you can follow along step-by-step and have all your questions answered in real-time.
Whether you’re struggling to understand a particular stitch or just want to see how it should look, the video tutorial is a fantastic resource to have. You can pause, rewind, and re-watch as many times as you need to make sure you’re doing everything correctly.
Watch Video Tutorial
The ribbed texture of the hat creates a comfortable and stretchy fit, which means that it will fit most head sizes.
You can customize the length of your hat to create the perfect slouchy look that complements your personal style. And if you want to add a little extra flair, you can even add a pom-pom or other embellishment to make it truly unique.
0-3 Months
Measurements 14” x 6”
Using 6.50 mm hook Ch 30
Row 1: Hdc in 3rd ch from hook and each ch across (28) ch 1 turn
Rows 2: Hdc in blo (back loop only) in 1st and each hdc across (28) ch 1, turn.
Repeat row 2 – until piece measures 14 inches in length.
After final row, lay piece flat with ribs vertical and fold in half. You don’t need to worry about right and wrong sides as they are both the same.
The Cuff
Using slip stitches sew together the first 7 sts (this is the cuff).
Turn hat inside out and continue to sew together. This will create a tube. Do not fasten off. Continue to close the top hat following instructions below.
Closing the top of the hat.
To sew the top of a crochet hat closed, cut off a long tail of yarn 12 to 16 inches long. Thread the yarn through the needle and insert it into the top of the hat.
Weave the needle in and out of the stitches, pulling tightly to create a secure closure.
Once the top of the hat is securely closed, weave the tail through the stitches to hide it, and cut off the excess yarn.
Turn the hat right side out.

3 – 6 Months
Measurements 15” x 7”
Using 6.50 mm hook Ch 32
Row 1: Hdc in 3rd ch from hook and each ch across (30) ch 1 turn
Rows 2: Hdc in blo (back loop only) in 1st and each hdc across (30) ch 1, turn.
Repeat row 2 – until piece measures 15 inches in length.
After final row, lay piece flat with ribs vertical and fold in half. You don’t need to worry about right and wrong sides as they are both the same.
The Cuff
Using slip stitches sew together the first 7 sts (this is the cuff).
Turn hat inside out and continue to sew together. This will create a tube. Do not fasten off. Continue to close the top hat following instructions below.
Closing the top of the hat.
To sew the top of a crochet hat closed, cut off a long tail of yarn 12 to 16 inches long. Thread the yarn through the needle and insert it into the top of the hat.
Weave the needle in and out of the stitches, pulling tightly to create a secure closure.
Once the top of the hat is securely closed, weave the tail through the stitches to hide it, and cut off the excess yarn.
Turn the hat right side out.
6 – 12 Months
Measurements 16” x 8”
Using 6.50 mm hook Ch 38
Row 1: Hdc in 3rd ch from hook and each ch across (36) ch 1 turn
Rows 2: Hdc in blo (back loop only) in 1st and each hdc across (36) ch 1, turn.
Repeat row 2 – until piece measures 16 inches in length.
After final row, lay piece flat with ribs vertical and fold in half. You don’t need to worry about right and wrong sides as they are both the same.
The Cuff
Using slip stitches sew together the first 8 sts (this is the cuff).
Turn hat inside out and continue to sew together. This will create a tube. Do not fasten off. Continue to close the top hat following instructions below.
Closing the top of the hat.
To sew the top of a crochet hat closed, cut off a long tail of yarn 12 to 16 inches long. Thread the yarn through the needle and insert it into the top of the hat.
Weave the needle in and out of the stitches, pulling tightly to create a secure closure.
Once the top of the hat is securely closed, weave the tail through the stitches to hide it, and cut off the excess yarn.
Turn the hat right side out.
12 Months to 3 Years
Measurements 17” x 9”
Using 6.50 mm hook Ch 44
Row 1: Hdc in 3rd ch from hook and each ch across (42) ch 1 turn
Rows 2: Hdc in blo (back loop only) in 1st and each hdc across (42) ch 1, turn.
Repeat row 2 – until piece measures 17 inches in length.
After final row, lay piece flat with ribs vertical and fold in half. You don’t need to worry about right and wrong sides as they are both the same.
The Cuff
Using slip stitches sew together the first 8 sts (this is the cuff).
Turn hat inside out and continue to sew together. This will create a tube. Do not fasten off. Continue to close the top hat following instructions below.
Closing the top of the hat.
To sew the top of a crochet hat closed, cut off a long tail of yarn 12 to 16 inches long. Thread the yarn through the needle and insert it into the top of the hat.
Weave the needle in and out of the stitches, pulling tightly to create a secure closure.
Once the top of the hat is securely closed, weave the tail through the stitches to hide it, and cut off the excess yarn.
Turn the hat right side out.
3 – 10 Years
Measurements 18” x 10”
Using 6.50 mm hook Ch 48
Row 1: Hdc in 3rd ch from hook and each ch across (46) ch 1 turn
Rows 2: Hdc in blo (back loop only) in 1st and each hdc across (46) ch 1, turn.
Repeat row 2 – until piece measures 18 inches in length.
After final row, lay piece flat with ribs vertical and fold in half. You don’t need to worry about right and wrong sides as they are both the same.
The Cuff
Using slip stitches sew together the first 9 sts (this is the cuff).
Turn hat inside out and continue to sew together. This will create a tube. Do not fasten off. Continue to close the top hat following instructions below.
Closing the top of the hat.
To sew the top of a crochet hat closed, cut off a long tail of yarn 12 to 16 inches long. Thread the yarn through the needle and insert it into the top of the hat.
Weave the needle in and out of the stitches, pulling tightly to create a secure closure.
Once the top of the hat is securely closed, weave the tail through the stitches to hide it, and cut off the excess yarn.
Turn the hat right side out.

Teen
Measurement 19” x 11”
Using 6.50 mm hook Ch 52
Row 1: Hdc in 3rd ch from hook and each ch across (50) ch 1 turn
Rows 2: Hdc in blo (back loop only) in 1st and each hdc across (50) ch 1, turn.
Repeat row 2 – until piece measures 19 inches in length.
After final row, lay piece flat with ribs vertical and fold in half. You don’t need to worry about right and wrong sides as they are both the same.
The Cuff
Using slip stitches sew together the first 9 sts (this is the cuff).
Turn hat inside out and continue to sew together. This will create a tube. Do not fasten off. Continue to close the top hat following instructions below.
Closing the top of the hat.
To sew the top of a crochet hat closed, cut off a long tail of yarn 12 to 16 inches long. Thread the yarn through the needle and insert it into the top of the hat.
Weave the needle in and out of the stitches, pulling tightly to create a secure closure.
Once the top of the hat is securely closed, weave the tail through the stitches to hide it, and cut off the excess yarn.
Turn the hat right side out.
Adult
Measurement 20” x 11”
Using 6.50 mm hook Ch 52
Row 1: Hdc in 3rd ch from hook and each ch across (50) ch 1 turn
Rows 2: Hdc in blo (back loop only) in 1st and each hdc across (50) ch 1, turn.
Repeat row 2 – until piece measures 20 inches in length.
After final row, lay piece flat with ribs vertical and fold in half. You don’t need to worry about right and wrong sides as they are both the same.
The Cuff
Using slip stitches sew together the first 10 sts (this is the cuff).
Turn hat inside out and continue to sew together. This will create a tube. Do not fasten off. Continue to close the top hat following instructions below.
Closing the top of the hat.
To sew the top of a crochet hat closed, cut off a long tail of yarn 12 to 16 inches long. Thread the yarn through the needle and insert it into the top of the hat.
Weave the needle in and out of the stitches, pulling tightly to create a secure closure.
Once the top of the hat is securely closed, weave the tail through the stitches to hide it, and cut off the excess yarn.
Turn the hat right side out.
Adult XL
Measurement 21” x 12”
Using 6.50 mm hook Ch 54
Row 1: Hdc in 3rd ch from hook and each ch across (52) ch 1 turn
Rows 2: Hdc in blo (back loop only) in 1st and each hdc across (52) ch 1, turn.
Repeat row 2 – until piece measures 21 inches in length.
After final row, lay piece flat with ribs vertical and fold in half. You don’t need to worry about right and wrong sides as they are both the same.
The Cuff
Using slip stitches sew together the first 10 sts (this is the cuff).
Turn hat inside out and continue to sew together. This will create a tube. Do not fasten off. Continue to close the top hat following instructions below.
Closing the top of the hat.
To sew the top of a crochet hat closed, cut off a long tail of yarn 12 to 16 inches long. Thread the yarn through the needle and insert it into the top of the hat.
Weave the needle in and out of the stitches, pulling tightly to create a secure closure.
Once the top of the hat is securely closed, weave the tail through the stitches to hide it, and cut off the excess yarn.
Turn the hat right side out.
Click on photo below for pattern download

Already a member? Head on over to the Freebie Library and start downloading now! To get instant access to these festive planners and so much more, simply click the buttons below to sign up for my freebie library!
You’ll unlock tons of free resources, patterns, and crochet goodies to help you stay organized and inspired.