


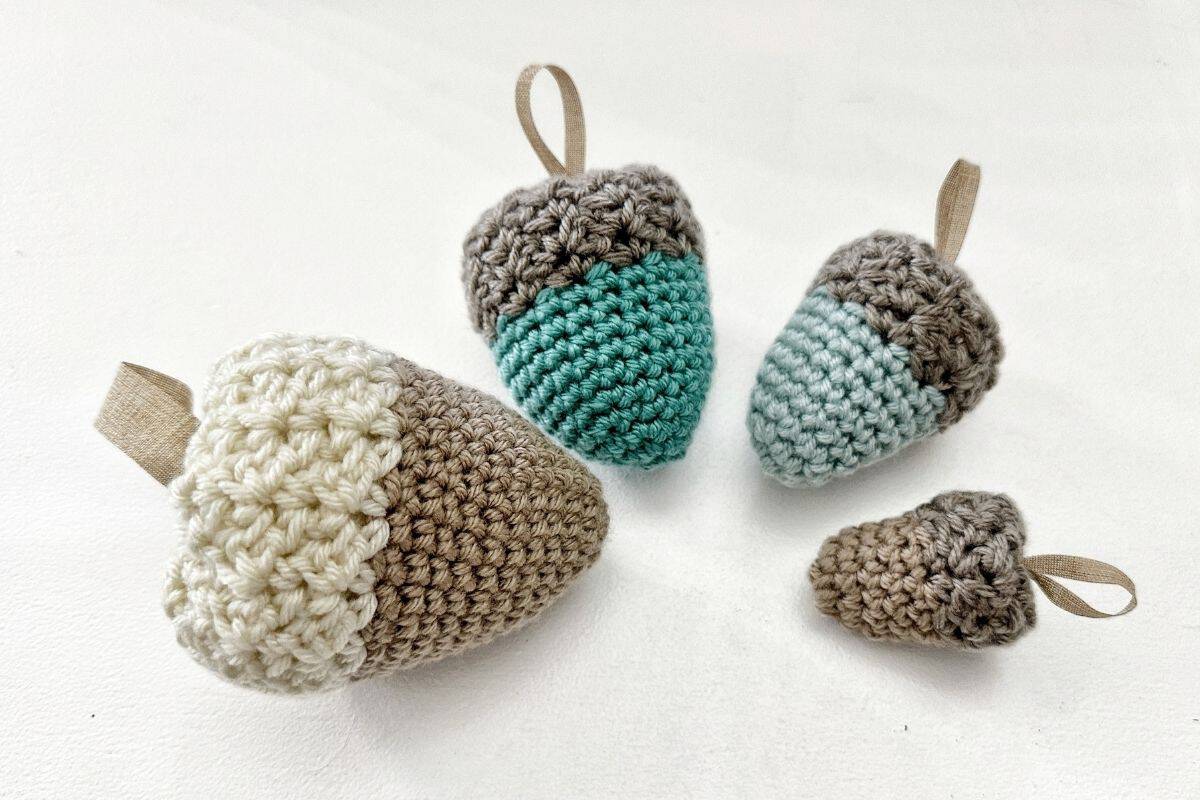
I love making small crochet projects for the fall season, especially when I can use yarn I already have. These little Cedar Ridge Acorns are quick to make, easy to customize and small enough to tuck into the fall decor I already have around my home.
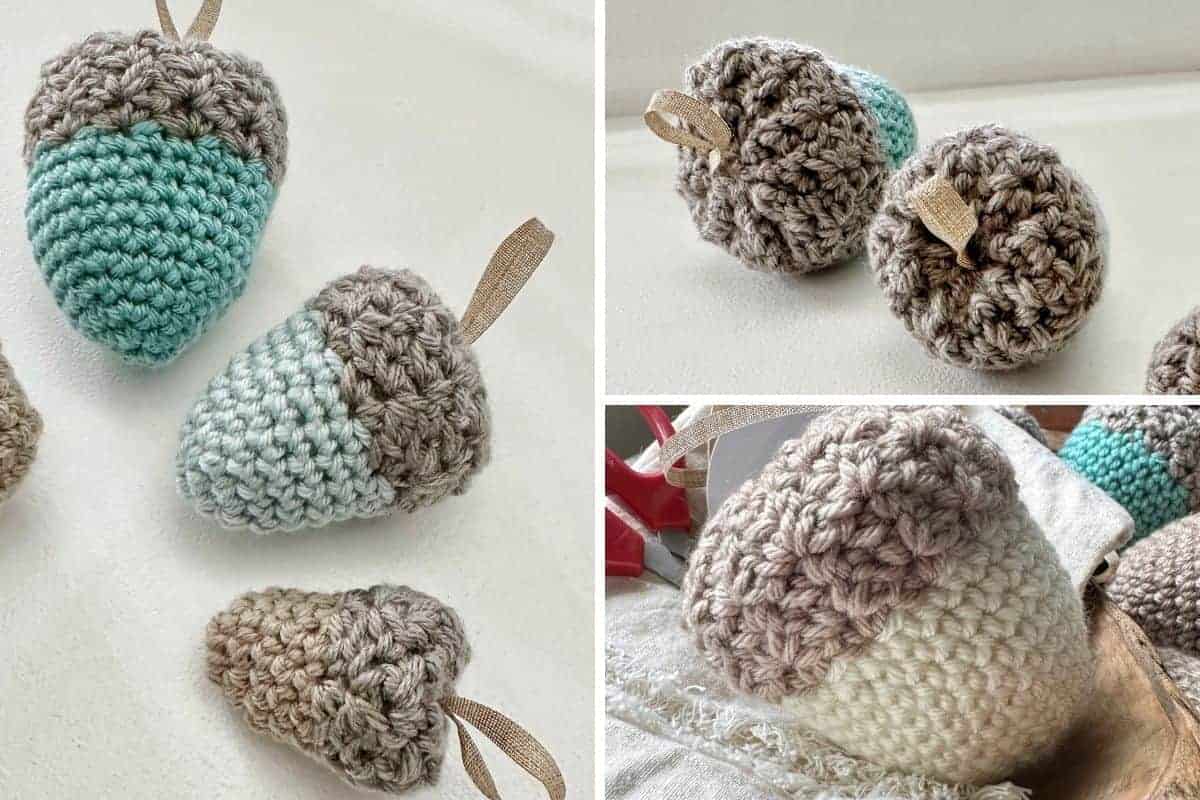
This free beginner crochet acorn pattern comes in four different sizes and uses simple single crochet stitches and chains. The body is easy, but my favourite part is the textured crochet acorn cap. That little bit of texture at the top of the acorn makes the finished piece look much more like a real acorn.
I used worsted weight yarn in cream, beige and aqua, but this is a perfect project for scraps of yarn. Change the colour combinations, add stripes or try different yarn weights to make your finished acorns completely your own.
Crochet Acorn Pattern At a Glance
Skill Level: Beginner
Yarn: Worsted weight yarn or yarn from your stash
Crochet Hook: 5.00 mm
Sizes: Mini, Small, Medium and Large
Construction: Worked from the bottom up in continuous rounds
Stitches: Chain, single crochet and slip stitch
Gauge: Not critical
Great For: Fall decor, an autumn garland, decorative bowls, baskets and scrap yarn
An Easy Crochet Acorn Pattern for Beginners
Don’t let the textured top fool you. This really is an easy crochet acorn pattern.
The acorn body is made with simple single crochet stitches worked in continuous rounds. Once you reach the top of the acorn, you’ll use a combination of single crochet and chain stitches to create the textured cap.
If you know how to chain and single crochet, I think you can make this free pattern.

Four Different Sizes
I deliberately kept these acorns on the smaller side.
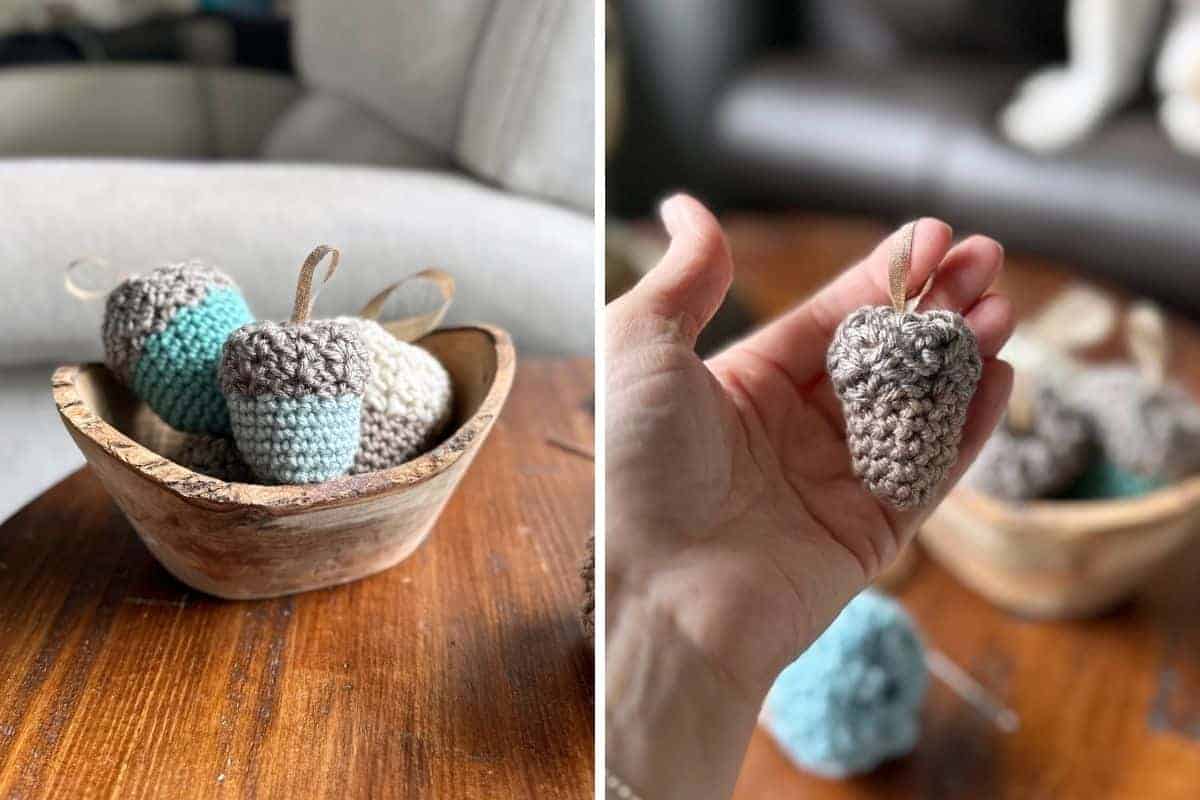
I don’t have a lot of flat surfaces for seasonal decorating, so I wanted something I could add to a decorative bowl, basket or shelf without having fall decor everywhere.
Make all four different sizes for a mixed display or choose your favourite small acorn and make a bunch for an autumn garland.
Purchase Ad Free Pattern – Instant Download!
Purchase the ad-free PDF for a smooth, distraction-free crocheting experience anytime, anywhere.
Already a subscriber? Check your latest email for your special discount code. Not subscribed yet? Sign up here to get yours!
Thanks so much for supporting my blog!
Skill Level
Beginner
Abbreviations
- ch – chain
- sc – single crochet
- sk – skip
- st – stitch
- sts – stitches
- sl st – slip stitch
- rpt – repeat
Gauge
Gauge is not critical for this project.
Finished Measurements (width x height)
- Mini: 1 1/2” x 1 3/4”
- Small: 2 1/4” x 2 3/4”
- Medium: 2 3/4” x 3 1/4”
- Large: 3 1/4” x 4”
- X-Large: 4” x 3 1/2”
Measurements are taken after stuffing. Final size may vary based on how much stuffing is used and how the acorn is shaped.
Materials Needed
- 5.00 mm hook – Be sure that your hook is either the same or smaller than recommended for your yarn.
- Tapestry needle
- Stitch markers
- Poly-fil
- Worsted weight yarn – Requirements listed below for solid acorn:
| Size | Body | Top |
| Mini | 8.7 yds / 0.18 oz / 8.2 m / 5 g | 13.0 yds / 0.26 oz / 12.1 m / 8 g |
| Small | 22.6 yds / 0.46 oz / 21.2 m / 10 g | 29.4 yds / 0.60 oz / 27.3 m / 13 g |
| Medium | 31.7 yds / 0.64 oz / 29.7 m / 14 g | 49.8 yds / 1.01 oz / 46.6 m / 22 g |
| Large | 40.7 yds / 0.84 oz / 38.1 m / 18 g | 99.6 yds / 2.00 oz / 93.2 m / 44 g |
Yarn Options
You can use any yarn weight and hook size you have in your stash for this project. Just be sure to choose a hook that is the same or smaller than what your yarn label calls for. This creates tight, neat stitches so your poly-fil stuffing doesn’t peek through.
Keep in mind that changing your yarn and hook size will directly change the final size of your acorn. Thinner yarns with smaller hooks will make sweet, mini acorns, while thick, bulky yarns will give you large, plush ones!
How to Make Colour Change
Steps
- Work the round as written in the current colour.
- When you get to the very last stitch of the round, stop before completing it.
- Drop the old colour and place the new colour on your hook.
- Pull the new colour through to finish the stitch.
- Join and chain 1 and turn (as pattern instructs), now working the next round in the new colour.
- No need to weave in – simply drop the current colour or tie a knot and tuck them to the inside of the acorn.
Notes:
- This acorn is crocheted from the bottom up.
- It is really important that you do not size your hook up for this pattern – it has somewhat of an open weave and if you go too large the stuffing will show through the chain 2 spaces.
- Use a stitch marker at the beginning of each round for easier counting.
- Bottom of the acorn is worked continuously in a spiral. Do not join unless noted.
- For the top of the acorn, all stitches are worked into the chain-2 spaces from the previous round, not into individual stitches.
Free Crochet Acorn Pattern
Mini Acorn
The acorn is worked from the bottom up in continuous rounds without joining. Place a stitch marker in the first stitch of each round to help keep track of your count.
With a 5.00 mm hook, ch 2.
Rnd 1: Work 6 sc into the 2nd ch from the hook. (6 sts)
Alternative start: You can also begin with a magic circle and work 6 sc into the ring.
Rnd 2: 2 sc in 1st st and each st around (12)
Rnds 3 – 6: Sc in 1st st and each st around. (12). After last round join with sl st.
Change to colour for top of acorn. Ch 1 and turn.
mini Crochet Acorn Cap
To begin Rnd 1, work into the first stitch of the final round of the bottom section, then continue as written.
Rnd 1: (Sc, ch 2, sc) in 1st sc, skip next sc. *(Sc, ch 2, sc) in next, skip next sc*. Repeat from *to* till end of rnd. Join with sl st to 1st sc. Ch 1, turn. (6 ch-2 spaces)
Rnds 2-3: (Sc, ch 2, sc) in 1st ch 2 space. *(sc, ch 2, sc) in next ch 2 space.* Repeat from *to* till end of rnd. Join with sl st to 1st sc. Ch 1, turn. (6 ch-2 spaces)
Final Round: Work a sc in each sc around. Join to 1st sc and fasten off, leaving a long tail for closing the acorn.
👉 When finished, scroll down to Finishing (All Sizes) to close and stuff your acorn.
Small Acorn
The acorn is worked from the bottom up in continuous rounds without joining. Place a stitch marker in the first stitch of each round to help keep track of your count.
With a 5.00 mm hook, ch 2.
Rnd 1: Work 6 sc into the 2nd ch from the hook. (6 sts)
Alternative start: You can also begin with a magic circle and work 6 sc into the ring.
Rnd 2: 2 sc in 1st st and each st around (12)
Rnd 3: 1 sc in 1st st *2 sc in next st, 1 sc in next st* rpt from *to* till end of rnd (18)
Rnds 4 – 8: Sc in 1st st and each st around. (18). After last round join with sl st.
Change to colour for top of acorn. Ch 1 and turn.
Small Crochet Acorn Cap
To begin Rnd 1, work into the first stitch of the final round of the bottom section, then continue as written.
Rnd 1: (Sc, ch 2, sc) in 1st sc, skip next sc. *(Sc, ch 2, sc) in next, skip next sc*. Repeat from *to* till end of rnd. Join with sl st to 1st sc. Ch 1, turn. (9 ch-2 spaces)
Rnds 2-4: (Sc, ch 2, sc) in 1st ch 2 space. *(sc, ch 2, sc) in next ch 2 space.* Repeat from *to* till end of rnd. Join with sl st to 1st sc. Ch 1, turn. (9 ch-2 spaces)
Final Round: Work a sc in each sc around. Join to 1st sc and fasten off, leaving a long tail for closing the acorn.
👉 When finished, scroll down to Finishing (All Sizes) to close and stuff your acorn.
Medium Acorn
The acorn is worked from the bottom up in continuous rounds without joining. Place a stitch marker in the first stitch of each round to help keep track of your count.
With a 5.00 mm hook, ch 2.
Rnd 1: Work 6 sc into the 2nd ch from the hook. (6 sts)
Alternative start: You can also begin with a magic circle and work 6 sc into the ring.
Rnd 2: 2 sc in 1st st and each st around (12)
Rnd 3: 1 sc in 1st st *2 sc in next st, 1 sc in next st* rpt from *to* till end of rnd (18)
Rnd 4: 1 sc in 1st 5 sts *2 sc in next st, 1 sc in next 5 sts* rpt from *to* till end of rnd (21)
Rnd 5: 1 sc in 1st 6 sts *2 sc in next st, 1 sc in next 6 sts* rpt from *to* till end of rnd (24)
Rnds 6 – 10: Sc in 1st st and each st around. (24). After last round join with sl st.
Change to colour for top of acorn. Ch 1 and turn.
medium Crochet Acorn Cap
To begin Rnd 1, work into the first stitch of the final round of the bottom section, then continue as written.
Rnd 1: (Sc, ch 2, sc) in 1st sc, skip next sc. *(Sc, ch 2, sc) in next, skip next sc*. Repeat from *to* till end of rnd. Join with sl st to 1st sc. Ch 1, turn. (12 ch-2 spaces)
Rnds 2-5: (Sc, ch 2, sc) in 1st ch 2 space. *(sc, ch 2, sc) in next ch 2 space.* Repeat from *to* till end of rnd. Join with sl st to 1st sc. Ch 1, turn. (12 ch-2 spaces)
Final Round: Work a sc in each sc around. Join to 1st sc and fasten off, leaving a long tail for closing the acorn.
👉 When finished, scroll down to Finishing (All Sizes) to close and stuff your acorn.
Large Acorn
The acorn is worked from the bottom up in continuous rounds without joining. Place a stitch marker in the first stitch of each round to help keep track of your count.
With a 5.00 mm hook, ch 2.
Rnd 1: Work 6 sc into the 2nd ch from the hook. (6 sts)
Alternative start: You can also begin with a magic circle and work 6 sc into the ring.
Rnd 2: 2 sc in 1st st and each st around (12)
Rnd 3: 1 sc in 1st st *2 sc in next st, 1 sc in next st* rpt from *to* till end of rnd (18)
Rnd 4: 1 sc in 1st 5 sts *2 sc in next st, 1 sc in next 5 sts* rpt from *to* till end of rnd (21)
Rnd 5: 1 sc in 1st 6 sts *2 sc in next st, 1 sc in next 6 sts* rpt from *to* till end of rnd (24)
Rnd 6: 1 sc in 1st 7 sts *2 sc in next st, 1 sc in next 7 sts* rpt from *to* till end of rnd (27)
Rnd 7: 1 sc in 1st 8 sts *2 sc in next st, 1 sc in next 8 sts* rpt from *to* till end of rnd (30)
Rnds 8 -12: Sc in 1st st and each st around. (30) After last round join with sl st.
Change to colour for top of acorn. Ch 1 and turn.
large Crochet Acorn Cap
To begin Rnd 1, work into the first stitch of the final round of the bottom section, then continue as written.
Rnd 1: (Sc, ch 2, sc) in 1st sc, skip next sc. *(Sc, ch 2, sc) in next, skip next sc*. Repeat from *to* till end of rnd. Join with sl st to 1st sc. Ch 1, turn. (15 ch-2 spaces)
Rnds 2-6: (Sc, ch 2, sc) in 1st ch 2 space. *(sc, ch 2, sc) in next ch 2 space.* Repeat from *to* till end of rnd. Join with sl st to 1st sc. Ch 1, turn. (15 ch-2 spaces)
Final Round: Work a sc in each sc around. Join to 1st sc and fasten off, leaving a long tail for closing the acorn.
👉 When finished, scroll down to Finishing (All Sizes) to close and stuff your acorn.
Finishing (All Sizes)
- Weave yarn through the top: This may feel a bit backwards, but it’s easier to do before stuffing, otherwise the needle tends to catch on the filling and things can get messy.
- Stuff your acorn: Add fibre fill (or stuffing of your choice) till it’s nice and plump.
- Close the top: Pull the yarn snug to cinch the opening shut. If you are inserting a stem remember to leave a small opening to accommodate the stem.
- Optional shaping: For extra definition, thread the yarn tail up and down through the centre of the acorn a few times, gently pulling to form. Adjust till you’re happy with the shape.
- Finishing touches: Weave in any remaining ends and add embellishments if you like.
Adding the Ribbon Loop
Cut a small length of ribbon and thread one end onto a yarn needle. Insert the needle through the top of the acorn and pull the ribbon end down into the stuffing. Repeat with the other end of the ribbon, inserting it through the top close to the first end.
Leave a loop of ribbon at the top in the size you like. The stuffing will grip the ribbon ends and help hold them securely inside the acorn, so there is no need to tie them together.
Tip: Add the ribbon after stuffing but before you completely close the top. This makes it much easier to adjust the size of your loop before finishing.
👉 Once you’ve closed it up, give your acorn a little squish and fluff till it looks just right. Then add a stem or leave it as is – either way it’s ready to show off!
Safety Note
When using natural materials like twigs, wood, or cinnamon sticks, inspect them to ensure they are smooth and free of sharp edges or splinters. Keep small accents like pine cones, beads, and loose twigs out of reach of young children and pets, as these can pose a choking hazard. For safety in playrooms or children’s spaces, soft crocheted stems and sewn felt leaves are recommended instead of hard items or hot glue.
Fall Decor Ideas for Your Finished Acorns
I put mine together in a small decorative bowl because they don’t take up much room.
You could also tuck your finished acorns into baskets, add them to a fall centrepiece, place the small acorns around a mantel or shelf, or use one as a little handmade addition to a fall place setting.
The Mini and Small sizes would also be really cute made into an autumn garland. Make several in different colour combinations and string them together using the ribbon loops.
You could even tie a small acorn onto a wrapped gift instead of a bow.

More Ways to Customize Your Crochet Acorns
There really isn’t a right colour for an acorn.
Try switching the body and cap colours, adding stripes, combining light brown and dark brown for a more traditional look, or ignoring traditional fall colours completely like I did.
A specialty or textured yarn could be really fun for the crochet acorn cap too.
And because this free crochet acorn pattern works with different yarn weights, you can make everything from tiny acorns to chunky versions without needing a completely different pattern.
Frequently Asked Questions
Is this free crochet acorn pattern beginner friendly?
Yes. This is designed as a beginner crochet pattern using chains, slip stitches and simple single crochet stitches. If you’re comfortable crocheting in continuous rounds, you should be able to make it.
What yarn is best for crochet acorns?
I used worsted weight yarn, also called medium weight yarn, for my finished acorns. However, you can use cotton yarn, acrylic or another yarn from your stash. Just adjust your hook size if you change yarn weights.
Can I make the acorns larger or smaller?
Yes. Using thinner yarn and a smaller hook will make a smaller acorn. Bulky yarn or chunky yarn with an appropriate crochet hook will make a larger one.
Do I need to use a magic ring?
No. My pattern starts with ch 2 and works into the 2nd ch from the hook. I’ve included the magic ring as an alternative if you prefer it.
What can I make with crochet acorns?
Use them as fall decor in a decorative bowl or basket, add them to a centrepiece, use a small acorn as a gift topper or make several into an autumn garland.
Is gauge important?
No. Gauge isn’t critical for this project. What’s more important is choosing a hook size that gives you tight enough stitches to keep the stuffing from showing.
More Free Fall Crochet Patterns
Cedar Ridge Pumpkins
These little acorns were made to coordinate with my Cedar Ridge Pumpkins. Mix the different sizes and colours together for an easy fall display.
Country Charm Acorn
Want another acorn to add to the mix? My Country Charm Acorn gives you a completely different style while still being a small scrap-friendly fall project.
Make a Few for Fall
I hope you have fun with this free crochet acorn pattern. Make one or make a whole bowl full. Use traditional brown yarn if that’s your style, or pull colours from your own home like I did.
Most of all, check those leftover yarns before heading to the yarn store. You might already have everything you need.
If you make your own Cedar Ridge Acorns, tag me on Instagram. I’d love to see your colour combinations.
Happy crocheting!