


If you have ever made my crochet Christmas ornament patterns you have heard about my Christmas tree. From the time the kids were little and started making decorations I have kept every single one. I love that my tree is filled with miss matched ornaments that have meaning in everyone. Don’t get me wrong I have plenty of ornaments I have picked up during the holiday season just because I love them!
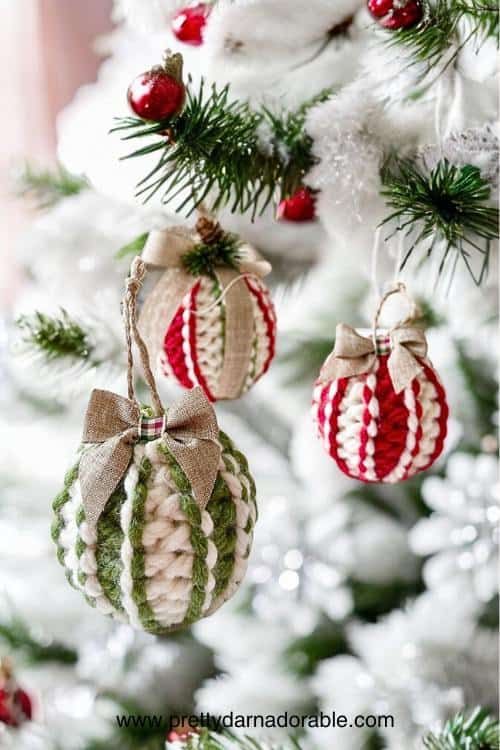
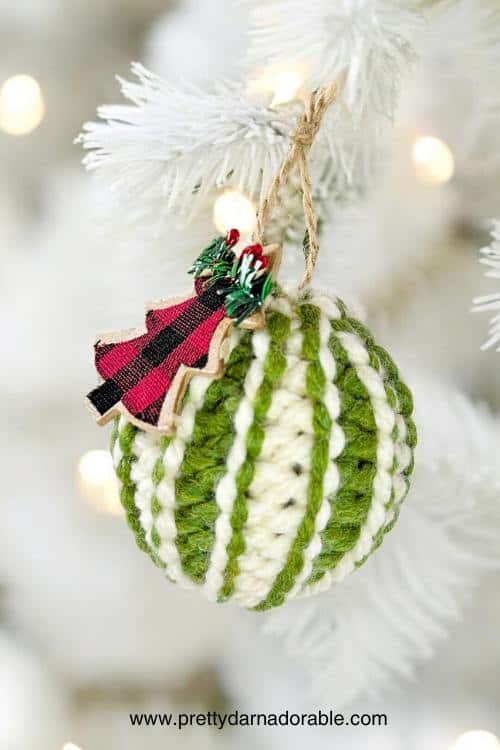
This year when I did the Rustic Rib Crochet Pumpkin Pattern I instantly thought how cute it would be as beautiful crochet Christmas baubles! So in this blog it has been transformed into a Christmas bauble crochet pattern! All you need are a few decorations to add festive cheer and that’s it – your Christmas crochet baubles are complete with festive cheer!
To make this project, you’ll need super bulky yarn; I used Lion Brand Wool Ease Thick and Quick, but feel free to experiment with different colours to match your favourite holiday theme or opt for a modern look with neutrals. A 10 mm crochet hook – keep the hook size the same or what is called for on the yarn—anything larger might make the bauble visible through your stitches. For the bauble itself, either glass or plastic Christmas bauble will work, but I prefer plastic for a stress-free experience (no worrying about breaking glass!).
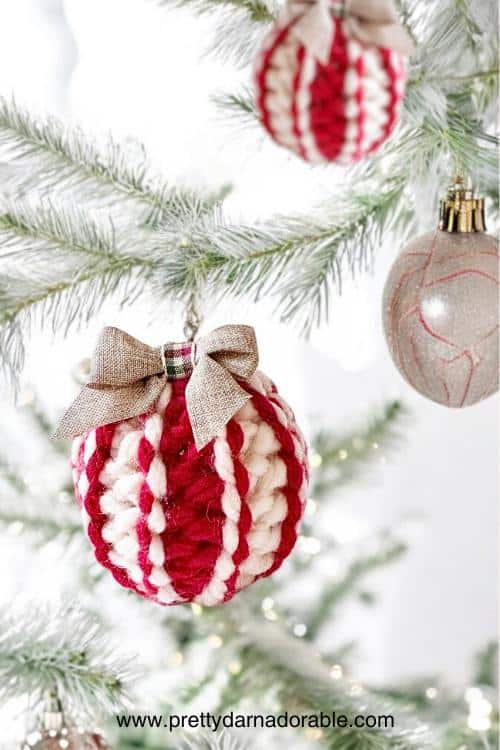
I love this crochet bauble cover because of how easy it is to showcase your own personal style in different ways. Whether it is changing to a new colour every few rows – choosing funky ribbon for the hanging loop or doing in one colour for a modern style I think this will become one of your favourite Christmas patterns. How ever you choose to customize I think you will love it!
Purchase Ad Free Pattern – Instant Download!
Purchase the ad-free PDF for a smooth, distraction-free crocheting experience anytime, anywhere.
Already a subscriber? Check your latest email for your special discount code. Not subscribed yet? Sign up here to get yours!
Thanks so much for supporting my blog!
Rustic Rib Crochet Bauble Covers
Skill Level
Beginner
Abbreviations
- blo – back loops only
- ch – chain
- flo – front loops only
- sc – single crochet
- sk – skip
- st – stitch
- sts – stitches
- sl st – slip stitch
- rpt – repeat
- Rs – right side
Gauge
Not required for this pattern.
Finished Measurements
This crochet bauble cover pattern is written for a bauble that measures 5” from centre top to centre bottom.
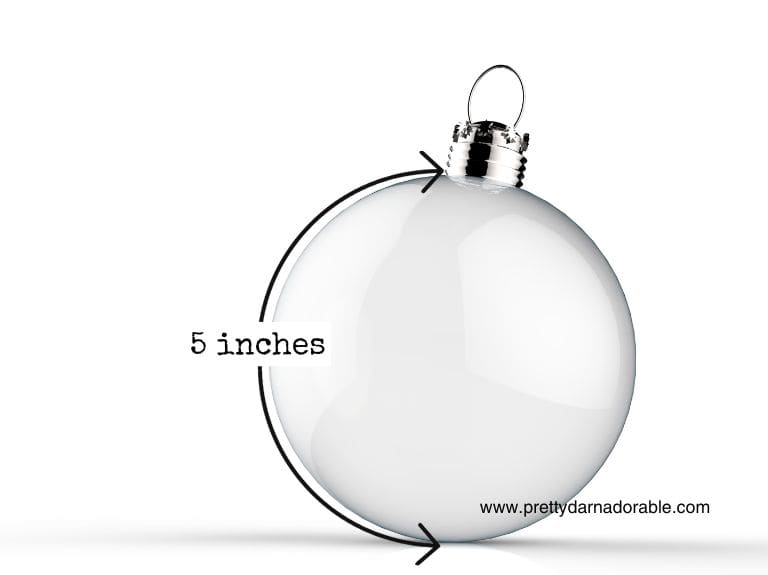
Finished dimensions and yarn requirements will change depending on the yarn and size of bauble used.
Materials
- 10.00 mm hook
- Tapestry Needle
- Stitch Marker
- Yarn Needle
- Plastic Bauble
- Ribbon or premade bow
- Super Bulky Yarn: Lion Brand Thick & Quick (see amounts below)
Two Colour Bauble: Yarn 22.5g, 14.5m, 0.795 oz, 16 yds of each colour
Red, Green and Cream Bauble:
Cream Yarn: 22.5g, 14.5m, 0.795 oz, 16 yds
Contrast Colour 1: 11.25g, 7.25m, 0.3975 oz, 8 yds
Contrast Colour 2: 11.25g, 7.25m, 0.3975 oz, 8 yds
Notes
For the starting chain only try to keep the tension fairly tight.
For the remainder of the bauble keep stitches loose: It’s important to work your stitches loosely throughout this pattern, especially when slip stitching. Tight stitches can make it difficult to insert the hook into the next row, which may lead to frustration.
Colour Changes: Colour changes are done every two rows. Be sure that the last two rows of the bauble are worked in a different colour than 2nd two rows – this is very important to ensure even striping of the bauble.
When using three colours I found it best to cut the contrast colours (red and green) at each colour change and I carried the cream yarn.
Join the tube securely: When folding the short ends together to form a tube, use the slip stitch to maintain the texture of the bauble. Make sure your seam is secure to avoid gaps in the bauble body.
Resizing your Bauble
Pattern Resizing Formula:
Starting Chain = Ornament Height
Row Count = Ornament Circumference (measured as you go to ensure a snug fit)
Measuring & Adjusting Your Starting Chain for a Perfect Fit
Achieving the perfect fit for your crochet bauble cover begins with careful measuring and adjusting of your starting chain. Here’s how to get it just right:
Measure the Length:
Wrap a flexible tape measure from the top of the bauble, down one side, and around to the bottom. This measurement determines the height of your crochet cover.
Create the Starting Chain:
Chain until it matches the height measurement. When gently stretched, the chain should be slightly smaller to ensure a snug fit.
Double-Check the Fit:
Drape your chain over the bauble to confirm it reaches from the top to the bottom. Adjust the length if needed to ensure a close fit.
Keep in mind the crochet cover will be worked in rows, so you’ll continue until it fits snugly around the bauble’s circumference.
Fit Test:
After enough rows to cover the circumference of your bauble, wrap the cover around the bauble to make sure it fits. It should stretch snugly around the middle.
Need Help with the Special Stitch?
If you’re new to this stitch or need a refresher, check out my video tutorial from the pumpkin pattern! It demonstrates the same stitch used here, making it easy to follow along and perfect your technique. Watch Video Tutorial Here
Free Crochet Christmas Bauble Pattern
Work in front loop right side facing.
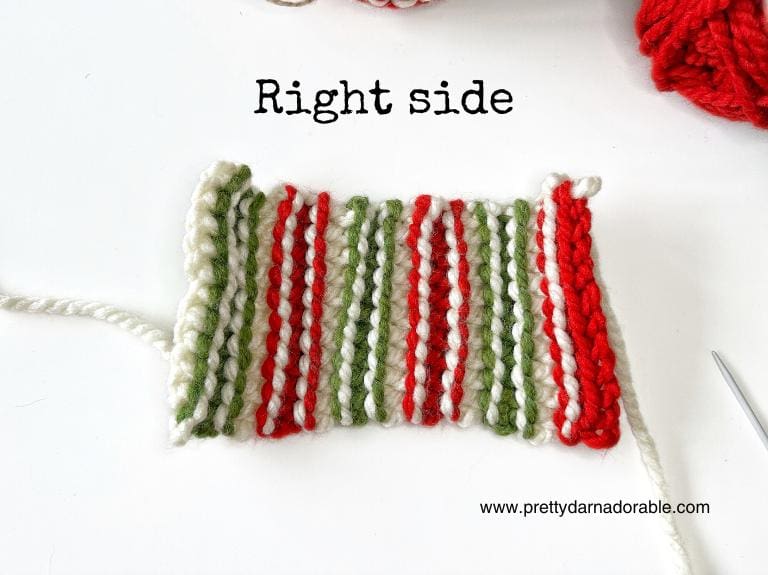
Work in back look wrong side facing.
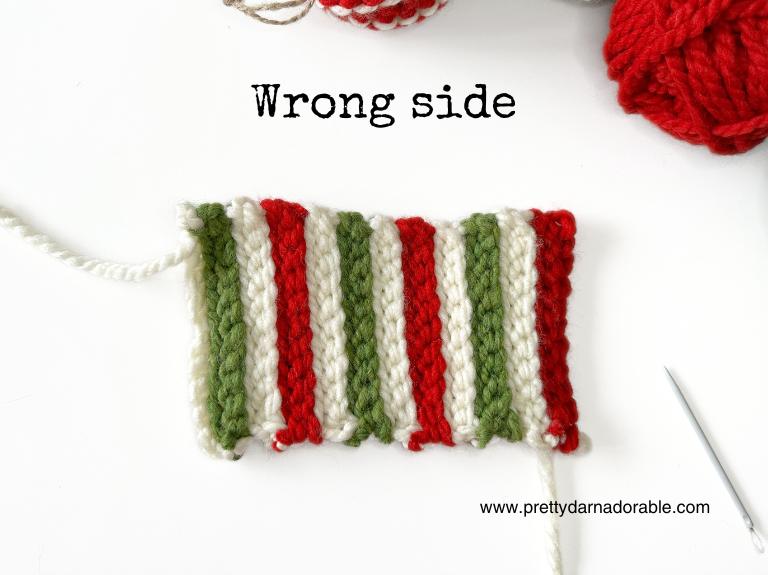
If making a striped bauble colour changes are done every two rows.
If using three colours it is best to fasten off and weave in the contrast colours while carrying the cream yarn.
Leave a long tail at the beginning for closing your bauble cover.
Using cream yarn and 10.00 mm crochet hook, ch 12.
Change to contrast colour for last chain.
You should have 13 chains in total.
Row 1: Slst in 2nd ch from hook and each ch across. Turn. (12)
Row 2: Slst in blo of each slst across. Turn. (12)
Row 3: Slst in flo of each slst across. Turn (12)
Rpt rows 2 and 3 until you complete 23 rows or desired size.
Finishing Steps
Now that the main part of your crochet bauble pattern is complete, follow these steps to secure the cover:
- Fold the rectangle with the right sides facing each other.
- Align the short ends, then join them by slip stitching through front loops of the side closest to you and the back loop of the other side. Continue this way across the edge to create a tube. Do not fasten off. (See photo below)
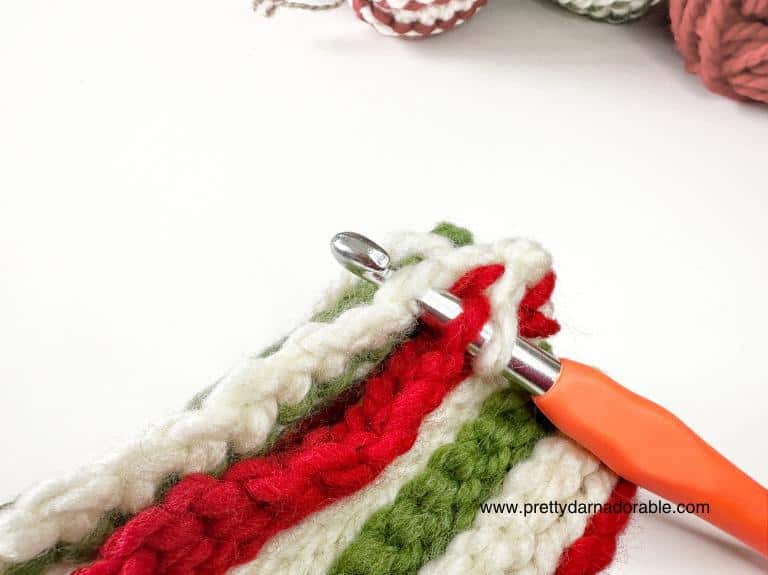

- Using the yarn tail and a yarn needle, weave the needle in and out around the edge of the bauble cover. Pull the yarn tight to close the bottom of the bauble, then weave in any remaining ends. Watch how it is done here: https://www.instagram.com/reel/DCp6P1LuKV3/
- If needed, attach yarn at the opposite end, or just use the starting tail from the beginning chain of the bauble cover. Then repeat step 3 above but DO NOT pull closed.
- Slide bauble into the ornament cover.
- Close the top – Using a yarn needle and yarn tail weave the needle back and forth between stitches. Pull the yarn until the top of bauble is closed. Weave in ends..
Top it Off
Browsing thrift shops for vintage Christmas decorations is such a fun way to find unique pieces with tons of character. There’s something about discovering quirky old baubles, worn ribbons, or little bells that adds a cool, nostalgic vibe to your ornaments.
Adding these thrifted finds to your crochet baubles—like a ribbon from an old ornament or a tiny, weathered bell—gives each piece its own story. It’s a great way to make your holiday decorations feel even more personal and special.
Here are some more creative ideas for decorating the top of your crochet Christmas bauble:
Miniature Bow
Add a small satin or grosgrain ribbon bow at the top of the bauble. You can hot glue it in place or secure it with a stitch for a snug fit.
Rustic Twine Wrap
Wrap jute or natural twine around the top for a rustic touch. Tie it off in a small knot or bow to keep it secure.
Beaded Accent
Attach a few small beads or a charm on a thread, and tie it around the top. This adds a bit of sparkle and elegance, especially with metallic or crystal beads.
Mini Pinecone and Holly Cluster
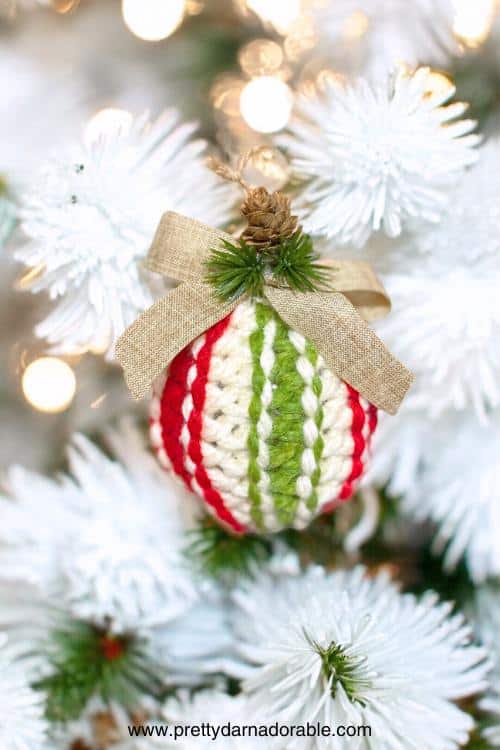
Attach a tiny faux pinecone, a sprig of holly, or a few berry accents for a woodland feel. These can be hot glued or tied with a small piece of ribbon or twine.
Crochet Loop Hanger
Make a chain loop (about 15-20 chains, or to desired length), and attach it to the top as a built-in hanger. This gives a finished look and provides an easy way to hang your bauble on the tree.
Faux Snow
Add a touch of winter magic by brushing the top lightly with glue and sprinkling a bit of faux snow or iridescent glitter.
Tiny Bell
For a touch of sound and whimsy, attach a tiny bell with a small piece of yarn or ribbon. It adds an old-fashioned feel and gives the ornament a cheerful jingle.
Mini Crochet Holly Leaves
Crochet a few tiny holly leaves and berries, then sew or glue them around the top. It adds a handmade, festive detail to complete the look.
Any of these additions will make your bauble unique and charming!
Show Off Your Work
I’d love to see your finished baubles! Whether you’re making just a few or a lot of baubles, your finished products will make lovely, personalized Christmas decorations. Feel free to share a pic of your work—these covers are perfect for gifting or decorating your tree with a cozy, handmade touch.
Happy Crocheting! Have fun adding festive cheer to your Christmas ornaments with these easy-to-follow steps. Whether in traditional red and green or your own favourite colours, these crochet ornaments will stand out on your tree all season long.
Adding these crochet baubles to your holiday setup not only enhances your decor but also gives you a fun festive crochet marathon. These crochet Christmas baubles can bring holiday season joy to any room, and with this written pattern, you can even make a few extra as gifts for friends and family!