


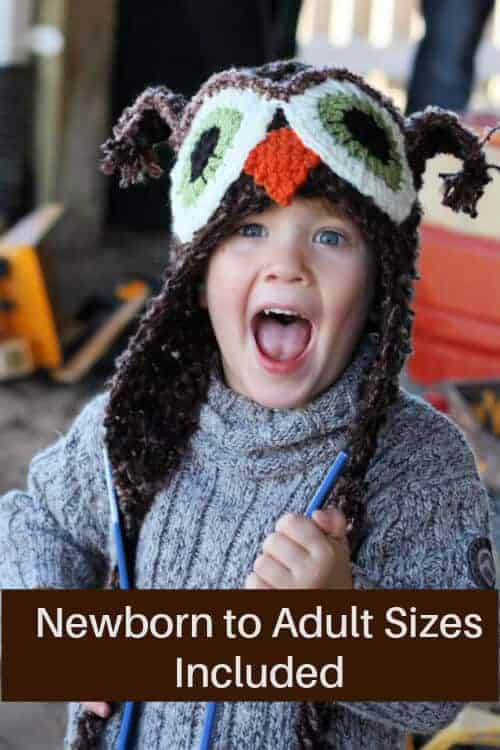
Fall is just around the corner and this Crochet Owl Hat Pattern is perfect to make up quickly for last minute fall fairs and gifts.
This fast and easy crochet owl pattern includes 6 sizes from newborn to adult so everyone can wear this cute little hat!
I mean really Hoo(t) can resist and owl hat with those big eyes and majestic look? But then again they take a long long time to make – or do they?
- Add Pattern to your Ravelry Library
- Download on Etsy
- Pin Now Make Later
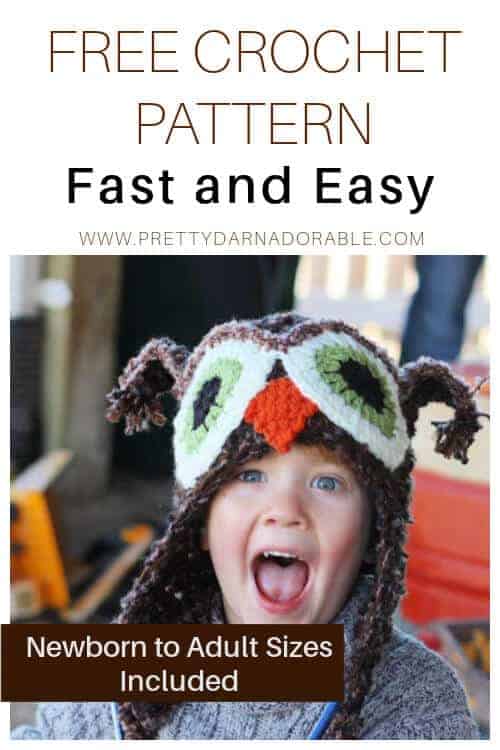
Not anymore! This season everyone wants owls and time is precious with so much to do – so here is my Fast and Easy version that keeps everyone satisfied.
It literally takes half the time as my Mystic Owl hat without sacrificing any style. With this pattern you might actually offer to make some:)
Use your favourite super bulky yarn or even two strands of your favourite worsted weight yarn held together and make this quick and easy crochet owl hat in just a few hours.
Think family fall photos, halloween or even Christmas! I guarantee once you make one it will quickly become a favourite.
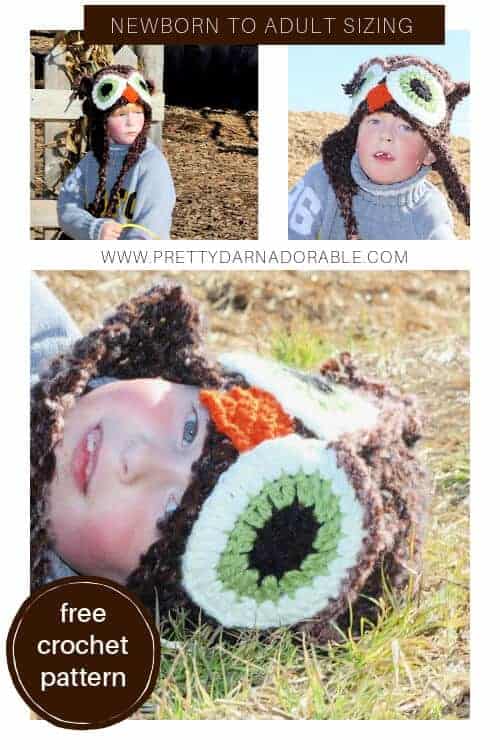
Crochet Owl Hat Pattern Great for Beginners
This crochet owl hat pattern is so easy to make. If you are new to crochet you will have success with this pattern. Just break it down step by step and down’t get a head of yourself.
Start by crocheting the base of the hat. If you have ever made a beanie before you will have no problems with this.
Next add the earflaps – gotta keep those ears warm on cold days 😀. When you make the earflaps they will be joined to the hat when you make the very first row. Once you start to decrease you will see the triangle shape start to emerge.
I recommend waiting on the ties as the final finishing touch.
Eyes, Ears and Nose
Next make ears, eyes and nose keep them all together until you are ready to assemble.
New to assembling crochet pieces? Follow the steps below for perfect placement!
1. Once your eyes and nose are ready to attach you will want to try it out in different areas on your hat to determine what placement you like best. I always recommend using the photos as guide (scroll down for photos).
2. Then BEFORE sewing on I highly recommend using some Liquid Stitch or Speed Sew to secure your eyes and nose in the best position. This is my number one tip for anything being sewn to a crochet or knit project. You will need to leave it to dry for an hour or so but it is totally worth it!
3. There is nothing worse than stitching on your pieces only to find that it has slid out of position.
Once the eyes and nose are secure you can sew around the outside for extra security and a beautiful finishing touch.
Designers Notes
- Skill Level is Beginner
- Skills Needed half double crochet, single crochet
- Sizes Newborn to Adult
- Made with Super Bulky Yarn or two strands held together
- All sizes written individually
- Unisex crochet hat pattern
- Written in Standard American terms
- Hat is worked in rounds top down
- Add Pattern to your Ravelry Library
- Download on Etsy
- Pin Now Make Later
THE YARN
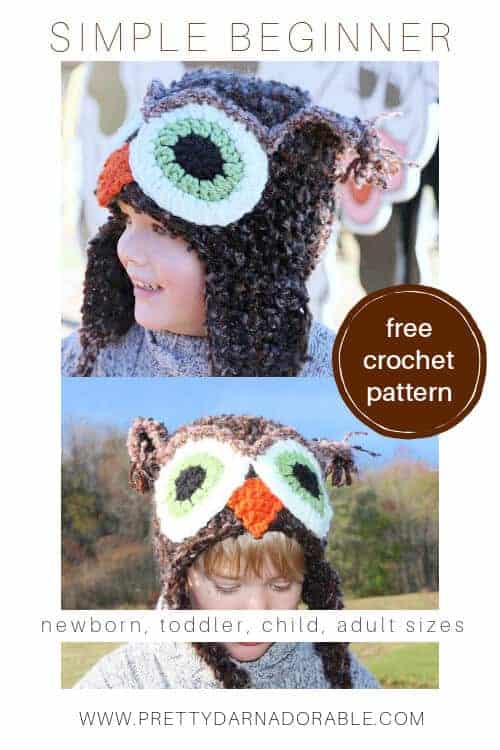
One of the things I love the most about this pattern is being able to mix and match different yarns together. It can be a great way to use up scraps and bits of yarn left over from other patterns.
I used Bernat Boucle and a strand of Vanna’s Choice for the owl hat shown in the photos. But if you want to keep things simple LIONS BRAND WOOL EASE THICK N QUICK is a super cozy yarn that offers great warmth.
If you are looking for a yarn that isn’t quite this warm there are many others that will work great. BERNAT SOFTEE CHUNKY for more substitute yarns check out www.yarnsub.com this website is fantastic for finding yarns to use in your projects.
Have fun with it and think holiday colours too!

PLEASE NOTE THIS POST INCLUDES AFFILIATE LINKS
Crochet Owl Hat Pattern Newborn to Adult
Skill Level
Beginner
Abbreviations
- ch – chain
- hdc – half double crochet
- sc – single crochet
- sk – skip
- sl st – slip stitch
- st – stitch
- sts – stitches
- rpt – repeat
Gauge
(Main part of hat)
4” X 4” = 6 hdc x 5 rows
Materials Needed
- 6.00 mm hook (used for eyes and nose)
- 9.00 mm hook (used for ears)
- 11.5 mm hook (used for main part of hat)
- Tapestry Needle
- Stitch Markers
- Small amount of worsted weight or bulky for eyes
- Small amount of novelty yarn for ears and brows (optional)
- 250 g – 6 Super Bulky yarn OR combination of two strands of worsted or one strand worsted and one strand bulky.
I used one strand of Bernat Soft Boucle and one strand Vanna’s Choice worsted
A combination of two strands of worsted weight and bulky can also be used ☺
Finished Measurements
- 0-3 Months 14” x 5”
- 3-6 Months 15” x 5 ¾”
- 6-12 Months 16” x 6 ½”
- 12 Months – 3 Years 18” x 7 ½”
- 3 to 10 Years 20” x 9”
- Preteen/Adult 22” x 9 ¾”
Little Extras
TIES
Cut 18 pieces of yarn 30 inches or longer.
Working in the 3 sc stitches at bottom of earflap, hold three strands of yarn and fold in half, (use only two for smaller sizes, if desired). Hold hat with right side facing you. Using hook, draw the folded ends through the stitch from right to wrong side. Pull the loose ends through the folded section and draw the knot up firmly. Repeat for next two stitches.
Braid to last 3 inches. Using a piece of yarn about 12 inches long, tie and knot leaving one long end to wrap around braid. Wrap yarn around braid several times and then use tapestry needle to weave end through.
Repeat for other earflap.
- Add Pattern to your Ravelry Library
- Download on Etsy
- Pin Now Make Later
Crochet Owl Hat Pattern for 0-3 Months
*Hat is worked in continuous rounds. Do not join. Use a stitch marker at the beginning of round for easier counting
Using 11.5 mm hook, Ch 2
Rnd 1: 5 sc in 2nd ch from hook (5)
Rnd 2: 2 sc in 1st st and each st around (10)
Rnd 3: 2 hdc in 1st st and each st around (20)
Rnds 4-6: Hdc in 1st st and each st around (20)
Slip stitch in next st, ch 1
Do not fasten off, continue working earflap below.
Earflaps
Row 1: Sc in same space as ch1 sc next 2 sts (3) ch 1 turn
Rows 2 & 3: Sc in each st across (3) ch 1 turn
Row 4: Sk 1st st, sc next 2 sts (2) ch 1 turn
Row 5: Sk 1st st, sc last st (1)
Fasten off and weave in ends.
With right side of hat facing you, count 8 sts to the left (of finished earflap) and join yarn with slst.
Repeat Rows 1-5 above.
Join yarn with slip stitch at centre back and work sc around entire hat including ear flaps. Fasten off and weave in ends.
EYES
(Make 2 of each)
Will be worked in continuous rounds. You can use either #4 or #5 yarn here.
Using 6.00 mm hook, ch 2
Start with black
Rnd 1: Work 7 hdc into 2nd ch from hook
Change yarn for coloured part of eye
Rnd 2: 2 hdc in 1st and each st around (14)
Change to white or any colour for outer part of eye
Rnd 3: 2 dc in 1st st and each st around (28) Fasten off and weave in ends.
NOSE
Using 6.00 mm hook, ch 7
Row 1: Sc in 2nd ch each st across (6) ch 1 turn
Row 2: Sk 1st st, sc in each st across (5) ch 1 turn
Row 3: Sk 1st st, sc in each st across (4) ch 1 turn
Row 4: Sk 1st st, sc in each st across (3) ch 1 turn
Row 5: Sk 1st st, sc in each st across (2) ch 1 turn
Row 6: Sk 1st st, sc in each st across (1) Fasten off leaving long tail for attaching to hat.
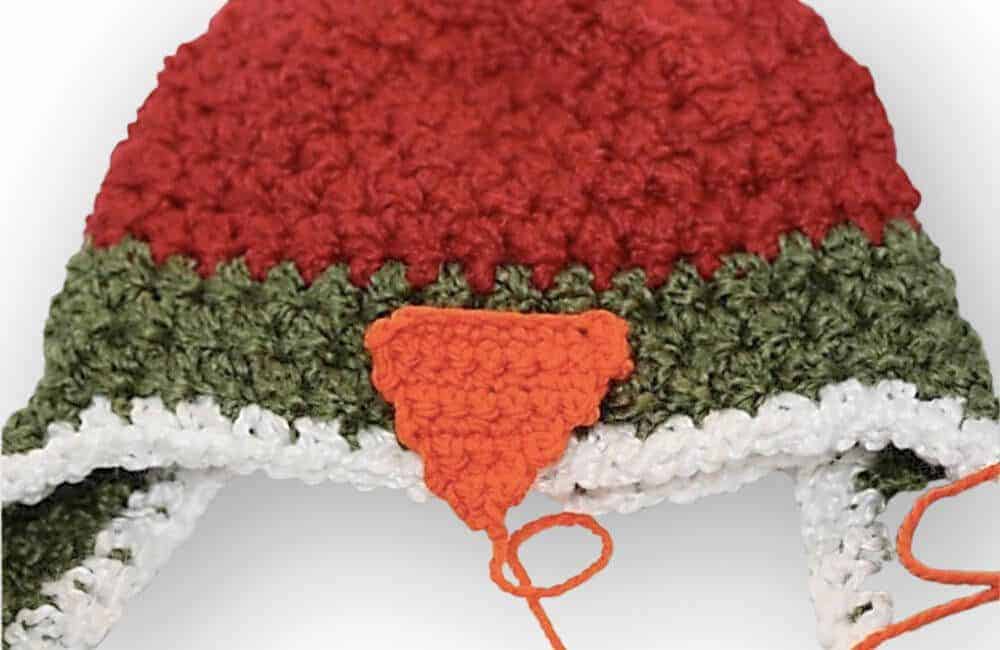
Use photos at end of pattern as guide for attaching nose.
Ears
(Make 2 of each)
Using 9.00 mm hook, Ch 6
Row 1: Sc in 2nd ch from hook and each stitch across (5) ch 1 turn
Row 2: Sk 1st st, sc in each st across (4) ch 1 turn
Row 3: Sk 1st st, sc in each st across (3) ch 1 turn
Row 4: Sk 1st st, sc in each st across (2) ch 1 turn
Row 5: Sk 1st st, sc in each st across (1) Fasten off leaving long tail for attaching to hat.
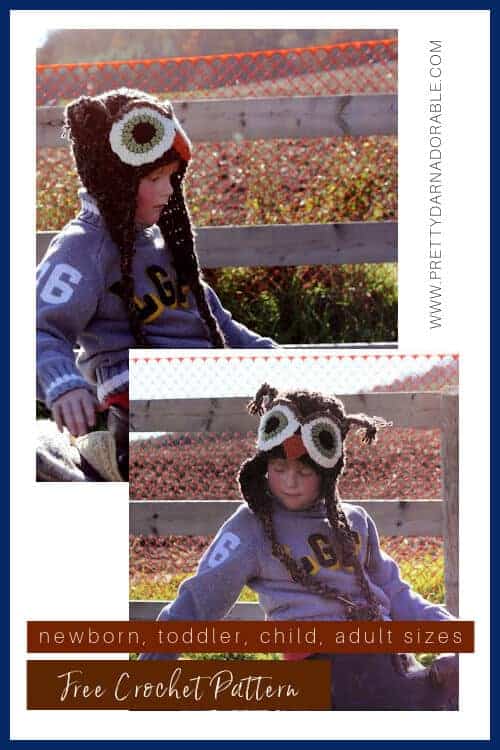
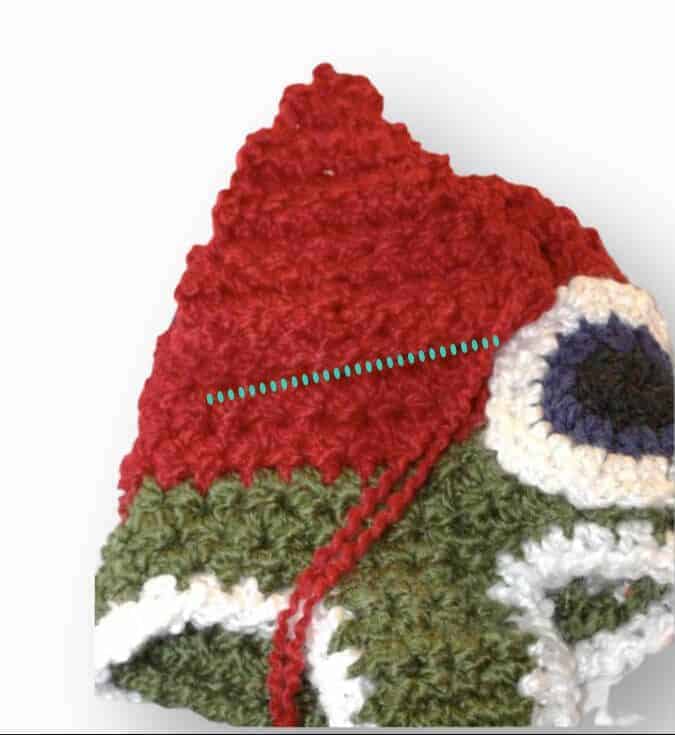
Use photos at end of pattern as guide for attaching ears and finishing of brow.
Crochet Owl Hat Pattern for 3-6 Months
*Hat is worked in continuous rounds. Do not join. Use a stitch marker at the beginning of round for easier counting
Using 11.5 mm hook, Ch 2
Rnd 1: 6 sc in 2nd ch from hook (6)
Rnd 2: 1 Sc in 1st st, 2 sc in next st and each st around (11)
Rnd 3: 2 hdc in 1st st and each st around (22)
Rnds 4-7: Hdc in 1st st and each st around (22)
Slip stitch in next st, ch 1
Do not fasten off, continue working earflap below.
Earflaps
Row 1: Sc in same space as ch1, sc next 2 sts (3) ch 1 turn
Rows 2 & 3: Sc in each st across (3) ch 1 turn
Row 4: Sk 1st st, sc next 2 sts (2) ch 1 turn
Row 5: Sk 1st st, sc last st (1)
Fasten off and weave in ends.
With right side of hat facing you, count 9 sts to the left (of finished earflap) and join yarn with slst.
Repeat Rows 1-5 above.
Join yarn with slip stitch at centre back and work sc around entire hat including ear flaps. Fasten off and weave in ends.
EYES
(Make 2 of each)
Will be worked in continuous rounds. You can use either #4 or #5 yarn here.
Using 6.00 mm hook, ch 2
Start with black
Rnd 1: Work 7 hdc into 2nd ch from hook
Change yarn for coloured part of eye
Rnd 2: 2 hdc in 1st and each st around (14)
Change to white or any colour for outer part of eye
Rnd 3: 2 dc in 1st st and each st around (28) Fasten off and weave in ends.
NOSE
Using 6.00 mm hook, ch 7
Row 1: Sc in 2nd ch each st across (6) ch 1 turn
Row 2: Sk 1st st, sc in each st across (5) ch 1 turn
Row 3: Sk 1st st, sc in each st across (4) ch 1 turn
Row 4: Sk 1st st, sc in each st across (3) ch 1 turn
Row 5: Sk 1st st, sc in each st across (2) ch 1 turn
Row 6: Sk 1st st, sc in each st across (1) Fasten off leaving long tail for attaching to hat.
Use photos at end of pattern as guide for attaching nose.
Ears
(Make 2 of each)
Using 9.00 mm hook
Ch 6
Row 1: Sc in 2nd ch from hook and each stitch across (5) ch 1 turn
Row 2: Sk 1st st, sc in each st across (4) ch 1 turn
Row 3: Sk 1st st, sc in each st across (3) ch 1 turn
Row 4: Sk 1st st, sc in each st across (2) ch 1 turn
Row 5: Sk 1st st, sc in each st across (1) Fasten off leaving long tail for attaching to hat.
Use photos at end of pattern as guide for attaching ears and finishing of brow.
Crochet Owl Hat Pattern for 6-12 Months Hat
*Hat is worked in continuous rounds. Do not join. Use a stitch marker at the beginning of round for easier counting
Using 11.5 mm hook, Ch 2
Rnd 1: 6 sc in 2nd ch from hook (6)
Rnd 2: 2 sc in 1st st and each st around (12)
Rnd 3: 2 hdc in 1st st and each st around (24)
Rnds 4-8: Hdc in 1st st and each st around (24)
Slip stitch in next st, ch 1
Do not fasten off, continue working earflap below.
Earflaps
Row 1: Sc in same space as ch1, sc next 3 sts (4) ch 1 turn
Rows 2& 3: Sc in each st across (4) ch 1 turn
Row 4: Sk 1st st, sc next 3 sts (3) ch 1 turn
Row 5: Sk 1st st, sc next 2 sts (2) ch 1 turn
Row 6: Sk 1st st, sc last st (1)
Fasten off and weave in ends.
With right side of hat facing you, count 10 sts to the left (of finished earflap) and join yarn with slst.
Repeat Rows 1-6 above.
Join yarn with slip stitch at centre back and work sc around entire hat including ear flaps. Fasten off and weave in ends.
EYES
(Make 2 of each)
Will be worked in continuous rounds. You can use either #4 or #5 yarn here.
Using 6.00 mm hook, ch 2
Start with black
Rnd 1: Work 7 hdc into 2nd ch from hook
Change yarn for coloured part of eye
Rnd 2: 2 hdc in 1st and each st around (14)
Change to white or any colour for outer part of eye
Rnd 3: 2 dc in 1st st and each st around (28) Fasten off and weave in ends.
NOSE
Using 6.00 mm hook, ch 8
Row 1: Sc in 2nd ch each st across (7) ch 1 turn
Row 2: Sk 1st st, sc in each st across (6) ch 1 turn
Row 3: Sk 1st st, sc in each st across (5) ch 1 turn
Row 4: Sk 1st st, sc in each st across (4) ch 1 turn
Row 5: Sk 1st st, sc in each st across (3) ch 1 turn
Row 6: Sk 1st st, sc in each st across (2) ch 1 turn
Row 7: Sk 1st st, sc in each st across (1) Fasten off leaving long tail for attaching to hat.
Use photos at end of pattern as guide for attaching nose.
Ears
(Make 2 of each)
Using 9.00 mm hook
Ch 7
Row 1: Sc in 2nd ch from hook and each stitch across (6) ch 1 turn
Row 2: Sk 1st st, sc in each st across (5) ch 1 turn
Row 3: Sk 1st st, sc in each st across (4) ch 1 turn
Row 4: Sk 1st st, sc in each st across (3) ch 1 turn
Row 5: Sk 1st st, sc in each st across (2) ch 1 turn
Row 6: Sk 1st st, sc in each st across (1) Fasten off leaving long tail for attaching to hat.
Use photos at end of pattern as guide for attaching ears and finishing of brow.
Crochet Owl Hat Pattern for 12 Months – 3 Years
*Hat is worked in continuous rounds. Do not join. Use a stitch marker at the beginning of round for easier counting
Using 11.5 mm hook, Ch 2
Rnd 1: 7 sc in 2nd ch from hook (7)
Rnd 2: 2 sc in 1st st,next and each st around (14)
Rnd 3: 2 hdc in 1st st and each st around (28)
Rnds 4-9: Hdc in 1st st and each st around (28)
Slip stitch in next st, ch 1
Do not fasten off, continue working earflap below.
Earflaps
Row 1: Sc in same space as ch1, sc next 3 sts (4) ch 1 turn
Rows 2 & 3: Sc in each st across (4) ch 1 turn
Row 4: Sk 1st st, sc next 3 sts (3) ch 1 turn
Row 5: Sk 1st st, sc next 2 sts (2) ch 1 turn
Row 6: Sk 1st st, sc last st (1)
Use photos at end of pattern as guide for attaching ears.
With right side of hat facing you, count 11 sts to the left (of finished earflap) and join yarn with slst.
Repeat Rows 1-6 above.
Join yarn with slip stitch at centre back and work sc around entire hat including ear flaps. Fasten off and weave in ends.
EYES
(Make 2 of each)
Will be worked in continuous rounds. You can use either #4 or #5 yarn here.
Using 6.00 mm hook, ch 2
Start with black
Rnd 1: Work 8 dc into 2nd ch from hook
Change yarn for coloured part of eye
Rnd 2: 2 dc in 1st and each st around (16)
Change to white or any colour for outer part of eye
Rnd 3: 2 dc in 1st st and each st around (32) Fasten off and weave in ends.
NOSE
Using 6.00 mm hook, ch 9
Row 1: Sc in 2nd ch each st across (8) ch 1 turn
Row 2: Sk 1st st, sc in each st across (7) ch 1 turn
Row 3: Sk 1st st, sc in each st across (6) ch 1 turn
Row 4: Sk 1st st, sc in each st across (5) ch 1 turn
Row 5: Sk 1st st, sc in each st across (4) ch 1 turn
Row 6: Sk 1st st, sc in each st across (3) ch 1 turn
Row 7: Sk 1st st, sc in each st across (2) ch 1 turn
Row 8: Sk 1st st, sc in each st across (1) Fasten off leaving long tail for attaching to hat.
Use photos at end of pattern as guide for attaching nose.
Ears
(Make 2 of each)
Using 9.00 mm hook, Ch 8
Row 1: Sc in 2nd ch from hook and each stitch across (7) ch 1 turn
Row 2: Sk 1st st, sc in each st across (6) ch 1 turn
Row 3: Sk 1st st, sc in each st across (5) ch 1 turn
Row 4: Sk 1st st, sc in each st across (4) ch 1 turn
Row 5: Sk 1st st, sc in each st across (3) ch 1 turn
Row 6: Sk 1st st, sc in each st across (2) ch 1 turn
Row 7: Sk 1st st, sc in each st across (1) Fasten off leaving long tail for attaching to hat.
Use photos at end of pattern as guide for attaching ears and finishing of brow.
Crochet Owl Hat Pattern for 3 to 10 Years
*Hat is worked in continuous rounds. Do not join. Use a stitch marker at the beginning of round for easier counting
Using 11.5 mm hook, Ch 2
Rnd 1: 8 sc in 2nd ch from hook (8)
Rnd 2: 2 Sc in 1st and each st around (16)
Rnd 3: 2 hdc in 1st st and each st around (32)
Rnds 4-12: Hdc in 1st st and each st around (32)
Slip stitch in next st, ch 1
Do not fasten off, continue working earflap below.
Earflaps
Row 1: Sc in same space as ch1, sc next 4 sts (5) ch 1 turn
Rows 2-4: Sc in each st across (5) ch 1 turn
Row 5: Sk 1st st, sc next 4 sts (4) ch 1 turn
Row 6: Sk 1st st, sc next 3 sts (3) ch 1 turn
Row 7: Sk 1st st, sc next 2 sts (2) ch 1 turn
Row 8: Sk 1st st, sc last st (1)
Fasten off and weave in ends.
With right side of hat facing you, count 12 sts to the left (of finished earflap) and join yarn with slst.
Repeat Rows 1-8 above.
Join yarn with slip stitch at centre back and work sc around entire hat including ear flaps. Fasten off and weave in ends.
EYES
(Make 2 of each)
Will be worked in continuous rounds. You can use either #4 or #5 yarn here.
Using 6.00 mm hook, ch 2
Start with black
Rnd 1: Work 10 dc into 2nd ch from hook
Change yarn for coloured part of eye
Rnd 2: 2 dc in 1st and each st around (20)
Change to white or any colour for outer part of eye
Rnd 3: 2 dc in 1st st and each st around (40) Fasten off and weave in ends.
NOSE
Using 6.00 mm hook, ch 10
Row 1: Sc in 2nd ch each st across (9) ch 1 turn
Row 2: Sk 1st st, sc in each st across (8) ch 1 turn
Row 3: Sk 1st st, sc in each st across (7) ch 1 turn
Row 4: Sk 1st st, sc in each st across (6) ch 1 turn
Row 5: Sk 1st st, sc in each st across (5) ch 1 turn
Row 6: Sk 1st st, sc in each st across (4) ch 1 turn
Row 7: Sk 1st st, sc in each st across (3) ch 1 turn
Row 8: Sk 1st st, sc in each st across (2) ch 1 turn
Row 9: Sk 1st st, sc in each st across (1) Fasten off leaving long tail for attaching to hat.
Use photos at end of pattern as guide for attaching nose.
Ears
(Make 2 of each)
Using 9.00 mm hook, Ch 9
Row 1: Sc in 2nd ch from hook and each stitch across (8) ch 1 turn
Row 2: Sk 1st st, sc in each st across (7) ch 1 turn
Row 3: Sk 1st st, sc in each st across (6) ch 1 turn
Row 4: Sk 1st st, sc in each st across (5) ch 1 turn
Row 5: Sk 1st st, sc in each st across (4) ch 1 turn
Row 6: Sk 1st st, sc in each st across (3) ch 1 turn
Row 7: Sk 1st st, sc in each st across (2) ch 1 turn
Row 8: Sk 1st st, sc in each st across (1) Fasten off leaving long tail for attaching to hat.
Use photos at end of pattern as guide for attaching ears and finishing of brow.
Crochet Owl Hat Pattern for Preteen/Adult
*Hat is worked in continuous rounds. Do not join. Use a stitch marker at the beginning of round for easier counting
Using 11.5 mm hook Ch 2
Rnd 1: 9 sc in 2nd ch from hook (9)
Rnd 2: 2 sc in 1st and each st around (18)
Rnd 3: 2 hdc in 1st st and each st around (36)
Rnds 4-13: Hdc in 1st st and each st around (36)
Slip stitch in next st, ch 1
Do not fasten off continue working earflap below.
Earflaps
Row 1: Sc in same space as ch1, sc next 5 sts (6) ch 1 turn
Rows 2-4: Sc in each st across (6) ch 1 turn
Row 5: Sk 1st st, sc next 5 sts (5) ch 1 turn
Row 6: Sk 1st st, sc next 4 sts (4) ch 1 turn
Row 7: Sk 1st st, sc next 3 sts (3) ch 1 turn
Row 8: Sk 1st st, sc next 2 stsst (2) ch 1 turn
Row 9: Sk 1st st, sc last st (1)
Fasten off and weave in ends.
With right side of hat facing you, count 12 sts to the left (of finished earflap) and join yarn with slst.
Repeat Rows 1-9 above.
Join yarn with slip stitch at centre back and work sc around entire hat including ear flaps. Fasten off and weave in ends.
EYES
Will be worked in continuous rounds. You can use either #4 or #5 yarn here.
Using 6.00 mm hook, ch 2
Start with black
Rnd 1: Work 10 dc into 2nd ch from hook
Change yarn for coloured part of eye
Rnd 2: 2 dc in 1st and each st around (20)
Change to white or any colour for outer part of eye
Rnd 3: 2 dc in 1st st and each st around (40) Fasten off and weave in ends.
NOSE
Using 6.00 mm hook, ch 11
Row 1: Sc in 2nd ch each st across (10) ch 1 turn
Row 2: Sk 1st st, sc in each st across (9) ch 1 turn
Row 3: Sk 1st st, sc in each st across (8) ch 1 turn
Row 4: Sk 1st st, sc in each st across (7) ch 1 turn
Row 5: Sk 1st st, sc in each st across (6) ch 1 turn
Row 6: Sk 1st st, sc in each st across (5) ch 1 turn
Row 7: Sk 1st st, sc in each st across (4) ch 1 turn
Row 8: Sk 1st st, sc in each st across (3) ch 1 turn
Row 9: Sk 1st st, sc in each st across (2) ch 1 turn
Row 10: Sk 1st st, sc in each st across (1) Fasten off leaving long tail for attaching to hat.
Use photos at end of pattern as guide for attaching nose.
Ears
(Make 2 of each)
Using 9.00 mm hook, Ch 10
Row 1: Sc in 2nd ch from hook and each stitch across (9) ch 1 turn
Row 2: Sk 1st st, sc in each st across (8) ch 1 turn
Row 3: Sk 1st st, sc in each st across (7) ch 1 turn
Row 4: Sk 1st st, sc in each st across (6) ch 1 turn
Row 5: Sk 1st st, sc in each st across (5) ch 1 turn
Row 6: Sk 1st st, sc in each st across (4) ch 1 turn
Row 7: Sk 1st st, sc in each st across (3) ch 1 turn
Row 8: Sk 1st st, sc in each st across (2) ch 1 turn
Row 9: Sk 1st st, sc in each st across (1) Fasten off leaving long tail for attaching to hat.
Use photos at end of pattern as guide for attaching ears and finishing of brow.
Placement of Nose
Placement of Ear
For finishing of brows work a hdc with contrast or novelty yarn starting at the back bottom part of ear.
Copyright
All patterns and photos are copyright protected, you are welcome to sell finished products. Please credit @prettydarnadorable. Please do not alter, copy parts of, or piece my different patterns together and claim the design as your own.
This includes any items listed with alterations to my original designs/pattern(s), as well as items listed for sale on Etsy, blogs, websites, Facebook or any other site.
I